You already have read, listened, and seen a lot about virtual reality. Now is the time to take action and experience the virtual reality yourself. This guide will help you create the virtual reality ready environment and help you design your first Virtual Reality-ready PC.
Virtual Reality is finally going mainstream. With so many VR heads, these days anyone can get a taste of VR if one is dead set on it. Headsets like the Google Cardboard and its variation have made VR quite accessible. Then there are the ones powered by smartphones like Samsung’s Gear VR. Sony has also released its console-based VR headset that is powered by the PS4 recently. PlayStation VR provides a rich VR experience. But, if you are looking to experience true virtual reality, Oculus Rift and HTC Vive are as close as it gets for now. The HTC Vive and Oculus Rift have now upgraded to the Cosmos and the Rift S, respectively, Both of these fetch quite a hefty sum. But, before you spend all of your savings on either one, make sure that you have a virtual reality ready PC.
Image Credits: CNET
How to check if your PC is VR Ready:
You might think checking your PC to see if its VR ready or not isn’t a big deal. Perhaps your PC already runs heavy games perfectly well and without any lag. But virtual reality games can tax a PC far more than PC games. Virtual reality games need to be rendered at a higher frame rate than normal. Furthermore, there can’t be any lag or delay. Fail on these counts, and you will be experiencing staggered movements that don’t react in time with your motions. This tends to make people nauseous. The images also need to be rendered twice, once for each eye. That is a tremendous amount of processing, and if your hardware isn’t compatible, then you are going to be left behind.
Fortunately, it is quite easy to test if your systems are VR ready or not. Compatibility tools are available online for both HTC Vive and Oculus Rift headsets.
If you are planning to buy the Oculus Rift, the manufacturers of the VR headset have launched a simple software utility that checks if you PC is compatible or not. The utility is freely available and you don’t even need to pre-order the Rift to use it.
First of all, you will need to download the Oculus Rift compatibility tool for Windows, the tool is available on the Oculus site. The compatibility tool doesn’t have a separate web page. It is situated on the Oculus Rift order page. This is to make sure that the customers can test their PCs and check if it is compatible before spending $599 on the virtual reality headset. After downloading the tools run it. Uncheck the box above the start button if you don’t want your system specifications sent to Oculus. After that just click start and the program will run and analyze your system. The results of the test will be displayed in a simple format indicating whether your PC is compatible or not. The result will also tell you which components of your PC are falling behind.
Image Credits: ROADTOVR
Similar to Oculus, HTC Vive has also released a compatibility tool. The good thing about this tool is that it check for both Oculus Rift and HTC Vive. The test is available at the Steam site for download. The Valve Performance Test tool needs to be downloaded and then installed on your PC. After that, the tool will evaluate your system. Once the Performance test is done, it’ll give you a breakdown of your operating system, GPU, and CPU. Furthermore, the result will also tell you which components you need to upgrade.
Below is the image of the SteamVR Performance Test running on a PC.
Image Credits: THESTATEOFGAMING
System Requirements For a Virtual Reality Ready PC:
Minimum system requirements for a VR ready PC are listed below.
Image Credit: CNET
How to prepare your room for Virtual Reality:
If you already have a giant empty room in your house, just waiting to be transformed into your personal virtual reality room, then you are in good luck. But, if not then you have some work to do before you are properly prepared to welcome the VR headsets into your house. The space requirements of the Rift and Vive differ a lot from each other. Not a lot of space is required for the Oculus Rift. But, the HTC Vive, on the other hand, is a room-scale VR experience so it requires a lot more space.
Image Credits: FORTUNE
How to Prepare Your Room For Oculus Rift:
Rift uses external IR LED tracking sensor for head tracking. The small sensor is mounted on an elegant metal stand. The sensor resembles a minimalist microphone stand with a cylindrical webcam mounted on top. The head tracking works by detecting infrared LEDs. The rays are emitted from beneath the fabric covering of the Oculus Rift headset.
You will need to prepare a small area of around 1.5×1.5 meters. This amount of space will be VR safe if you are using a single sensor. The Oculus Rift ships with only one sensor but you can also order more to cover a larger space. To make the room VR safe remove all tripping hazards. Keep the desk area around your computer free of stuff that can get easily knocked down.
Place the sensors on a desk or a table. The Rift headset should be in the field of view of the stand when you are operating it. But, the field of view of the motion sensor is wide enough that you don’t need to sit directly in front of it.
Make sure to clear the desk or table on which you place your VR accessories. Be careful when handling the headset and place it in a clear space. All of the launch games for Oculus are designed for a sitting experience. But if you are considering using the Rift while standing, buying an anti-fatigue mat designed for standing desks will be helpful. Plenty of Oculus Rift games are offering 360-degree experience, so consider getting a swivel chair for the seated experience. Also, make sure that the cables are out of the way and will not trip you. And clear a path between your PC and where you play your virtual reality games.
How to Prepare Your Room For HTC Vive:
The HTC Vive is a full-scale room VR experience. Valve wants you to walk around when experiencing virtual reality. The Vive uses SteamVR’s Lighthouse tracking system. The tracker covers the room in safe lasers. It tracks your positions pretty accurately using those lasers.
The Vive comes with two base stations. The base stations can cover an area of 4×3 meters. They need to be positioned above head height for proper tracking. They can be placed on bookshelves, or on a tall piece of furniture in you room.
Alternatively, you could mount them on the wall. The sensors will require a proper camera mount to be mounted on the wall. They are too heavy to mount by using an adhesive. The sensors use a standard 1/4-20 thread same as your average tripod.
Image Credits: IBITIMES
Vive Lighthouse sensors should be placed in opposite corners for perfect tracking. Mounting the sensors in a perfect diagonal will ensure there is no occlusion.
You will have to completely free the space of furniture and other tripping hazards. If you don’t have a 4×3 meter free space available you can just place the sensors closer to track a smaller space area. Same as for Oculus Rift, it is best if you keep an empty desk or table to place all you VR accessories.
Remove all things that might be easily spilled or broken from the room as a precaution. Consider buying an anti-fatigue mat designed for standing desks to make the VR experience more comfortable. You can use the edges of the pad to center yourself as you start to wander around in VR. The pad will prevent you from stumbling too far. Also, clear a path between the PC and your play area. Make sure to get all the cables out of the way to so you don’t trip on them.
Best Available PCs for Virtual Reality:
You took the above compatibility tests and the results showed that your PC doesn’t fit the bill. So, you decide to look for a good VR PC to buy for you VR headset. Well, look no further because we are here to help you out with that. There are a lot of good PCs out there but picking the right one can be a tough job. A rock bottom VR-ready PC will fetch you a hefty price of $999 and that is only with the bundled discount from Oculus.
There is no need to be disappointed if your PC isn’t VR compatible. The PC you have today probably won’t run either the Oculus Rift or HTC Vive. There is a small chance that it will, and the chances increase if it’s a fairly recent tricked-out gaming desktop. The system specifications required for VR include a recent Intel Core i5 or Core i7 CPU. When it comes to the graphics card, you will need at least Nvidia GeForce GTX 970 or AMD R9 290.
The PCs discussed in this article are highly configurable. Here we have selected PC configurations across the whole price spectrum. We will cover from best PCs with minimum specifications required for VR to highly specialized systems intended for virtual reality developers. You will also find some laptops from top brands in our review.
The best price range to spend on your VR ready PC is $2000. With that amount, you can easily get a current generation Core i7-6700K processor and a single Nvidia GeForce GTX 980 graphics card, along with a decent amount of hard-drive space for heavy game files.
Without further ado, here are the best VR ready PCs currently available in the market:
The Dell XPS 8900 SE is one of the most popular VR ready systems. This PC is lauded by Oculus as one of the company’s handpicked VR ready system. You can get this for $999 after Oculus bundle discount. Dell XPS 8900 comes with Core i5 CPU and it includes Nvidia 970 graphics card.
Other specifications all meet the minimum requirements for a VR compatible system. It works perfectly with first generation virtual reality games. The outer casing of the CPU isn’t very attractive and the system also doesn’t offer liquid cooling or other special top shelf features.
But, if you are on a budget and looking for a PC that will sufficiently power your headset this system is the one to go for. The $200 discount that Oculus offers if you purchase the bundle with the Rift headset makes it a good budget buy.
The Alienware X51 mini tower PC has a similar configuration as the Dell XPS 8900. Both systems cost the same. This PC is also chosen by Oculus as one of the company’s handpicked VR ready system. You can get this for $999 after Oculus bundle discount same as the Dell XPS 8900. The chassis of this system is more stylish and sleeker than the Dell PC. But, Alienware X51 is less upgradable.
Chronos is great-looking small desktop PC that is a lot smaller than big tower PC models. The system is also highly customizable. The key hot component is its liquid cooling system. The tower PC has some very clever magnetic rubber feet that make it easy to switch it between horizontal and vertical orientations.
It comes with a lower-end GeForce 970 graphics card. But, it also comes overclocked for an extra performance boost. The Chronos VR is an original Origin PC . The system is made of steel and measuring a compact 11.75 inches high by 4 inches wide by 13.75 inches deep. It’s big enough to fit in a full-size graphics card such as a Nvidia 980. But, it is also small enough to be squeezed into a large backpack for occasional travel.
Lenovo has been building a reputation for making brilliant gaming systems for quite a few years now. The reasonably priced Y-series laptops have been quite popular. This desktop is massive, so there is room for a lot of upgrades. The outer casing comes with some red accent lights and a clear side panel. This configuration comes with the Core i7 and Nvidia GeForce 980 graphics card. It also includes a hefty keyboard-and-mouse along with plenty of macro keys.
The Predator G6 is similar in configuration to the Lenovo Ideacentre Y900. It also has the same price. This Acer desktop goes off the reservation in design. It looks similar to an armored tank tread. The PC includes a front-accessible hard drive bay. But, the side panel of the system needs a screwdriver to remove. It comes with Steel Series keyboard and mouse, which are excellent. The system also includes a software overclocking the CPU. It can be activated by pressing a big red turbo button which is on the CPU casing.
Velocity Micro is known as the maker of excellent custom gaming PCs with an understated, simplistic look. Only a clear side window and some blue accent lights indicate that this is a gaming desktop. There are two key selling points of this gaming configuration. First, one is the VR-ready panel on the front, which offers access to the HDMI and USB ports required to hook up a VR headset. Other is the inclusion of the Nvidia 980ti graphics card, which is a step up from the standard 980 card.
Origin PC Eon17-SLX
Image Credits: PC World
Eon17-SLX is one of the only laptops that can run virtual reality headsets. It is a massive overclocked 17-inch laptop from Origin PC. This laptop manages to squeeze in a desktop Core i7 processor and a version of the desktop 980 graphics card designed by Nvidia to fit into oversized laptop cases. This is the first time a desktop GPU is embedded inside a laptop. You are paying for all the extra engineering, but this is the only way to run VR on a laptop right now, and it’s also one of the fastest systems in this roundup. Origin PC has labeled this system as VR-Ready.
Falcon Northwest Tiki
Image Credits: PCMag
This VR-ready PC is smaller than most system out there. But, it is also more powerful and quite expensive. The Tiki is created by Falcon Northwest, and it is one of the main machines virtual reality developers, including those at Oculus, use to develop content. This very high-end configuration has an Extreme Edition Intel Core i7-5960X CPU, the faster Nvidia 980ti graphics card, and 6TB of storage on top of a super-fast PCI-Express 512GB SSD. It is one of the most expensive VR-ready PC, but it is also the fastest.
Titan SLI is the best choice if unbridled, untamed power is what you’re looking for. MSI GT80 Titan SLI is a massive 18-inch notebook. It houses not one, but two desktop graphics chips in SLI configuration, which should translate into smooth VR graphics available in this gaming laptop.
Asus GX700v0
Image Credits: Asus
G700v0 showed that water cooling is not just for desktops anymore. The Asus G700v0 is the first gaming laptop to feature a water-cooling system. This feature is something normally left to the realm of desktop enthusiasts. Because of the innovative cooling system, gamers can push their laptops with overclocking even further, squeezing out every bit of performance. The laptop performs optimally while staying cool under pressure. It is a feature that will come in handy when it is time to suit up for virtual reality.
How To Build A Virtual Reality Ready PC Yourself:
Image Credits: PC Gamer
Now if you are an experienced gamer and have built personal gaming PCs before you may decide to take the hard but budget-friendly road, and build your own VR ready PC. To run the Oculus Rift and HTC Vive your PCs have to be very powerful. If your current PC lacks in performance there are two things that you can do. You could buy a VR-ready PC, we have created a complete list of recommended VR-ready PCs above that you can choose from.
Alternatively, you can decide to build a VR ready PC yourself. And if you do we are here to guide you through the process. Hopefully, this guide will help you build a PC capable of high-quality VR gaming. You can also refer this guide if you are looking to upgrade your current PC to VR-gaming standards. Our primary focus will be the hardware demands of the virtual reality headsets.
How to begin:
Building a PC is a lot simpler than you may think, it may seem daunting at first but once you decide what kind of PC you want, it is just a matter of choosing the right components and putting them together. Arguably, the hardest part of building a PC is selecting the right components. To begin here is an outline of what you will need to do:
Decide what type of PC you want.
Select the proper components according to you budget and needs.
Insert the components into the CPU casing, in their respective slots.
Install the operating system.
What you will need:
Here we will discuss all the components that will be required to build a VR ready PC. For each component there will be three options; the bare minimum, the mini, and the future ready. If you are looking to build a budget PC that will properly play VR titles of today the bare minimum will suit your needs.
The future-ready PC will be expensive, large and have all the very best components available and will be ready for all future virtual reality titles. But, if you are looking for something compact and small that won’t occupy much space, you could go for the smaller components to build a mini PC.
If you have built gaming PCs before you will have a bit of an idea on how to proceed, if you haven’t, try consulting someone who has, just to be on the safe side. When we talk about building a VR ready PC, you will have to pick out your components very careful. The components we have listed here have been thoroughly researched and they will run VR headsets without difficulty. So without further ado here are the components that you will need:
Graphics card:
The Graphics card is the main component of a VR-ready gaming system. Unless you have a recently tricked out gaming PC chances are that you would have to upgrade. Both Oculus Rift and HTC Vive recommended minimum is AMD’s Radeon R9 290 or Nvidia’s GeForce GTX 970. Both this cards will run the VR titles comfortably at the bare minimum.
It’s all about the frames when it comes to graphics in gaming. For a satisfying gameplay on a PC 60 frames per second is the right choice. When it comes to VR what you need for a smooth and comfortable gameplay is 90 frames per second. Any less will lead to staggered movement. And when it comes to VR if your actions don’t react in time with your motions then it will lead to nausea and disorientation.
Image Credits: Gizmodo
A single GTX 970 or Radeon R9 290 should be enough for a comfortable VR experience. But if you have got money to spend and are looking for something more you could go for two GPUs, or the GTX 980. It is better to save the extra money and wait for future GPUs instead of spending money on two GPUs right now. In case you are looking to go overboard and future proof, you PC, two of Nvidia’s GeForce GTC 980 Ti graphic cards will do the trick.
The CPU is the brain of the PC. The GPU will be the main star of your PC but you need a strong enough processor that will keep up with virtual reality rendering. Oculus and HTC recommend Core i5-4590 to run virtual reality smoothly. For the future proof PC, we suggest Intel’s Core i7-6700k. To install this one you will need a new motherboard.
The Core-i7 also supports DDR4 RAM. Core i7-6700k is an unlocked processor, so you will be able to overclock it. For a mini VR-ready PC build the good old Core i5-4690k processor will be sufficient. It will easily fit in small motherboards, unlike Intel’s latest Skylake processors. It would be best to go for liquid cooling to keep the PC performance optimal.
Image Credits: Techspot
AMD CPU’s aren’t yet up to the task of rendering virtual reality, according to experts. This is because of it is lacking in single-threaded performance, which is how fast a processor can work on any single small task.
Memory these days is quite affordable mostly because of how fast its technology is progressing. Compared to other components RAM is fairly cheap but still quite crucial to any PC. More RAM means your PC can run faster, and perform more tasks before hanging.
With virtual reality, it is very important to make sure that your computer doesn’t hang, or experience the slightest lag. So it is important to get the right amount of RAM for you VR ready PC. VR experts suggest 8GB of RAM as a suitable choice. 8GB worth of DDR3 RAM will be more that sufficient for a bare minimum PC. For future proofed PC build 16 GB of DDR4 RAM should be best. The DDR4 is quite new and hence expensive. If you are going for a mini PC, go for 16 GB DDR3 RAM.
Next up is Power Supply. You will need a suitable power supply to power your VR ready PC. Power Supplies are available in a wide range of wattages, it will be important to select one that will properly power your PC. You can use PCPartPicker to keep track of all the hardware components that you have selected for your virtual reality compatible PC. The tool will help you estimate what wattage of Power supply you will need.
If you are going for the bare minimum PC build, Corsair’s 500-watt CX500M power supply is a great choice. The massive 12,000-watt SeaSonic power supply will be better suited for future proof VR compatible PCs. This amount of power is most definitely a bit over the top for most users, but it will give you the opportunity to use three huge graphics cards if future VR games wind up requiring them.
It also provides an incredibly stable source of power for overclocking. Moreover, power supplies tend to outlive every other PC component, so a good power supply is an investment.
Storage:
You’ll need sufficient hard drive space to store your heavy VR games and the operating system. A $50 magnetic hard drive will be suitable for a bare minimum PC. It will be best to use SSDs (solid state drives) for all PC builds. The traditional hard drive will give you a lot of space but an SSD will make your entire system feel faster.
A speedy 500GB SSD, along with with a reliable 2TB 7200RPM standard hard drive for storage will be more than enough storage space for now.
Other Hardware Components:
The components listed above are the main ones that directly affect your virtual reality experience. There are still several crucial components left that are required to build a PC but they don’t affect the VR experience directly like the motherboard, CPU case, peripherals etc. Still we are not going to leave them out.
You are going to need a motherboard that will support your CPU and all other upgraded components. Gigabyte GA-Z170X Gaming 7 ($200) has space for three graphics cards, supports DDR4 RAM. It also has a Thunderbolt 3 port for external graphics.
Then come the CPU case, you will need to carefully pick one that has enough but not too much space. It should also allow proper airflow so your system is kept cool at all times. You can pick the case that suits you best. You could go for a cool flashy design or something simplistic and light. The case we suggest is Corsair 760T, it has plenty of space and easily accessed dust filters. Other good cases include the Raidmax Super Hurricane, Cooler Master HAF 912 and the Rosewill Galaxy 02.
For keyboard and mouse, you can easily use the ones lying around or opt for a gaming pad. For an operating system, it is best to go with Windows 10.
Building a PC is a tough job, there are plenty of ways that you can mess up, but that doesn’t mean that one shouldn’t try. We hope that this article will help with your PC building process. Here are all the components for respective VR-ready systems in an easily readable format:
Image Credits: Cnet
Things to look out for in VR gaming:
Now that you have setup everything for experience the next frontier of gaming i.e. Virtual Reality. You should do some research for games as well as virtual reality is still just in its initial stage, so we can safely say there is a lot to learn . You can read about the best VR games being released in 2016 as well. As more and more people use the headsets, we learn more tricks and tips about each of the platforms. There aren’t a lot known at present time but here are the few tips and general tricks we would like to pass along:
Add a patterned tactile surface to crucial buttons on your gaming keyboard or controller. This will let you know if your hands are in the right position, without having to take off your VR headset.
It is important to stay organized. Like we discussed above in how to prepare your room for virtual reality, there will be a lot of cables and other VR components accompanying whatever headset you choose. That, along with all of the loose components and cables that come with building a PC means that you will have a lot to organize. Try to keep all of your cables managed to avoid tripping and get obstacles out of the way when gaming.
Keeping your VR headset clean is also very important regardless of which VR platform you have chosen. Sweat and oil from your hair will accumulate on the headset over time. Be sure to periodically wipe everything down to keep the “The Future of Gaming” hygienic.
Experiencing the virtual reality in its fullest is much expensive in terms of headsets and compatible PC. But if you have decided to dive into the complete new world of VR, we hope this guide will help you design your first virtual reality ready PC yourslef.
Do you want us to add something in the guide, do tell us and if you liked the guide do not forget to share it on Facebook and Twitter.
Take a look at your smartphone. How many apps do you have installed? If you are like most people, you probably have somewhere between 25 to 30 apps installed on your phone. But how many of them do you actually use? Again, if you’re like most people, you probably regularly use just a handful of those apps, meaning that you are using up more space on your phone, and likely creating unnecessary security risks, by keeping all those apps.
Because apps can put your privacy and security at risk, it’s usually a good idea to conduct a “spring cleaning” of your phone.
Getting Apps Under Control
When smartphones first started to grow in popularity, the iTunes App Store and Google Play were new and exciting places. Packed with literally thousands of apps that ranged from the indispensable (such as Facebook, for most people) to the downright silly, many new smartphone users downloaded apps with abandon.
But in the decade since smartphones began their rise to dominance, the app market has slowed down some — and users have bloated devices filled with useless apps. But how do you decide which ones are worth keeping, and what to delete?
1. Delete unused apps. The most obvious place to start is to delete any app that you never use —especially if you can’t remember why you downloaded it in the first place. If you haven’t used an app in 90 days or longer, delete it. If you can’t remember the last time you opened an app, it needs to go.
2. Delete irrelevant apps. If you downloaded an app for a specific purpose, such as a guide to a vacation destination, and you no longer need it, delete it.
3. Delete duplicate apps. If you have multiple apps that do the same thing, delete the one you use less often. In many cases, users downloaded apps when they first got their devices, but newer devices have the same capabilities already built-in, rendering those apps unnecessary.
The best way to approach your app cleaning session is to be quick and ruthless. The worst that can happen is that you delete something you wanted to keep, and need to reinstall it. Chances are, though, if you just delete unwanted apps, you won’t even notice they are gone.
Get a Handle on Security
Once you have cleaned out all the unwanted apps, you can work on securing the ones that remain. The fact is, many apps contain security vulnerabilities that can lead to data breaches even after they go to the market. A recent report from the Ponemon Institute, published in conjunction with IBM, revealed that about half of all apps that are built are not completely tested — and 33 percent aren’t tested for security at all before they are released. That is why it’s up to you as the user to pay close attention to security and take steps to keep your app data safe.
1. Install updates. While some users set their devices to automatically install updates as they become available, many do not. Because so many updates include bug fixes and security updates, though, this is an important task. If you haven’t updated your apps, make this a part of your regular maintenance.
2. Review the app permissions. Whenever you install an app, you grant certain permissions — permissions that could be putting your information at risk. If you have older apps that you haven’t reviewed in a while, check to be sure that you aren’t providing access where it’s not needed. While you are at it, consider turning off location services as well as the microphone and camera access to your apps. You can restore permissions on an as-needed basis.
3. Change passwords. Just like your online accounts, you need to regularly refresh app passwords. If two-factor authentication is an option, enable it.
4. Remove your cached data. The more you spend your time on the internet, the more will be your cached size that in turn will slow down your phone so clear your cache regularly.
Cleaning up the clutter on your mobile phone and getting rid of unused or unwanted apps will not only help improve the security of your device, but it will improve your phone’s performance as well. You’ll gain more storage space, and should see at least a small boost in battery life. Most importantly, though, you can gain peace of mind that you know exactly what’s on your phone and why it’s there.
The number of “things” connecting to the internet these days is astounding – and the numbers continue to grow. In fact, by some estimates, machine-to-machine connections will represent nearly half of all internet connections, and most of them will be wireless. The dominant technology for these connections is Wi-Fi, but is that really the easiest and most efficient way to connect devices with the internet?
As of this moment, the answer would have to be no. But that is all changing, as engineers look for ways to simplify the connections between the IoT(internet of things) and Wi-Fi.
Wi-Fi, Bluetooth, and the IoT
There are several reasons that Wi-Fi has become the accepted standard for connected devices, over other technologies such as Bluetooth or ZigBee.
For starters, Wi-Fi and Bluetooth are designed for different purposes. For instance, say that you install a sensor near your front door that will send an alert to your phone when someone visits. The easiest way to connect the devices is Bluetooth, which is designed to connect two or more devices and send data between them wirelessly. Bluetooth does not connect directly to the internet, though, so the applications are limited.
Wi-Fi, on the other hand, does connect the device directly to the internet. Information collected from embedded sensors and monitors in devices is sent directly to a server, where it’s stored and analyzed, and then used to determine further actions. For example, it’s likely that you have a smart meter on your home to measure your electricity usage. The information collected from that meter is sent directly via Wi-Fi to the power company’s central servers, where it not only determines your individual monthly bill but is also analyzed in aggregate with other customers’ data to identify trends and patterns of usage and identify potential problems before they occur.
The fact that Wi-Fi connects directly to the internet is only the start of its advantages, though. Another advantage is Wi-Fi’s ubiquity. It’s truly a global standard-everyone knows and understands the symbol for Wi-Fi, and actively seek out the millions of hotspots around the world. That also means that most people know exactly how to use Wi-Fi: It’s easy even for small children to connect a device to Wi-Fi and authenticate their account. This isn’t always the case with a protocol like ZigBee.
With these advantages, it only makes sense that Wi-Fi has become the de-facto standard for IoT connections. However, there are still some obstacles to Wi-Fi’s domination.
Creating a New Standard
IoT devices are becoming increasingly complex. No longer limited to 8-bit microcontrollers, many are powered by complex computer systems with advanced 16-bit DAC microcontrollers that offer additional computing power, data storage, and more. Along with this power comes the need to add wireless connectivity, but developing a proprietary system for doing just that is often beyond the capabilities of device manufacturers. As a result, they generally use pre-existing integrated Wi-Fi solutions that are not only cost-effective but allow them to get their products to market faster.
But there are limitations to overcome. For starters, the number of devices that can reasonably use the same access point is limited, meaning that the more devices we connect, the more likely it is to experience failures due to overloaded connections. Another problem is that most things aren’t designed to allow users to easily connect to Wi-Fi; instead, they must connect to another device that is used to enter the necessary configuration commands. Coffee makers, for instance, don’t come equipped with full keyboards, making it a challenge to connect to Wi-Fi.
There are two solutions to this problem in development. The first is a new Wi-Fi standard, 802.11ah that uses the 900MHz band. This standard can potentially connect more than 8,000 devices to a single Wi-Fi access point within a range of nearly one mile. The second solution is the ProbMe protocol, which would allow users to simply plug in a device, turn on the “listen-only” mode, and then configure the device using a smartphone and then send the information to the secure Wi-Fi network. With this protocol, all ProbMe-enabled devices in the home would share the same configuration details, and connect to a designated network, taking some of the guesswork and complexity out of connecting devices.
Regardless of how the problem of simplifying connectivity is solved, one thing is certain: Wi-Fi is going to be the standard for IoT device connectivity going forward. As devices become more powerful and more complex, the need to develop better connection mechanisms is only going to increase.
A GPS running watch is there to help you keep track of your location and running distance. It also lets you know about your pace. If you are considering buying a GPS running watch and don’t know which one, then don’t worry because we are here to help you. With so many models on the market, it can be a little intimidating finding the right GPS running watch. We have this comprehensive guide in which we have discussed every question you can have about the GPS running watches. We have also collected the best GPS running watches so you can pick out one that will match your requirements.
Best GPS running watches: The ultimate guide to choosing the best one
There are smartwatches and fitness trackers that provide a lot more than just tracking the location, distance, and pace. However, some people want something that is basic. Moreover, a GPS running watch’s primary objective is to track your running and all of its detailed stats so undoubtedly it does a better job and is more accurate than most smartwatches article will provide answers to the following questions about GPS running watches:
Understanding what a GPS running watch is
Why should you buy a GPS running watch?
Do GPS running watches actually work?
How to choose the best GPS running watch that works best for you
Best GPS running watches
Using your watch efficiently
Conclusion – what actually makes a difference
1. Understanding what a GPS running watch is:
Understanding what a GPS running watch is
A GPS running watch comes with an integrated GPS receiver that tracks down the location of a runner and works as a guide to help them reach a certain goal. The watch is often used for fitness and sports purposes. However, they can have many more functions and capabilities depending on the developer. It can be integrated into a smartwatch as well. The stats of these functions are displayed on a touchscreen integrated within the device. The screen could be OLED, LCD, or something else, depending upon the model of the watch. The key features usually integrated within the watch are:
Speed & pace tracking to let you know how fast you are:
The device shows current speed by calculating distance through its GPS and time. The results can be inaccurate if you use this function for basic exercises. It works well for running, walking, and perhaps swimming as well. However, the best option to choose is “average speed” as the current speed’s calculation can be shaky.
Heart rate monitoring for pulse control:
A heart rate monitor measures the heart rate through optics with the help of infrared light. There’s a sensor that measures the amount of light darkened by the blood. The darkness is proportional to pulse. Another way to measure heart rate is a smart fabric that works as a conductor with the assistance of built-in microprocessors which record the EKG signals and analyze them to calculate heart rate.
These systems are installed within GPS running devices so that along with speed and distance, heart rate would be displayed to the user, so they run at a healthy pace. It’s a great feature for people having heart diseases. They can monitor their heart rate while performing exercises and sports.
Time display:
At the end of the day, it is a “watch” after all. So, the display of time is essential. Besides, while performing activities like sports, running, and exercising, time’s the main key.
Route choice and tracking:
Route tracking tracks down your location during any activity that involves you being mobile. You can view various routes through the map and select your current and destination point and it provides you a highlighted route that leads you to your destination.
Map to display coordinates:
There’s a map always present in the software of a GPS running watch. It displays all elements of space including regions, themes, and objects. Routes and destinations are displayed through the Map.
Accelerometer to help you know your steps:
An accelerometer is very important both in GPS running watches as well as fitness trackers. It helps in tracking of steps as it measures how much you accelerate. The purpose of the accelerometer is to monitor the movement of your feet as it hits the ground and then how many steps it takes while running or walking through a sensor. The final tracking is the number of steps and a pace estimation which results in the distance covered and of speed.
Cycling Cadence sensor for cyclists:
Cycling Cadence means the revolution number made by the cranks arm and pedals in your bicycle per minute. It is an important count for professional and regular cyclists. A cadence sensor measures your cadence and rear-wheel revolutions as well. The sensor works by having a magnet detector within which detects movements of two magnets that are relatively small in size, integrated into your bicycle.
One is attached to the crank arm and the other is on the spoke of the rear wheel. The former measures cadence and the later does the job of measuring the speed. However, a small sensor is attached to your chainstay which helps in detecting the movement of the magnet. Through Bluetooth, the information is transmitted wirelessly to your GPS running watch.
Footpod compatibility for indoor treadmill workout:
This device is great in case you don’t go out for running/walking and prefer to do it indoor on your treadmill. Now, before the GPS was invented, Footpod was used to give an estimate of distance covered and speed as well. However, now this device has been modified to be very small and simple. It can be easily fitted within your shoe as its size is a quarter. The device then is able to broadcast ANT + protocol signals to various fitness devices and Smartphones as well. This device is great to tell accurate data of pace and distance while working on treadmills (since treadmills aren’t much reliable when it comes to stats). The information can be stored and used later onwards to create good workout routines.
Interval Alarms to help you maintain your pace:
Now, this feature is amazing. It works in coordination with your heart rate monitor as well as GPS. It carefully analyzes your heart rate while your jogging or running and the pulse gets high it notifies you to slow down and walk for a certain distance when the pulse is stabilized it notifies you again through vibration or sound to start running again. Indeed, a GPS watch is a runner’s best choice.
Goal set-up to help you attain the perfect fitness routine:
This feature allows you to set up daily fitness goals or receive them from the device i.e., the number of steps you walk, the distance you cover while running, etc. Usually, GPS running watches create goals on the basis of weight, heart rate, and stamina of a person as well.
Coaching and training program:
This feature offers a program of weekly, monthly, and yearly programs that enable people to attain the perfect fitness goals. The program gives a routine and helps the user to achieve it through reminders. Smart Coach an app that is often installed within smartwatches and fitness trackers serving the same purpose.
There are some extra metrics that will help you improve your running form. To have such metrics you would need to expand your budget a little. The metrics include HR Max, lactate threshold, Orthostatic Test, Basal Metabolic Rate (BMR), and excess post-exercise oxygen consumption (EPOC). However, the most important are Vertical oscillation, VO2 Max, and heart rate zones.
1. HR max:
This is the highest number of times your heart is supposed to beat per minute when you’re going through the most intensive workout level.
2. Lactate threshold:
When the maximum level of uric acid’s build up in the bloodstream during an intensive workout after which fatigue kicks in, the pace gets affected, and the efficiency of workout gets affected.
3. Orthostatic Test:
An orthostatic test is supposed to measure your heart rate while you’re at rest and while you’re standing up before. This gives you a standing, rest, and peak heart rate. This gives your device enough information to tell you when you’re physically ready to train again and go out.
4. Basal Metabolic Rate(BMR):
Now, instead of getting a highly expensive test, there are watches that will give you the rate at which you burn calories by just breathing and being alive with basic info such as age, height, and weight.
The boost received in metabolism right after your body is done with a workout. Also known as the “afterburn”.
6. Vertical oscillation:
While running, the bounce degree in your motion. It’s one of the optical running metric measurements.
7. VO2 Max:
This is the maximum oxygen volume (mm) you’re body can consume per minute per kilogram body weight during the highest point of workout/running. Running watches use a smart algorithm along with the heart rate monitor to give you an estimate of your VO2 max on the basis of your latest workout’s performance and vital stats.
8. Heart rate zones:
Different GPS running watches break down your heart rate tracking into segments based on your sports activity. For example, for running:
Recovery (60% of MHR)
Maximum pace (78-95% of MHR)
Endurance building (60-80% of MHR)
Lactate threshold training of running ( 81-91% of MHR)
Fitness training for running (72-85% of MHR)
2. Why should you buy a GPS running watch:
Understanding what a GPS running watch is
Well, it’s simply a great invention. It helps you in staying fit and be regular at daily walks and running. It also enables you to keep a history of your outdoor sessions.
There’s absolutely no denying the fact that there are many free or with a little subscription fee apps for smartphones that offer about 90% of the features that are available on a smartwatch. There’s Strava, Nike+, Runkeeper, Runtastic, and Edmundo. So, why buy a watch worth $300?
However, it should be kept in mind that these apps don’t provide up to date tracking of vitals on the screen while you’re mobile. They do provide information on distance, laps, and speed but it’s all the information is not available at your wrist’s glance. Rather, the pace gets affected once you take out your phone from your pocket to check the running status.
So, now that you know why you need it, you must be thinking…
3. Do GPS running watches actually work, and are they accurate?
Understanding what a GPS running watch is
Jonathan Rawstorn study:
Well, a GPS running watch has its setbacks and limitations. A study was carried out at the University of Aukland by Jonathan Rawstorn and some other researchers that proved how GPS technology doesn’t work well during short intervals.
The validity of GPS tracking was tested on a soccer player’s movement. The players were asked to perform a jog/walk/sprint in a loop, drills of interval-style, and a two-line based shuttle run. In this way, the movement of the players had intervals throughout the 8 miles they covered. Rawsthorne wanted to see how well the watch would detect distance and pace during such intervals in a jog.
The loop repeats were carried out on a 200m loop which resembles the tight turns and leaps made by runners while covering difficult trails or performing loops within a jog. The watches gave an overestimated result of the distance covered during the loops by almost 3%. This isn’t much relevant in case you’re on a run, but it’s important if you’re performing a race or workout in some competition. (Rawstorn, Maddison, Ali, Foskett, & Gant, 2014)
Another study carried out on Garmin, Polar, and some other GPS running watches:
This person tested various GPS watches of famous brands like Garmin, Polar by covering 6,000 miles and taking a record of over 2,500 data points. His study was focused on finding out the best GPS running watches. However, it did give an overview of the true accuracy of a GPS watch.
The watches work well while covering smooth trails under favorable conditions. However, when getting tough, the watches started giving shaky results. It was noted that the GPS accuracy of any watch wasn’t accurate enough to display the current pace. The only option viable enough to display the current pace accurately was by using a foot pod. It’s highly recommended to choose a GPS running watch that has compatibility with a foot pod.
Thus, it’s proven that GPS running watches might lack in displaying 100% accuracy when it comes to pace especially during irregular intervals or unfavorable conditions. But they are currently the best solution for tracking your workouts.
4. How to choose the best GPS watch that works best for you?
Understanding what a GPS running watch is
When it comes to buying a GPS running watch, there are several questions that will come to your mind. It’s important to do your market research before investing this amount of money. Back in the day, there wasn’t much variety to select from when it came to fitness devices. There was the classical Casio, Polar or Garmin’s stopwatch. Now, there is a huge variety of products in various brands to choose from.
Whether you want to buy the watch for general fitness or you’re a member of the 100 Marathon Club, by tracking your stats you will be able to improve your performance and get your daily dose of motivation as well. However, just like picking out the best tracksuit or running shoes can be tricky, buying the perfect GPS running watch that fills in your requirements and expectations can be tricky too. Lucky for you, we have done the research for you so you can choose the best device that works well for you.
The four main questions to ask yourself before buying a GPS watch:
4 main questions
There are many factors to consider while buying a GPS running watch. But we believe all the focus should be narrowed down to these 4 basic questions before looking at other aspects. If the watch offers answers to these, it means it fills its purpose.
What’s my location?
One of the main purposes of a GPS watch is to tell you where you are located. The navigator guides can vary from a compass’s needle which displays directions to you so you can reach your destination or get back to your starting point or a highlighted track, preloaded on the map. Colored maps are displayed by Leikr and Epic, while Finex 2 and Motoactv display maps containing names and roads.
What’s my pace?
The average pace and time can be calculated through time and distance. However, runners often want to know what’s their current pace. The GPS system is not that good at displaying current speed so, for the accuracy of speed, you need a Footpod. Racers need to know their accurate pace at various distant point and the feature is important for training programs that require you to run at a certain pace.
How much distance did I cover?
This feature requires GPS accuracy and is one of the sole reasons why you buy a GPS watch. Runners want to know where they are as it helps them achieve certain goals. Most watches are good at displaying current location while the route is straight; however, the results become shaky when the route gets twisted and complicated. You can prefer buying a GPS watch with a built-in accelerometer that fills in the gaps created by GPS.
What is my current cadence?
There are watches being invented which display the current cadence even without external devices. The watches have an internal accelerometer and sensors to detect the current cadence by which you are running or cycling. Most watches, however, need devices attached such as foot pod to your feet or crank arm sensors to your bicycle. Garmin watches use the technology of Dynamics heart rate strap. There’s a useful feature in watches these days called a “cadence” alert which will help you maintain your cadence range.
Price ranges and the features that they offer:
Well, GPS running watches start at $50 and reach a $600 price tag. We don’t recommend extra-high range watches as they contain some unnecessary features. Here’s what you get at different ranges:
Under $150: If we talk about GPS running watches, in this range there are very few running watches that come with GPS. There’s Garmin Forerunner 25 which gives you all the basics including pace, calories, distance, and GPS. Often watches under this range will need to be paired with your smartphone to display the stats.
$150 to $300: You’ll find nice watches like Fitbit Surge, Polar M400, and TomTom Spark in this range. They offer built-in accelerometers, heart rate tracking, and advanced training features like interval session programs and heart rate zone training. You’ll be able to leave your smartphone at home.
$300 above: GPS running watches like Suunto Ambit3 Peak Sapphire HR which will cost you around $600 but will offer pretty much every sort of tracking regarding sports.
Key features to look out for:
Running dynamics, Footpod, and vertical oscillation:
A GPS running watch will give you the current pace. However, our above section on accuracy has proved that no watch gives 100% accuracy of pace unless you use a Footpod. This device gives you the exact cadence of running as in how often your feet strike the ground. Additionally, vertical oscillation provides you the degree of bounce in your motion while running. This and many other running dynamics offered by high range watches help you improve your running form.
Battery life depends on the distance you’ll cover:
If you’re planning on taking your GPS running watch to the marathon with you, make sure it has enough battery life. We recommend you get a watch that will last a bit longer than your longest run. However, if you do get a watch that offers less battery timing then you can carry backup battery packs along to charge on the go.
Coaching programs and interval sessions:
Interval sessions help you build up the right speed and pace during your run. Watches like TomTom Spark and Garmin Forerunner 235 offer customizable interval sessions you can create on the basis of heart rate, duration, pace, and distance. The number of sessions you can create is infinite.
Additionally, brands like Adidas, Polar, and Garmin offer comprehensive expert training programs and plans for covering half, full, 5k, and 10k marathons. If you want training plans, make sure you check the Smartphone apps and web tools associated with your device before purchasing.
The efficiency of the GPS:
When it comes to GPS running watches, GPS is the main thing. It’s true that up till now no GPS provides 100% accuracy of the result but it’s about who’s nearest to it. Garmin Forerunner 235 has been claimed to have the best GPS system and provides amazing stats when it comes to running.
Heart rate tracking if you’re serious about training:
Well, if you’re buying the watch just to keep track of your speed and distance, you don’t need one with heart rate tracking. However, if you’re serious about training, a watch with a heart rate sensor monitor is a must. There are two options within the device, chest strap, or built-in optical heart rate (OHR).
Chest strap tends to be 100% accurate at giving results for HR but some people find it to be uncomfortable. For them, we recommend OHR but it won’t give 100% accuracy in the result. However, for steady runs, OHR gives accurate results but not for weight lifting or interval training.
Syncing with 3rd party apps and data upload:
If you want to analyze your data and want to make the best of it, it’s better if you download all the apps and web tools associated with the device. It’s important that the device has compatibility with third-party apps. Most brands offering GPS running watches support Strava – an excellent app designed for athletes. Strava connects millions of cyclists and runners across the globe.
Data uploading is another thing you must check before buying. This feature allows you to store and record your workout stats in apps like SportTracks and Dailymile. We recommend even new runners to use this feature. It allows them to take a look at their previous running stats that are months and years old to see their progress.
5. Best GPS running watches:
Best GPS running watches
So, after knowing what a GPS watch is….you must be wondering, what’s the best watch that will fit all your needs? You know why you’re buying a GPS watch. Some of you are buying because you’re tech geeks and already have a GPS watch and want to buy a newer and better model, some of you want to train yourselves for races and marathons, some of you are buying it to improve your running or cycling pace, while some are you are buying just for the “try something new” sake. Well, for all of you, we have displayed the best
After doing lots of research, we’ve come up with the best GPS running watch of 2016. Following it, we also have listed the best watch selected by tech geeks. Furthermore, there are watches ranking best in various qualities including the price for readers with a limited budget.
Heart rate monitoring, GPS system built-in music playback in one device which is rare.
Well designed menu – easy and logical browsing.
24/7 Activity tracking plus sport training sessions.
Tracks swimming, treadmill, indoor cycling, and workout sessions as well.
Comes with a satellite lock.
5 hours of GPS tracking and weeklong and 7-day battery life for activity tracking.
Heart rate zone tracking with a graph to tell you if you need to balance your pace.
Accurate stats.
Over 500 songs of music storage.
Automatic sleep tracking.
Cons:
Outdated design-LCD monochrome screen and black plastic with a black colored rubber band. The design isn’t lightweight and feels bulky to wear.
TomTom MySports web app is limited and just provides you a clear display of your stats. Nothing motivational to get you back on track tomorrow.
“Never judge a book by its cover”, this saying perfectly fits Spark’s TomTom. The watch looks like an old fashioned chunky piece of plastic which isn’t light to wear, but what’s underneath that is what has amazed us. TomTom doesn’t have a touchscreen however, there are heart rate monitoring, GPS, and built-in music all at the same time, which is rare.
The watch gives accurate activity and sports tracking. There’s running, swimming, cycling, treadmill, indoor cycling, and workout tracking. The watch has an accurate cadence sensor and the GPS works amazingly as well. Under the display, there’s a four-way button system under the screen. When you’re running, your hands are very sweaty and the buttons are easy to control. By tapping up and down, you’re able to view all the metrics easily on the screen, thanks to the amazing UI the device has. Just by using back and forward buttons, you’ll be able to effortlessly slide through menus to listen to music or open a different tracking element.
The watch gives 5 hours of battery for GPS but you don’t need to switch it on all the time. TomTom was specially designed for runners in Marathon. With weeklong battery life, the device will give them tracking throughout the run.
When it comes to heart rate tracking, OHR doesn’t give many accurate results as compared to the chest strap. However, TomTom’s OHR created by LifeQ has given the most accurate results of heart tracking as compared to the other watches we tested. In fact, TomTom’s OHR result resembles that given by Garmin’s chest strap.
When it comes to the ecosystem, the TomTom MySports Connect app is there to help you understand your post-workout data. You get details on your distance, pace, duration, heart rate, cadence, and calories. There’s a graph on which you can plot all your elements. There’s a display of your route on a map as well. However, the app doesn’t inspire you to repeat your routine tomorrow as Garmin connect. However, you don’t really need to use the ecosystem of the app. The app can be connected to your android or iOS account and you can link it with excellent apps such as Strava and RunKeeper. You can even see the running segments on the device once it’s connected to Strava without taking your phone along the run.
A good GPS system connects very fast with wrist-based Heart rate
Sports tracking is very good.
Easy to access the metrics through the screen.
You can make customizable workout sessions.
Offers extra metrics in the Garmin connect app.
Works pretty good as an activity tracker.
Built-in OHR.
The display type is sunlight-visible.
Receive audio prompts from your connected smartphone with laps and lap time.
Smart notifications: emails, text messages, call alerts, calendar reminders from your compatible smartphone.
Cons:
The design feels delicate and sticky due to the plastic.
No VO2 metric present.
Some metrics require web tools and apps to access.
Inaccurate results of OHR.
The design includes a 1.23-inch diameter LCD screen and 215 x 180-pixel resolutions. Garmin Forerunner displays time various stats such as pace, distance, heart rate Zones, heart rate, cadence, and calories as well. It’s easy to access the metrics as you can use buttons to tap up and down the screen even mid-run. By cycling around the screen, you get a current heart rate zone.
Another feature that’s synced from Garmin’s web app is customizable workouts that you can plan according to your desired time, distance, workout intensity, and even heart rate. The plan is then sent to the watch. The app is called the “Garmin Connect mobile app” that is available on iOS and android. If you use the Express Software, you can even use the app on Mac/PC.
When it comes to high-intensity interval sessions (HIIS), the watch doesn’t show accurate results with OHR. So, you’ll need to attach a chest strap if you want good quality training. OHR is a benefit in activity tracking as the watch is able to provide the current heart rate throughout the day. Due to the watch’s lightweight design, it’s comfortable enough for you to wear while sleeping. You can’t do that with TomTom Spark. It’s just a single tap and you’re able to access your steps, pace, and calories. Garmin forerunner 235 displays calendar updates and notifications of calls, messages, and texts on the wrist, by pairing it with a Smartphone.
Garmin Forerunner 630 – Best for recovery tracking
Pros:
It has Smartwatch inspired features.
Waterproof by 5ATM. So, you can take it to swim up to 50 meters.
The threshold limit and VO2 Max metric are available.
Built-in Wifi so you can upload your sessions directly to Garmin connect.
There’s the Auto Goal feature which alerts you when you reach it and also when you don’t.
Connects to your phone and you can control your Garmin VIRB action camera with it.
The battery lasts for a month if it’s used just for activity tracking and a watch.
Matte plastic with a blue finish has a strong body against tough workout sessions.
The Garmin Forerunner 630 supports numerous advanced physiological measurements such as stress score, performance condition, lactate threshold, recovery time, predicted race times.
Wirelessly calculates your heart rate and sends it to a compatible device.
Cons:
The watch needs a chest strap, there’s no Optical heart Rate sensor.
It is heavy on the pocket.
The device has low resolution, less impressive screen. The design has dull colors.
Doesn’t sync well and displays the exact time when the activity tracker is switched on.
Once the battery runs out, it takes a lot of hours to charge back to 100%.
Garmin’s Forerunner 630 offers features inspired by smart-watch, advanced running metrics, and analytics to help you improve your running form; and access to Garmin’s Connect IQ app store. However, is it really worth $398? Let’s see…
The watch has a round-faced watch consisting of a colored 1.23-inch touch screen display. The screen size is nice with a black bezel surrounding. It’s a strong watch which you can take with you in rough weather as well.
With the watch being waterproof by 5ATM, you can take it to swim but the swimming modes and analytics it offers are way less than Garmin Forerunner 920xt. Keep in mind that there’s no optical heart rate sensor as we mentioned before so you need to connect the four charging pins to a proprietary charger. There’s also a 5ATM waterproof run chest strap bundle by Garmin HRM which you can wear.
It’s said to be one of the best watches for heart rate tracking and GPS. It picks up the signal quicker than TomTom Spark and drops out in between either. The watch also does a great job as an activity tracker. There’s a Move bar feature that displays your activity and alerts which send vibrations to your device to tell you to start moving when you’re inactive for too long. Indeed, Garmin’s products do a good job when it comes to being motivational.
The best thing about this watch is how it can be used as a smartwatch as well. It displays texts, emails, and event updates and alerts of other apps. The watch can also be connected to Garmin Connect and IQ apps. You can view all your stats, upload them, and share them with friends and users online.
Comes with a built-in GPS and optical heart rate sensor.
It’s gives missed calls, text messages, and incoming call alerts.
The watch comes with a 3-axes accelerometer, 3-axes gyroscope, and a digital compass as well.
It’s easy to use.
The updated Fitbit gives cadence, heart rate zones, and biking pace.
Monitor your sleep and wake with a silent alarm
Surge syncs automatically and wirelessly to tablets, computers, and 150+ leading iOS, Android, and Windows smartphones using Bluetooth 4.0 wireless technology
Cons:
The device has a Battery life of just 3 days max.
Charges through a USB cable attached to a proprietary connector.
Has a very boring display that lacks aesthetics.
GPS tends to give inaccurate results in the longer run.
The Fitbit app doesn’t support more than one tracking device you’ll have to delete your previous tracking device from the Fitbit app.
The people who love cycling, running, and working out; all at the same time, Fitbit Surge is the right choice for you. The watch comes with a rubber strap with a choice of three colors; blue, black, or tangerine. The grasp is secured and comfy but you can’t ignore the old fashioned, weird-looking display which has an increased girth from the top end to the bottom of the module. The 1.2-inch LCD monochrome touch screen comes with a solitary button the left and two buttons on the right.
The watch can track calories burned, steps, duration, climbed floors, and elevation thanks to the 3-axes gyroscope, digital compass, and a 3-axes accelerometer it comes with. Using the Fitbit’s latest PurePulse technology, the device gives 24/7 heart rate monitoring. You’ll also be able to train efficiently through heart rate zone tracking and cardio workout tracking.
The device offers various tracking of runs including lap, free, or treadmill as you navigate through the running menu on the main home screen. The treadmill tracking doesn’t use a GPS rather a step algorithm to track your jogs. Like most high-end GPS running watches, Fitbit offers a cycling track. However, the recent update now consists of a Bike Mode as well. Just like running, the bike mode provides the same level details of time, heart rate zones, and pace. The device proves useful for cyclists. However, the level of detail and accuracy is nowhere near the sports tracking of Garmin.
The best thing about Surge is its app. The device syncs with your Android phone, iOS device, or Windows phone by using Bluetooth. It can also be connected to your PC or MAC using a wireless dongle. The data is stored on the cloud once synced with the mobile app. If you connect Fitbit Surge to your app, there’s a Fitbit Surge section that displays your current heart rate, covered distance, burned calories, step count, minutes you were active, floors climbed, and details of workout sessions as well. There’s even a graph to help you understand your progress better.
It is extremely wallet-friendly at just $169/$179.
Tracks activity even when you’r stationary.
The watch alerts you when you’ve been immobile for too long.
It also guides you back to your home location through the nearest route through a GPS marker.
It consists of an accurate calorie count.
Waterproof fitness trainer.
It is compatible with the H7 Heart Rate sensor.
Cons:
It pairs up with fewer accessories.
The device doesn’t give you over the edge metrics such as cycling cadence.
No built-in OHR.
Give less depth inactivity and sleep tracking stats.
The best thing about this device is that it offers the basics of a running watch at a reasonable price. It’s a simple GPS running watch with some cool extra features. It has a better design then Polar V800, despite lacking extra metrics like cycling cadence and built-in OHR. The watch has a small face and a very comfortable strap for the wrist. You’ll be able to see your stats even in direct sunlight through the high contrast display.
You don’t need a unique charging cable to charge it; a simple USB cable does the job. It gives the basic pace, burned calorie, distance, and altitude tracking. Through an internal accelerometer, the device will track your steps, sleep, and activity even when your mobile.
The recent update of the device will give not only give iOS notifications, but it will also give notifications of other smartphone apps such as Instagram, Facebook, WhatsApp, and Twitter as well.
When it comes to syncing and connectivity, the data on your Polar M400 can easily be transferred to your connected Smartphone with blue tooth technology. The watch also gives you 21 days of battery if used as a tracker or a general watch. With GPS, it will run out at 16 hours, which is even better than most watches at this range.
Garmin Vivosmart – More than just a GPS running watch
Pros:
The device is a smartwatch that works amazingly as sports watch too.
It is reasonably priced at $249.
The extreme thinness of 8mm.
Accurately tracks your runs, pace, and distances. The same goes for walking, swimming, and cycling.
Syncs with Garmin connect Smartphone app.
Fast Bluetooth syncing.
3 weeks of battery time with 10 hours of GPS tracking.
Cons:
Poor design with an extremely low resolution.
Looks like a typical square-faced watch with an extremely dim light in the screen which barely shows the result in the dull condition.
Poor settings of goals.
Garmin’s Vivosmart is not just a sports tracking watch but works great as one of the best Smartwatches as well. The only setback with this device is its outdated square face watch design and its low-resolution screen. The resolution is only 205 x 148 pixels and the light is so less that it’s almost impossible to see the screen in dim light conditions. There’s a backlight which lasts hardly for 5 seconds.
When it comes to activity tracking, the watch does a fairly good job. There are steps and sleep tracking which works quite well. Though, the sleep tracking isn’t as good as Jawbone. It works well with Garmin’s HR chest straps to give you heart tracking along with the other metrics.
The best thing about this device as a GPS running watch is that it’s GPS is quite accurate. It gives you great stats for cycling, running, walking, and swimming. There’s no guesswork of accelerometer, rather accurate detailed tracking. There’s also Golf tracking with back, front, and center of the green yardages. The ecosystem is incredible and the device pairs with your Smartphone to give you all the notifications on your wrist.
The watch comes with a sleek design with a large display so the users can view the stats by just a glance during their workout. The silicone bands are also soft and comfortable on the wrist. It’s available in frost blue and midnight blue or black gray colors. The battery lasts for 11 days in general watch and activity tracking mode, and 14 hours if all features are used. The watch offers heart rate monitoring and tracking of activities such as; cycling, swimming, cardio, paddle sports, XCskiing, hiking, multisport and strength training as well.
Garmin Forerunner 735XT offers advanced metrics for running, swimming, and lots of other sports. The watch is waterproof up to 50m and is a great tool for tracking of swimming. You can take the watch during your swimming training and workouts in the water and it will guide you through. Though at times the tracking gives inaccurate results, there are many options to choose from. The watch also offers GPS tracking of 24 hours.
The watch syncs automatically to Garmin connect and you can track your workouts, trends and join challenges with communities online to compete against friends, and earn badges for achieving fitness goals.
Great for stats, provides various metrics and high-end data.
Let’s you know when you’ll be ready to train again once you’re exhausted.
Let’s you know how much you burn through general activity, workouts, or just breathing.
You can connect additional cycling accessories to get even more metrics on the sport.
Built-in GPS keeps track of your ride, run or hike measuring your speed, distance, and route
Compatible with H7 Heart Rate sensor while training and even while swimming
Compatible with Bluetooth Smart running and cycling sensors more details about your training.
Cons:
ANT + power meter isn’t there.
The data can’t be exported to 3rd party apps.
This is an excellent watch for metrics. If you’re a swimmer, biker, or runner and looking for a running watch that gives you detailed metrics; Polar V800 is what you were looking for all this time. It tracks distance, pace, heart rate, and calories burnt as well. The screen used to display the metrics is very clear and is customizable as well.
You can unlock Heart rate zonal training once you pair it with a Polar H7 heart rate monitor. It makes sure that you’re sweating it enough to meet the perfect goal. It also gives you 100% accurate running cadence by using a shoe pod. To increase the stats of two-wheeled training, you can buy additional accessories in the big range for cyclists. The Recovery Status with Orthostatic Test features predicts when you’ll be ready to train again once you’ve completely lost every bit of energy left in you for a further workout. Indeed, it’s a marvelous GPS running watch when it comes to activity tracking and sports metrics.
6. Using your watch efficiently:
Using your watch efficiently
So, now that you know what to buy…are you aware of how to use it so it gives you maximum results? It’s important to know that these watches aren’t as simple as they often seem. I mean…we have already explained to you the key and some additional features they offer and what they mean, but how you use them is entirely up to you. However, we’ve come up with a guide to help you use these watches in the most efficient way possible.
Create a workout diary:
Create a workout diary
Well, yes the watches do come with their own web tools and apps for analysis, progress reports, and records but it’s very important for you to keep a separate record that helps you in a motivational way. You can use a google calendar and create a training calendar. You can note down the information that’s most relevant to you, i.e. heart rate, goal achieved, what activity you performed, and your feeling towards the experience.
Keep track of your heart rate and know your MHR:
It is important that you find your maximum heart rate (MHR). Your GPS running watch will use this information to divide your heart rate into segments called the “heart rate zones” according to the stages of your workout, depending upon your workout type.
In order to find your max heart rate, you need to warm up for 15 minutes. You can do sluggish jogging and maximum stretches during this period. Then, once you’re all baggy and set, find a slope that will at least take 2 minutes to reach the top. It can be a small hill or a steep road as well. Run with a hard but manageable pace towards the building. Once you’ve reached the top, run down with a simple pace and then repeat the first step. This activity will provide your watch with enough information it needs to set your heart rate zones. The advanced watches will then find your maximum heart rate by setting the zones in each run.
You can also use the BPM and heart rate zone feature to find out when you’re working out too much or when you’re being sluggish. You can also set automatic alerts for this purpose.
Use the VO2 max:
What the VO2 max does basically is that it tells you what your maximum rate is during exercise by which your heart, muscles, and lungs can use oxygen efficiently. It’s more like your individual aerobic and workout capacity after which you could faint.
VO2 max
If you want your accurate VO2 max, you’ll probably need to go to a lab and have a gas exchange mask attached to your face. The test is quite expensive. However, our Polar and Garmin have used incredibly clever algorithms to find a way to give an estimate of your VO2 max without the need for costly tests. There’s a test within Polar’s running watches that gives you a set workout which calculates your VO2 Max. Garmin Forerunner 620 will just use your stats during race times and run to give you an estimate of your VO2 Max.
Keep track of your BPM:
As any part of a training plan, it’s important to know when to stop. This is where Heart rate tracking comes in handy. What you need to do is use either a chest strap or built-in OHR in your watch and lie down, stay still for at least 5 minutes. When you’re fully relaxed, your device will give a reading of your resting heart rate and you need to note it. Each morning for at least two weeks, repeat the same process. You’ll then have your average resting heart rate.
So, whenever you’re exercising the next time, in case your heart rate comes higher 10 beats per minute (BPM), it probably means you’re over-training yourself and you need a break.
Conclusion:
GPS running watches are amazing fitness wearables. They can really help you keep better track of your fitness routine and help you excel at it. Hopefully, this ultimate guide on GPS running watches will help you pick one that will match your needs. However, if you want to get fit buying a fitness wearable is only the first step towards a long strenuous journey.
If you put in a lot of effort than these wearables will help you accomplish a healthy lifestyle.The key is to stay motivated and keep pushing forward. With the help of all the amazing features that these watches offer hopefully the path to a healthy life will get less complicated and your fitness wearable will by your side helping you achieve your health goals.
If you are a tech & gadgets enthusiast then you probably know that among the latest tech trends smart home devices and smart assistants are quite popular. When it comes to virtual assistants Amazon Alexa has been very successful especially in the smart home automation domain. This is because the smart assistant allows one of the best voice controlling for your smart home. It provides standardized control over the basics like lights, locks, and more. This is what makes the Amazon Alexa very popular and if you are looking to set one up, then you are at the right place.
How to setup Amazon’s Smart Home Assistant:
Setting up Amazon Alexa can seem a bit intimidating at first for first-timers, but it is simple and we are here to guide you through it. This article contains all the best tips for setting up your Amazon Alexa Assistant. Following this article will help you utilize your smart assistant fully and understand it’s unique and exciting features. Alexa quite a bit of customization, in this article we are going to touch the basics of setup along with a few helpful tips about the Amazon Alexa’s features and functionality.
Buy an Echo Smart Device:
The first step to setting up an Amazon Alexa controlled Smart Home is to buy an Echo Product. It can be either an Amazon Echo or Echo Dot Smart Speaker. The Echo is a bit pricey but packed full of features. However, if you are just starting out and want to keep it small and affordable then Echo Dot is your best bet.
However, if you are looking to take out Amazon Alexa for a test drive before making an investment then that is achievable as well. All you need to do is download the Amazon app and log in. Download the app on any smartphone or tablet with iOS 11.0 or higher, Android 6.0 or higher, or Fire OS 5.3.3 or higher. Downloading the app on a computer? Make sure you’re connected to Wi-Fi, then visit the Amazon Alexa website. Then you will find a little microphone icon in the upper right corner of the home screen. Give it a tap and you can talk to Alexa. If you link your smart devices with the Alexa app you can control those from here as well.
Settings to Enable and Disable:
Once you have gotten your hands on an Amazon Alexa enabled device all you need to do is turn it on and it will walk you through setting up your home assistant. For best utilization and customization, you will need to go to the Alexa App. Alexa’s settings can be accessed from its app by logging in with your Amazon account. The Settings are on the menu. From here you can access your smart device’s settings for Alexa.
Choose a Location for Amazon Alexa:
Next, you need to select a proper location for your device. The optimal place would be somewhere you can easily access it at all times like the living room, or the bedroom. The device should be in the range of Wi-Fi signal to work. If you want Amazon Echo speakers in multiple rooms then you can always set up more than one.
Set up your smart home devices:
Now that, you have Amazon Alexa you will need some smart devices that can be controlled by it. Here’s our list of the Best Amazon Echo & Alexa enabled Devices & Accessories for your smart home. Here you can find all the very best options that are compatible with Amazon Echo & Amazon Alexa. Setting up smart home devices can be very simple or complex depending on what you select. The best approach would be to start small and simple like with lights and then work your way up.
Sync your smart devices with Amazon Alexa:
After you have bought and set up your smart devices the next step is to sync all of them with your Amazon Alexa App. You will need to do this in order to control them using Alexa. Note: Only Compatible devices can be controlled. To sync your smart devices say to Alexa, “Alexa, discover new devices.” After about 10 seconds of scanning, your devices will be added. In special cases, this might not work and then you will have to enable Smart Home Skills from the App and then search again for remaining devices.
Create Groups and Scenes:
Group and Scenes allow you to control multiple devices at a time. For instance, you can control your bedroom or kitchen lights collectively by creating groups. Groups can be created by using the Alexa App. To create a group, just go to the smart home section of the Alexa app and tap on “Groups.” Then select “Create Group,” give it a name, and select devices.
Scenes allow you to execute multiple commands on different synced devices simultaneously. You can use this to set different moods like “movie time”, or “good night”. Creating a scene is different than groups. Scenes can’t be created from the Alexa App. They can only be imported from your devices and only if they provide a way to create them.
Set Household Profiles:
Alexa’s biggest advantage over Google is that it allows you to create multiple user profiles. This means that you can switch users. To switch users the user should be part of Amazon Household. To add a user profile to your household, go to Household Profiles to start the process.
Add music services:
To fully enjoy the echo speakers you need to add your music service. By default, the service is set to Amazon Music. However, you can link your desired music services like Pandora, Spotify, and TuneIn, as well. The speaker will allow you to play songs from your existing library as well. To change the music service, go to Account, and select Music & Media.
Refine and fine-tune your smart home:
Amazon Alexa allows quite a few customization options. The above settings are enough to get started with but for optimal results, you will need to keep fine-tuning your settings. Experiment with the scenes, groups, and user profiles. You can also give an alternate name to your devices. This type of fine-tuning can help guide you through a gradual expansion of your smart home. And in no time you will have an automated Alexa controlled Smart Home of your dreams.
Asus has always been a PC powerhouse, especially when it comes to gaming hardware. In fact, they even created a separate line for it: the Republic of Gamers (ROG). If you recall, we even featured one of the most notable ROG PCs of the company, the G752VT, in a previous article on the best gaming laptops, and it was applauded for its cheap yet solid benchmark performance. The Asus ROG Phones are much the same.
Now, with the release of the Asus ROG Phone 3, we are excited to share everything that we know about it so far.
Specifications
Riding on the success of the ROG Phone 2, the ROG Phone 3 aims to be yet another impressive addition to Asus’ growing list of gaming smartphones. It comes with a Qualcomm Snapdragon 865 Plus chipset for optimum performance, which may make use of metal core PCB technology to easily transfer heat away from active components. Most mobile phones come with standard PCBs, but for a phone built for gaming, preventing the components from burning out is crucial. A user even caught it clocking at 3.09GHz recently, which is bound to drive your average hardware to its limit. Fortunately, the ROG Phone 3 is no ordinary device.
Additionally, the device has a 6.59-inch FHD+ AMOLED display, up to 16GB of LPDDR5 RAM, 6000mAh battery, and 30W fast charging. It will also support up to 4K quality of video recording and playback. Besides this, it has a refresh rate of 144 Hz.
When setting up the device you’d first have to select your desired theme and then scan the ROG logo on the box. A sudden scanning animation will appear on your screen and lastly turns into a game that you have to play in order to complete the setup.
Image
Earlier, a couple of ROG Phone 3 photos were leaked onto TENAA (a Chinese certification center)—giving us a near-complete image.
One photo contained the back of the phone, where we can see a triple-camera setup, plus, a “64MP quad Bayer” label directly below it. The Tencent Games brand can also be seen at the bottom part, which implies a special variant of the publisher. However, much like the Tencent ROG Phone 2, it may not be available outside of Asia.
The second photo is that of an alleged promotional poster. It features a glimpse of its front and what appears to be a USB-C and 3.5mm port at the bottom. As official listings from Asus have already confirmed that the phone will have no headphone jack. Although the Asus ROG Phone 3 has no headphone jack it comes with an extra accessory that has a headphone jack.
Still, all of the details revealed about the device have been nothing but good so far.
Want some cool tips and tricks for getting the most out of your Amazon Echo? You’ve landed at just the right place. Amazon has been successfully adding innovative features to its Echo devices. If you want to get the most out of your Echo, below is the list of useful tips and tricks that will help you to get what you are looking for.
1. Profiles for all family members
Amazon Echo Profiles for all family members
If there are people in your home that own Amazon accounts, you may add them to the Alexa household profile. With this feature, you can access your family members’ content such as music or audiobooks. Also, you can manage the shared content. For this, go to settings, scroll down the page, and set your Household. The shared members need to download the Echo app and agree to join the Household.
To view which profile is being used, you can ask “Alexa, which profile is this.” If you want to swap profiles, say “Alexa, change profiles.” When you are adding members, it won’t provide you a separate to-do list. Despite this, it lets you share content libraries, and yes, keep in mind; it does allow them to order things using your accounts.
Whereas inducing additional members won’t give you separate to-do or shopping lists, and it does allow you to share content libraries. Although it even allows them to use your primary account for ordering items.
Let the switch profile battles begin!
2. Mute or change – “Alexa” wake command
Have someone of the name “Alexa” at your home, Echo will always listen for the word “Alexa.” Whenever you say it, the Echo will listen and respond accordingly. If you want the device to turn silent completely and respond to none of the commands, not even accidentally; for that there is a mute button on the top of Echo to mute Alexa. Pressing it will pop a red ring and Alexa will stay mute until you press the button again.
So if you don’t want the Echo to wake up and answer on this, just press the mute button on the top of the speaker. To unmute it, press it again. If you don’t want to mute or unmute time and again, you can rename the Alexa. Go to, Alexa app > settings > select your Echo > Wake Word and choose a new word from the list.
3. Controlling Amazon Echo via the browser
Controlling Amazon Echo via the browser
There are many ways through which you can control your Echo along with your shopping or to-do lists. The easiest way is through the Alexa app. The second alternative way is through the web. From the web, you can navigate to and log in to your Amazon account. To communicate with Alexa, click and hold on the microphone button and speak a command or ask a question. Alexa will respond just as it would as if it is in front of you. Via the web, you can interact by visiting this site http://echo.amazon.com, log-in, and regulate your device without even requiring a phone.
Alexa will be officially coming to smartphones by this year, but for now, you can access Alexa on your smartphone via Roger. On Android, there is also an Alexa app called Ubi.
4. Settle a confusion
If you and your friends or family are confused about where to go for the dinner, or, you are unsure about where to go for vacation this year, here you can use Alexa for an exciting act. Say, “ Flip a coin” to select between two possibilities.
5. Default music service changing
The Echo is capable of working with numerous music services, besides Amazon’s own. If you pretty much use Spotify, go to the Alexa app > Settings > Music & Media. In this part, you will also find link music accounts and select the default. Afterward, when you ask Alexa to play a particular song, it will use Spotify instead of Amazon music. It changes the need to particularly “on Spotify” whenever you want to stream music. Instead, you will be just saying “on Amazon Music” when showing up a song to play it using Amazon’s music service.
6. add skills to Alexa
Add skills to Alexa
There are several things that the Echo will do by default. At times, you need to enable a feature to get more out of it. In simple words, these are called skills. It is giving Alexa a particular set of information. In the Alexa app, move, to Skills, and you will find many compatible apps and features. For example, from here you can take control of your BMW or even have access to your Hive heating, via the connected app.
7. Controlling smart home devices
You can control several smart home devices with Alexa. When you say, “find my tools” or use the Alexa app to find and pair smart home appliances, you can ask Alexa to do various tasks such as “Turn on the thermostat” or “Dim the light to 50%”. Additionally, you can also set up groups such as “house lights” that will turn on or off several lamps. Alexa efficiently works with many standard connected devices e.g. Philips Hue.
8. S0ftware Updates
Amazon Echo comes with a CPU and software that needs to be updated. Though the Echo searches for updates regularly, still if you want to force to update, you can press the mute button and allow Echo to sit for a minimum of 30-minutes, and Amazon Echo will update itself.
9. ‘Can you say that again?’
Alexa, Can you say that again?
If you have missed one of Alexa’s responses or you want her to repeat something. Say, “Alexa, say it again” or “Alexa, can you repeat this again.” Afterward, she will repeat as much as you need. Also, you can view the recent responses in the Home tab of the Alexa application. Likewise, you can listen to the recording that you have said to Alexa.
10. Dumping all of Amazon voice data
Every task or command you say to Alexa is recorded and uploaded to the Amazon’s servers immediately. If you don’t want these hundreds of recording moving around in the cloud, you can just remove them. Keep in mind that even deleting all these recordings, the new one will always be added when you speak to Alexa.
11. Solve quick math problems
Solve quick math problems
One of the most significant uses of Alexa is to control your smart home devices with voice commands instead of going through your phone and opening applications to perform a particular task. The other significant use of Alexa is quick calculations and conversions, especially while you are busy. You can convert measurements and can even solve mathematical equations e.g. say “Alexa, ten times 22”.
12. Adding unsupported smart home devices
If you have multiple different smart home appliances, there might be a few that are not compatible with Alexa. The first thing you should do is to check whether there is an Alexa skill for that smart device. If you can’t find one, check the online connection sites such as IFTTT to see if your device is supported. If yes, go to the site as it can significantly expand the usefulness of Alexa and let you perform several actions by just a single voice command. In this way, you can export your Alexa shopping or to-do lists to Apple reminders and much more.
13. Streaming audio using Bluetooth
Through Amazon Echo, you can enjoy Amazon Prime Music, Spotify, iHeartRadio, etc. You can even ask Alexa to read your Kindle books for you. But if you want to play Apple or Google play music, your music library, or any other that is not supported, you must pair the Alexa device to your PC or mobile using Bluetooth. After that, you can easily stream any audio as per your requirement through Echo, Dot, or Tap thus using it as a Bluetooth speaker.
14. Order anything from Amazon Prime
With Amazon Echo, you can now order limitless products by simply asking for them. Previously, you can only record things that you have purchased using Prime. But now you can order anything that is prime eligible such as apparel, jewelry, shoes, watches, Amazon Fresh, Amazon Prime Pantry, Amazon Prime, and many other items. It lets you even order a pizza or a ride from Uber.
15. Track your Amazon packages
Alexa track your Amazon packages
If you have ordered something from Amazon with your Echo, you can even track those packages by asking,” Alexa, where is my package” or “Alexa, please follow my order.” Though the information provided to you by Alexa won’t be a detailed one, it will tell you about the day when the package is expected to arrive. Currently, Amazon is working on an update to tell about which carriers the item was shipped so you can better determine the time it will reach.
16. Switch on the wake-up sound
One of the convenient features of Alexa is that you do not need to wait for Alexa to light up after you have given the command “Alexa, turn on the lights” without pausing. At times, you might be away from Alexa’s speaker and can’t see whether she had heard your command. So, to receive an audible notification to know whether Alexa is listening, go to the Alexa app, open Settings, and toggle Wake up the sound. Also, enable the End of request music to have an audible confirmation that Alexa had successfully listened to your command.
17. Adding a Voice Remote
If you can’t sit near your Alexa speaker all day long still you want to easily control it from the bedroom while the speaker is in the living room, then consider an option of remote voice control for Amazon Echo. It is available at $30 and works well with both Amazon Echo and Dot. For this, you need to, pair the remote with the settings menu in the Alexa app so you can remotely communicate with your Echo from any place. Also, it connects using Bluetooth, but the range is limited.
18. The Exclusive Prime deals
Amazon always looks forward to showing their appreciation for their best customers. From time to time, it runs special offers that are reserved exclusively for Echo, Dot, and Tap customers. For example, the Echo Dot and Tap were initially available for only those who owned an Amazon Echo. Another recent instance is Prime Day where several deals are available for conventional Amazon Alexa devices. Any third-party Alexa devices and services are excluded from those deals.
19. Mount it on the wall
You have an innovative way to use the Echo efficiently by placing it in the common room at home, but if you can’t manage to find a place you like fit your Amazon Echo or Dot, consider mounting on your wall. It won’t only put the speaker closer to the wall as recommended, but will also get it away from other barriers and allow you to place it in a perfect place. Cool?
Looking for smart home stuff? Something like you can remotely control? Well here is something that will be of great interest to you; some best smart switches and plugs.
A smart switch and plug is a device that is plugged into your wall outlet. The plug also has an outlet, so you may call it something like an outlet extension. Rather than plugging your appliances into the wall outlet, you would plug them right into the smart switches and plugs.
So what’s the advantage of smart switches and plugs as compared to the ordinary switches and plugs?
The very advantage of smart switches and plugs is that it can be controlled remotely via some application in your smartphone. Some of the switches and plugs are re-programmable so that they can turn on or off automatically during specific hours.
Things you should consider while buying some best smart switches and plugs:
1.) Automation controlling.
2.) Compatibility.
3.) Connectivity.
4.) Weather endurance.
Best Smart Switches and Plugs Comparison
After having detailed research on some best switches and plugs for various electronic appliances, downloading, and using apps, we have found the top 10 best smart switches and plugs just for you!
All of these switches and plugs are easy to set up and comes with a better range of useful features such as customizable alerts. They are Android and iOS compatible and integrate with other smart home protocols and devices. Have a look to know the detailed features of each smart switch and plug.
Best Smart Switches and Plugs
Features
Combability
Connectivity
Belkin Wemo Insight Switch
Compact, standard smart switch features, customizable alerts, notifications
Android, IOS apps
Wi-Fi, WeMo Motion Kit, WeMo LED lighting, Amazon Echo, IFTTT
iDevices Switch
smart-switch features, photo library, Apple HomeKit, customizable LED night light, side outlet
IOS
Alexa, Dot, Amazon Echo, Tap
Zuli Smartplug
White LED backlight, a button for manually switching, schedule commands, turn electronics on and off, dimmer, monitor, energy usage, Bluetooth location tracking, Presence technology
IOS
Nest
iDevices Outdoor Switch
weatherproof body, an external nightlight, dual-outlet, command options, organization, scenes function
HomeKit
the iDevices app, smart home integration app
D-link Wi-Fi Smart Plug
Thermal sensor, monitor and control devices, monitor energy usage consumption, create schedules, set alerts
Looking for some multi-supporting smart switch? Well, we’ve got just the thing for you then…
Belkin WeMo Insight Switch is a consistent performer that comes with all the standard smart switch features. It is capable of controlling many devices remotely including options for scheduling, connecting with Android and iOS apps, and integrating with smart home devices.
Also, it monitors energy consumption and emails you reports about the usage. The WeMo Insight is compact thus delivers smart features to one socket in a duplex outlet without blocking the other. The switch conveniently connects to Wi-fi without requiring any hub. Moreover, it offers you customizable alerts and notifies you whenever the switch is turned on and off. The switch features a power button on the top that illuminates when in use. The WeMo Android and iOS apps offer on-off options, timers, rules, and energy usage information. These apps include photos of each WeMo device as well. In addition to that, it effectively integrates with WeMo Motion Kit, WeMo LED lighting, Amazon Echo, and IFTTT, being one of the best smart switches you will ever find.
Something pretty smart? Right?
Pros
1 Belkin WeMo Insight Switch is a compact device.
2 It controls several devices remotely.
3 It is compatible with a number of home platform products.
Cons
1 It does not provide an option for adjusting the light brightness or switching off the light without turning off the entire switch.
iDevices Switch effectively performs all the standard smart switch features. It adds Apple HomeKit integration. Also, it has become Alexa compatible thus allowing users to control it with Dot, Amazon Echo, or Tap. The device has a very aesthetic standout and features a customizable LED night light that can be turned off or twisted to come in a perfect combination of your color scheme.
Colorful? Is it?
Moreover, it comes with a side outlet that makes it quite assessable for plugging in items. iDevices has a smart photo library. The app gives you the option to upload your photos. Also, you can group devices and create schedules, scenes, and energy usage reports. The device has support for Apple HomeKit that lets you group the switch with other HomeKit enabled devices, making it simply wow!
Pros
1 iDevices Switch comes with all the standard smart switch features.
2 It features a side outlet.
3 It has Apple HomeKit support.
Cons
1 It has limited support for other smart home systems.
2 The switch is not compatible with Android, Windows, or another mobile device platform.
Off to buy a smart plug? Something outstanding, the very best smart plug?
Well, we’ve got one of the just perfect a one for you……
Zuli Smartplug is a compact switch with a glossy white face. It features a hexagonal logo along with a simple white LED backlight. The body of the switch is small, and it has a button for manually switching on and off. The switch comes with various app features such as schedule commands, turn electronics on and off, etc. Also, you can use it as a dimmer, monitor, energy usage, and integrate with Nest.
Another interesting feature of the Zuli smart plug is Bluetooth location tracking. The outlet provides automated and presence dependent commands. Moreover, the Bluetooth range is solid which is quite impressive. Lastly, the present technology is precise and effective. Overall, it is a better investment as compared to other smart plugs.
Making it low priced, best smart plug you’ll ever buy.
Pros
1 Zuli Smartplug features a precise presence of technology.
2 It comes with a Bluetooth location tracking feature.
3 The device has Nest integration.
4 It can control your appliances and light through an app on iPhone
Up to buying some weatherproof switch for outdoor use? Here’s what you need then…
iDevices Outdoor Switch is a perfect combination of aesthetics with function. It has a black outer shell with a weatherproof body. The device can set up and run within minutes. It connects with the iDevices app, smart home integration app, and is HomeKit compatible. The app effectively guides you to interface with various command options from turning the switch on and off and scheduling its activation. The switch includes an external nightlight thus glowing your house with more style, yet being the best switch you need.
Moreover, it provides amperage and dual outlet to power 2500 incandescent bulbs. The switch also monitors your energy consumption such as consumption and estimated costs. One of the significant features of iDevices is its organization. It allows you to segregate your home and tell Siri to control a whole zone. Another practical feature of the outdoor switch is the scenes function. It lets you send commands to your switch even if the Wi-Fi is off. The iDevices Outdoor Switch is an excellent choice for those who want to string up their holiday lights and set them on a schedule.
Pros
1 iDevices Outdoor Switch has a power tracking feature.
2 It features the function of a scene.
3 Outdoor switch responds to Siri, Amazon Alexa, and google assistant and can control your smart home by using your voice.
4 It provides amperage and dual outlet to power 2500 incandescent bulbs
Cons
1 It is a bit expensive.
2 It does not allow you to control dual outlets individually.
We’ve another amazing yet best smart switch for you and it’s, D-link Wi-Fi smart plug which is a multi-tasking, compact, and easy to use the device. It allows you to monitor and control your home electronic devices from any place. The mobile app will let you switch devices on and off, monitor energy usage, create schedules, and set alerts. The device features a thermal sensor that will prevent your devices from overheating.
Once you are controlling your device remotely through the app and uses schedules, then you don’t need to worry about leaving the device on while you are away. All you need to do is simply push the Wi-Fi Protected Setup (WPS) button and turn on your home D-link router to establish a secure connection. The smart plug will automatically be added to your list of devices on your smartphone or tablet app and get you started right away.
Beauty, isn’t it?
Pros
1 It can work with Alexa
D-link Wi-Fi smart plug features a thermal sensor.
2 It effectively monitors the power consumption of connected devices.
3 It easily connects to existing Wi-Fi with WPS and does not require any additional hub.
4 You can instantly turn on and off devices on your smartphone or tablet through a D-link smart plug application.
5 IFTTT compatible Pair with any IFTTT enabled product or app to connect your Wi-Fi Smart Plug to the world
With Lutron Caseta In-Wall Wireless Smart Lighting Kit you can automate and control your devices remotely. It effectively works with Alexa, IFTTT, Nest, Wink, and Apple HomeKit. The switch is available in a number of colors and tones that look quite fancy. It features a top button that brings light to full brightness, the middle button allows for fine adjustments whereas the bottom one fades them out. The switches communicate using radiofrequency for maximum reliability and minimum interference.
Fancy, right?
Moreover, Lutron’s app has an organized design with customizable themes. Simply tap to control individual lights right from the home screen or setup lighting “scenes” to activate with a tap later on. It also lets you group multiple lights into rooms and zones. In addition to that, it allows you to relocate the light controls from your iPhone’s control center, adding some more comfort to your life.
Besides this, Lutron offers some special features such as geofencing and Smart Away. The geofencing mode permits you to let the lights turn on and off automatically as soon as your phone enters and exits the area surrounding your home. Whereas the Smart Away features automatically cycle lights on and off in the evening. Overall, Lutron’s connected light switch performs exceptionally well. They are easy to install, program, and use on various popular programs.
Told you already it’s one of the other best switches we on the list, just for you.
Pros
1 The Lutron’s app is well designed and easy to use.
2 It comes with geofencing, Smart Away, and scene management features.
3 The device efficiently works on several home platforms.
Cons
1 It requires a hardwired Ethernet connection to your router.
The ConnectSense Smart Outlet combines two outlets in one device along with a USB charging port for charging an iPhone or iPad. It uses Wi-Fi and connects to your home Wi-Fi network. Devices plugged into both outlets can be controlled separately. Next to each socket is a LED light. The light turns blue when the outlet is turned on. An option for turning it off is also available. At night, the glow serves as a muted night light which looks pretty appealing.
Looking for some personalized stuff? Well, here it is…
The ConnectSense app gives the user a physical way to control the device. It is designed into various sections such as home, scenes, rules, settings, and devices. The app lets you turn on and off the device, rename it, give it an icon, and adjust the brightness of the LED. It displays all the connected devices, temperature, and humidity readings.
Moreover, it can also be used to control the entire home setup. With Rules, the outlet can be programmed to switch on and off at a specific time. Also, the Rules can be set up around an event such as Sun setting. Overall, the app has a nice design with great features such as Wi-Fi-connected sockets, USB charging port, organizing into multiple zones, and much more.
Pros
1 ConnectSense Smart Outlet features a USB charging port.
Thinking to schedule your appliances when to switch on and off, in your absence? Sit back and relax we have GE Plug-in Smart Switch provides a quick and easy way to automate your devices by using your smartphone. The switch is well built and works reliably. The switch uses Bluetooth smart and a free app for IOS and Android handsets to power your devices. These multiple switches automatically repeat the signal up to 100 feet thus creating a network that covers the whole house.
Something amazing, right?
The app offers 7-day scheduling, countdowns, sunset and sunrise synchronization, and much more. The smart switch is larger than the traditional plug and comes with an adapter. The top of the adapter features a manual on and off button which glows blue as a connection indicator. The Bluetooth controlled outlet is present on the side that can be conveniently used in narrow positions. Moreover, the response to the command is instant, and the range is quite impressive. You can also set action timers up to 24 hours in advance to switch power on and off, making it one of the best smart switch.
Pros
1 GE Plug-in Smart Switch quickly and conveniently automate the devices.
2 It offers scheduling, countdowns, sunset synchronization, and various other features.
3 It features a good range of Bluetooth.
4 Lightning is controllable from a smartphone without a Hub or router.
Cons
1 The group option requires an additional upgrade cost.
iHome ISP8 Smartplug works with the foremost smart home platforms such as Amazon Echo and Apple HomeKit. The device introduces new energy monitoring while connected to various platforms. You can control the plug using Siri and Alexa as well. It allows you to organize the plug among several devices thus coming up with a full home voice control. It allows you to control power to devices plugged into it from your smartphone or voice assistant.
In addition to that, you can also monitor the power consumption of devices and set schedules for it. As the device is Wi-Fi enabled, it does not require any hub for operation. An indicator is positioned on the side that tells you whenever the switch is connected to Wi-Fi. Another button is present just below the indicator that allows you to control the smart plug manually as well as compared to all other plugs iHome is the best smart plug The smart plug comes with a remote. Also, it is remarkably easy to set up. All you need is a 2.4 GHz network available, and the process will take a maximum of 5 minutes.
Pros
1 iHome ISP8 Smartplug works with the leading smart home platforms.
2 It comes with a voice assistant.
3 The device does not require any hub for operation.
Cons
1 It does not have the depth of integration possibilities.
Looking for something extra-ordinary? Some voice automation stuff?
iHome iSP5 is just the best smart plug we have for you, it effectively plugs to your Wi-Fi network and allows you to control the socket remotely. It lets you program your plug with an online automation service IFTTT. It works with Apple HomeKit and Siri, Alexa, and Nest. The HomeKit brings along software that permits you to control the switch with your voice. The plug is simple, small, and designed to extend horizontally. It features a button on the top right corner for turning the switch on and off.
Moreover, a small green LED on the upper right will let you know about the Wi-Fi signal. You can also invite other family members to share the control of your device. The iHome iSP5 Smartplug app is very responsive. It has a tab with a button for the devices names. It lets you switch them on and off instantaneously.
One best smart plug it surely is! I know you are overwhelmed.
Hear up more…..
It has a tab for your home to organize various devices as well. At night, you can also have your place lock itself down and adjust the smart thermostat settings. In addition to that, the timer, scenes, and editing the users and account options are also made available to you. Overall, it is a great device to organize your home into rooms and zones.
Pros
1 iHome iSP5 efficiently program with IFTTT.
2 It lets you control the switch with your voice.
3 It features an indicator button, LED, and various app smart options.
Cons
1 It can be a bit problematic while working with Android.
Now set up your tech game with these amazing smart yet best switches and plugs. All of them are highly rated and reviewed ones. These units not only give you full control over your plugged-in devices but also offer you appealing and useful app options. Through the blessing of Wi-Fi, these units are playing a key role in keeping track of energy consumption, turning things on and off instantly, and scheduling for your devices.
Here’s How Practice Tests Can Help You Prepare for Microsoft MD-100 Exam
Did you know that Windows is the world’s second most used operating system? According to StatCounter, 36.27% of all operating system users are utilizing Windows! Now you can see why Microsoft administration skills are so valued and in demand throughout the whole globe. And the Microsoft 365 Certified: Modern Desktop Administrator Associate certification is perhaps the best opportunity for you to move further up the ladder of Windows administration. To get there, one of the exams you will need to complete is the Microsoft MD-100 that will then give you the opportunity to proceed with the second assessment known as MD-101. As MD-100 is the hub of this post, let’s get to know more about it.
Simply put, exam MD-100 validates the enterprise-level skills of a Windows administrator. Those skills usually include configuring, securing, and managing client applications. In particular, the areas on which the candidates should focus to excel in such as assessment are like these:
To fully answer this question, we have compiled 3 compelling reasons why sitting for assessment MD-100 can be one of the best decisions you’ll ever take:
It’s all in the name
Being recognized as the second most popular operating system in the world, getting a credential from Microsoft will ensure that this is a badge that everyone across the world knows the worth of. Thus, there’ll be no questions about the validity of your skills as they come verified by the vendor itself.
The Microsoft MD-100 exam is an excellent chance for you to upgrade your knowledge to keep relevant with the changing times of the IT world. It also offers the opportunity for you to get your hands dirty by practicing on various applications, thus preparing you to better handle real-world scenarios once you’re out there.
The post-COVID job hunt can be quite an exhausting thing to do. But having a certification of this caliber in your arsenal can convince hiring managers that you have the ability to properly handle their company’s valuable assets and that you’re in fact as competent as you claim to be.
Secret Recipe for Success in Microsoft MD-100
If you are taking the official training offered by Microsoft, it still won’t prepare you to handle the heat of the final assessment. And for that, you need to complete at least two or three practice tests before proceeding with the real accreditation. In a nutshell, practice tests can prepare you to:
The Microsoft MD-100 exam brings you one step closer to obtaining the highly valuable Microsoft 365 Certified: Modern Desktop Administrator Associate badge that can open many opportunities for you within the related field. As this is no cakewalk, your secret ingredient in the recipe for success lies in the number of practice tests that you can complete by the time of the real assessment!
Smartphone’s these days are so much more than just communication devices. A smartphone can be your camera, your media center, your gaming console, or even your personal fitness trainer. Fitness apps really help out if you are trying to get in shape. The key is to find the right one that will match your style. There is a wide range of fitness apps available these days. You have your trackers, nutritional diaries, workout guides, and so much more. Here we are going to list the very best third party fitness apps that will help you shape up.
We hope that our list will help you pick out a fitness app to help with your fitness routine. Some of the apps listed here are health and fitness trackers.These apps will allow you to log workouts, count calories, and collect stats about runs, walks, and bike rides to see over time how you’re improving. Fitness apps can also be coaching apps that put you in touch with a personal trainer or nutritionist who will check in with you once a week. In short, there are various types of apps in this lists which will motivate you, help you track your health, and meet your fitness goals.
Why use fitness apps?
Maintaining a healthy lifestyle has become more and more difficult in recent times. In a way, the rapid advance in technology especially smartphones and similar devices have made us lazy. We are constantly on our devices and too busy with the all that it has to offer to consider going for a run. However, the very thing that makes you lazy can also help you get in shape. Fitness apps are a great way to motivate yourself to live a healthier lifestyle. Studies have shown that fitness apps use behavioral change techniques. They can be effective at promoting engagement in physical activity.
If you are looking to get into shape then fitness apps can help you track your progress. There is nothing more motivating than knowing you are progressing, and with fitness apps, tracking your progress becomes easier, quicker and more fun. Fitness apps are also a great source for workouts and exercise routines as well. There are apps that will give you access to large databases of workouts and exercises, meaning you will never get bored doing the same old workout week after week.
Some fitness apps also have communities set up. With communities, you can also get in touch with more experienced people from whom you can get plenty of valuable tips and advice. Then there are apps that allow you to share your fitness stats. Some apps give you the option to post the badge of honor you got for completing that difficult challenge to social media, or the option to share your completed workouts.
These are the best third party fitness apps:
Fitness apps can help you keep track of your fitness and health easily and more accurately. Here are the best fitness apps that will motivate you to live a healthier lifestyle.
Free; $7.99 per month or $39.99 per year for Premium
Available on: Android, iOS
If you want to get fit and can’t go to the gym for some reason then it is best to do workouts at home and this is where the FitStar app comes into play. This app creates custom workouts for you based on your fitness level. You start by doing a few workouts with the app and you give it feedback as you go about which exercises were too tough, too easy, or just right. The app records information and creates a fitness routine that is unique to you and challenges you. It is also compatible with a few Fitbit devices as well.
Free
Available on: Android, iOS, Kindle, Nook, and Web
Lose It! is a completely free fitness app that is available on various platforms. It is designed for counting calories and logging exercise, can help you lose weight. The app has been around for quite some time and it has an incredibly strong community of supportive people to help you stick to your goals. It is also compatible with several fitness devices and apps, including Nike+ FuelBand, Fitbit devices, Runkeeper, MapMyFitness, and Jawbone UP, so you can import your calorie intake and balance it effortlessly against your calorie expenditure.
Free; optional $5.99 per month membership required for some features
Available on; Android, iOS, Windows Phone
Map My Fitness is an app that you can use to track over 600 fitness activities. This app provides the widest range of supported activities and lets you track different sports and workouts. It uses GPS to track the routes you travel and shows you a map of the ground you covered when you’re done. It also displays length, in both time and distance, as well as pace, maximum speed, and a few other statistics. However, My Map Fitness keeps some of its features behind a subscription pay, starting at $5.99 per month or $29.99 per year. The subscription is worth the extra features the app provides.
Charity miles is a really great fitness app that provides excellent motivation to run. This app lets you earn money for charities each time you go in a run, walk, or use your bicycle. Corporate sponsors donate a few cents for every mile you complete. There are multiple charities available in this app like Save the Children, Alzheimer’s Associations, World Wildlife fund, and a lot more so you can select which charity to support. A few cents might seem insignificant but when a lot of people use Charity Miles, those little bits of money add up.
Free; $4.99 Elite Upgrade optional
Available on; iOS
The Cyclemeter app is one of the very best bicycle-ride tracking apps around. This app collects a ton of data, is very accurate, contains several well-thought-out features, and appeals to fitness enthusiasts who participate in more than one sport. This app is also capable of tracking walks, runs, and other activities. It does not include a calorie-counting component, but it is packed with cycling data. Unfortunately, for now, it is only available on iOS.
Free; $5.99 per month or $29.99 per year for Premium
Available on; Android, BlackBerry, iOS, Windows Phone
Edomondo is a great tracking app that is available on various operating systems. It is capable of tracking your runs, bike rides, and other outdoor activities with good accuracy and a simple interface. The premium version of the app comes with training plans and coaching features which definitely improve the Endomondo experience. For the premium app, you have the option to pay monthly or yearly at a discounted rate.
Free; $3.99 per month for Premium
Available on: Android, BlackBerry, iOS
Sometimes all you need for your fitness routine is some good music to move to and Fit Radio does just that. The simple music-streaming app specializes in DJ-created mixes that maintain a consistent beat. The tunes on this app are designed to motivate you and get you excited during your workout. There are several mixes on this app that you can choose from. You can browse mixes by genre, DJ, or a type of workout, such as Spin, Zumba, or yoga. Fit Radio is free to use, but with the free level, you get only one genre of music and only a few mixes.
Free; $49.99 per year for Premium
Available on: Android, iOS, Windows Phone, and The Web
The Fitbit app is best when paired with its own fitness trackers but you don’t actually need a tracker to use the mobile app. Without a tracker, the Fitbit app can count your steps, help you track the calories you consume, log your weight, and record other health information, such as blood pressure and glucose levels.
Free; Jefit Pro version available for $4.99
Available on: Android, iOS
This is another great app that offers various workouts that you can do at home or at the gym. Jefit also helps you keep track of your sets and reps. The Jefit Workout app gives you simple tools for crafting weight-lifting workouts and keeping track of the details as you complete your routines. It is a simple app that gets the job done in a minimalistic way.
This is a free app that comes with several workouts and exercises but the star in this app is the 7-minute high-intensity workout that will help you squeeze in some exercise even in the busiest days. The workout requires only a chair and 7 minutes of your time. There are also other lengthier workouts in the app as well. The app coaches you through each move as it comes up in the workout. It’s a great app for people of all ability levels.
Asics is a company that manufacturers sneakers and the My Asics app is created by them. This app lets you formulate a training plan for running a race or a marathon. This app is great for beginners as well as seasoned marathon runners. Training is usually a premium feature in other run-tracking apps but this app offers it for free. My Asics isn’t the best at tracking runs, but it gets the job done. The app records your runs and then modifies your plan to suit you. The plan formulated is challenging but adjusted to stay within your reach.
Free
Available on; Android, BlackBerry, iOS, Windows Phone, The Web
This app lets you keep track of what you eat in a simple yet comprehensive manner. MyFitnessPal is a mobile app and website that gives you a wealth of tools for tracking what and how much you eat, and how many calories you burn through activity. The interface and functionality of the app make it easy to manage. It also has one of the largest databases of foods and drinks. With this app, you can track your intake 24/7.
Free; wagering money is optional (but kind of the point)
Available on: Android, iOS
If you can’t find the motivation to exercise then Pact is a great app for you. This app allows you to wager money on whether you’ll go to the gym or complete a workout. If you don’t complete your workout then you lose the money you wagered. The app verifies if you’ve hit your goals by making sure you check into the venues where you said you’d pump some iron. Basically, if you reach or exceed your goals, you earn cash. If you don’t, you have to pay up. The app’s tagline is “Earn cash for living healthy, paid by members who don’t.”
Free for app; requires heart rate monitor
Available on: iOS
If you are looking for a personal fitness coach then you should try the Pear Personal Coach app. This app provides you at-home workouts, yoga routines, and even training programs for running races. Pear features real human voices as the audio guide. The app is free, but in-app purchases can are worth the money. The Android version is called Pear Interactive Coach.
RockMyRun is a music fitness ao that lives up to its name. This app changes the tempo of your running music based on your footfalls or heart rate. It also lets you set the tempo of a playlist if you’d rather try to make your feet keep up with the music. All of the playlists don’t have the advanced features but most do. The RockMyRun app offers a free week trial no credit card required. After that, you’ll have to pay $4.99 per month or $35.99 per year to keep using it. The app has a wide range of genres including classical so there is a huge collection to choose from.
$4.99
Available on; Android, BlackBerry, iOS, Windows Phone, and The Web (for accessing account)
If you are into running then the Runtastic Pro is a suitable fitness app companion for you. The app allows you to measure and track your runs, walks, and other exercises, but it also acts as a coaching app to motivate you to keep working toward your goals. The app will also help you train for races and marathons as well. The $4.99 Pro version is also worthwhile. Runtastic Pro provides you with several features to improve your fitness and ensure that you are enjoying your workout. Additionally, you will be a part of a global fitness community as well where you can achieve extra motivation and tips and tricks from professional coaches to help you reach your fitness goals.
Free; $4.99 in-app purchase for full content, recommended
Available on: Android, iOS
The Runtastic Six Pack Abs app is specially designed to help you strengthen your core. This app will guide you through various workouts that will help you get abs. Runtastic Six Pack Abs app is great for both beginners and advanced users. There are several workouts on this app with varying intensities so you can easily find one to suit your needs. It’s a solid coaching app that targets abs through a wide variety of exercise moves. A human voice counts through your sets and reps, while a video of an avatar shows you the correct form for each exercise. There are also training programs available in this app as well.
$2.99 per month or $24.99 per year
Available on: iOS
If you are just looking for some great workout tunes then the Spring Running Music app is the one for you. This app supports a number of different activities, including running, walking, interval training, bicycling, and more. It has a huge collection of more than 40,000 songs, as well as some pre-made playlists for workouts. Unfortunately, it is only available for iOS and it is not free. However, with this app, you keep your pace to the beat, and you can change the music’s tempo during your workout if you’re looking to slow down or speed up.
This app features rich statistics and is one of the best running apps for data-lovers. Runmeter is highly customizable and it’s Elite membership is also quite affordable. It also collects comprehensive stats. Unfortunately, it is only available for iOS only. The interface is also not very pleasant but aside from that, Runmeter is an excellent app for tracking your route, pace, and many other stats while running.
Free app; requires compatible heart rate monitor (about $50 to $100)
Available on; Android, iOS
If you are looking for an app that has a bunch of features that will help you track your fitness statistics then look no further because Digifit iCardio is the answer. It is available for both iPhone and Android and it can be paired with any supported heart rate monitor to track your runs, bicycle rides, and other workouts. Not only will it record your heart rate, but it will also keep track of distance, time, and pace. All you need is a good heart rate monitor to utilize this app to the fullest.
The iPhone 6s and iPhone 6s Plus hit the market and touched your hearts. The iPhone 6s is now an older phone at some point, but if you’re still using it and want to protect your iPhone 6s from fall or any damage, we will recommend you to cover your iPhone devices with cases. A case made for the iPhone 6, 7, or 8 can also use for the iPhone 6s as well. Since now you will be buying the smartphone and many of you might have already bought it, so here are some of the best cases for iPhone 6s and iPhone 6s Plus we bring for you to safeguard your smart-techs and enjoy the beauty with a dashing style.
Despite we think all iPhone 6 cases are compatible but there is a little shift in size so the tighter shells might be a bit of a squeezy for the new models.
Let’s get rolling now……
First, we’ll show you some of the best iPhone 6s Cases and next to the iPhone 6s Plus cases.
Best Cases for iPhone 6s/6s Plus
Smartish iPhone 6/6s Wallet Case:
The Smartish iPhone 6/6s wallet case is a beautifully designed, credit card holder for the Apple iPhone 6s/6. It can carry 3 cards with cash on the back of the case. Having Textured edges with a strong grip. It has protective air pocket corners. It is available in Black color.
The case has slots to keep your important card just on the go for any important moment and if you might forget your wallet at home and as well as a larger money pouch at the back. OtterBox DEFENDER iPhone 6 PLUS/6s PLUS Case
So here is the OtterBox Defender iPhone 6 Plus/6s Plus case for your iPhone 6S. The otterBox defender uses polycarbonate material, The case is multilayer and has a synthetic rubber slipcover, a clear touch screen protector that protects your screen from scratches and damage against drops. The case comes in black color and extremely stylish. It is compatible with iPhone 6 Plus and iPhone 6s Plus. Otterbox has a 1-year case warranty.
This case is extremely thin i.e. 0.4mm only and has a semi-transparent matt effect that lasts the Rose Gold or says the beauty of the smartphone shine through. Despite that, the case isn’t good for saving your gadget from accidental drops but it amours scratches and stops your phone from rocking when you place it on a flat surface. The case is available in soft clear, mint grey, pink, or beige.
Lifeproof is an interesting case that uses polycarbonate and synthetic rubber. Compatible with both iPhone 6 and iPhone 6s
Looking good isn’t what all of us want but the drops are also our concern so for this the case also protects your iPhone against bumps, scratches, and accidental drops. The case is available in Black, Banzai, Purple, and Grey colors.
The case is priced between $24 and $33 depending on the design and colors.
The case is just perfect so as to customize and outstanding among all other cases in the market. The case uses hard polycarbonate material that is durable. The case has a kickstand for hand-free use mobile, comes in Gunmetal, and Rose Gold. Compatible with iPhone 6 Plus and iPhone 6s Plus. Might be perfect as a gift to your loved ones!
If you want something stylish and sleeky, the Case-Mate iPhone Case is the best thing we bring to you. The case has an ultra-clear design, Provides protection against scratch, drops, and dust. You may pick among clear, clear bumper, or sheer Glam. The case has natural feel metallic buttons with a shock-absorbing bumper. When you hold it in your hand that holds tight to your smartphone.
The ITG Patchworks Level Case has drop protection certified to military drop-test standard 810G with being beautifully slim. You will also witness a patchwork diamond on the inside that helps create shock absorbers for sudden drops. You will also like the beauty of cut-outs on the case and the textured sides really add the perfect grip.
The availability of the colors is black, white, or sand colors.
Want some extra power for your iPhone 6 Plus? Here is what you just want – “The PhoneSuit Elite 6 Pro Battery Case” The polycarbonate case is a shiny metallic finish comes with a two-piece slide together so it just perfectly fits your phone. It adds a 4200mAh battery charge which gives one full charge for your iPhone. The pushbuttons are perfect and you can have your headphone adaptor in the box.
Vesel this time brings something different for its users. The iPhone 6 Plus, varieties combine an aluminum top and bottom in two colors i.e. gray or silver with a different choice of, wooden sides in acacia, pear, or maple. You also get a screwdriver in the box for taking the bumper apart of the case and sorting your smartphone into place and then sealing it safely. OtterBox COMMUTER SERIES iPhone 6/6s Case
The otterBox commuter case is a thin, lightweight 2- pieces case. The case comes in white, black, aqua blue, and ink blue colors. The case is compatible with both iPhone 6 and iPhone 6s but doesn’t have screen protectors. It protects your phone against scratches, drops, and dust.
The primary concern of an individual is one’s home’s security where his family lives. You just can’t always be physically present to monitor your home’s security, that’s when IP cameras’ surveillance steps in to ease your tension.
Therefore, home surveillance is a very important addition to your home. While looking for home security solutions, you may have several factors and options to consider. One of the best options you can consider is the internet protocol camera which is known as IP camera. It is a safekeeping video camera in which information is sent through WiFi or networked connection.
In comparison to classic closed-circuit television, an IP camera offers you live video streaming, notifications of happenings in your home, better quality image, fewer cable requirements, remote control settings and two-way communication. We have looked into the number of IP cameras and selected the top ones for you. The buyer guide is made available to let you choose more easily by considering the significant aspects.
Factors to consider while buying an IP camera
If you are looking for an IP camera for your home or office, then you need to keep in mind a few essential things. Here we have mentioned some of the factors that you need to consider for fulfilling your requirements.
The requirement for one or more camera
Choose the number of surveillance cameras as per your requirement. If you are looking forward to knowing about the happenings in your outside areas or rooms then you will be needing more than one IP camera. Also, you need to ensure that the IP camera is focusing on the key areas that you are monitoring. On average, homes and small businesses can be monitored with four IP cameras.
Type of IP camera
Surveillance IP cameras are designed either for indoor or outdoor use. Usually, indoor surveillance cameras are smaller, lighter and less visible. Outdoor cameras are generally more advanced and costly as they are designed to withstand extreme temperature and from the attacks of intruders. But nowadays high-quality cameras that can be used for both indoor and outdoor use are also available.
Adjusting the right angle of the camera
Before buying an IP camera, you should see the lens size and the focal length the lens should cover. The image sensor determines the wide viewing angle of a surveillance camera. Usually larger image sensors provide you better wide viewing angle and allow more light in the picture. Whereas other lenses will probably give you the viewing angle of a partial side.
Degree of recording resolution
If you are looking for an indoor camera monitoring a single area under proximity, then 550 lines are enough. But if you intend to use the IP camera for a longer distance then 700+ resolution of the camera is recommended.
Setting up remote viewing
As every system has its own capacity for allowing you to watch the videos. Therefore, one needs to consider the instructional manual for details. Mostly DVRs allow you to watch the videos and live streaming on your computer. Also, you can use the apps provided by some systems for convenient viewing on your Android phone or PC. In this case, a high-speed Internet connection is also required.
Benefits of IP Camera
1. IP cameras come with a broad range of resolutions that are usually measured in megapixels that you can choose as per your requirements. Even the surveillance cameras with the lowest resolution are equal to 4 times of an analogue camera. In addition to that, faces are more clear, license plates are easy to read and the surveillance of a major area can be covered by using a single IP camera.
2. IP cameras provide better scale-ability as they connect to the IT network along with no restriction on the limit of surveillance cameras connected. Also, there is no need to run a cable from the camera to the DVR. Moreover, in IP cameras video is recorded by using network video recorders. NVRs use multiple drives and often use a redundant array of independent disks as a backup technique to disperse data safely and efficiently.
3. IP cameras provide you remote access, you can conveniently login into a secure server remotely. By using the web-based interface, you can watch real-time footage on your PCs, Macs and other mobile devices.
4. You can review the footage with multiple zooms on the playback with no degradation of the image.
Looking for some best IP cameras on the front line? I’ve got just the thing for you…..
Nest cam is one of the leading best IP cameras and previously known as Dropcam Pro. Nest cam features 1080p HD sharp video from your home to your computer, tablet or mobile phone. If it senses any motion or sound, it will immediately alert you and you can see or hear what’s going inside your place with 8x zoom and 130-degree lens.
Wondering if any additional security features?
Yes surely! The best IP surveillance camera comes with in-built speaker and microphone that lets you talk and listen through the app. Also, it features 8 infrared sensors that effectively give you clear night time shots. In addition to that, you can get even more features including cloud storage and Netatmo-style facial recognition in order to improve alert accuracy being one of the best IP cameras.
Pretty amazing, isn’t it?
Pros
1 Nest Cam comes with speakers.
2 The infrared feature effectively help with recording at night time. Now you can see the whole room at night and not just the limited spotlight view.
3 It has a quick and easy setup. Simply plug in Nest cam and download the app to get started. No hub is required.
4 This surveillance camera has excellent clarity, even in low light.
Cons
1 All the extra features are not available for free.
2 The invisible LEDs used for nighttime video illuminate rooms unevenly.
Wansview wireless WiFi camera is an appealing IP Camera. Why?
Well, I’ll tell you why…..
It works seamlessly with both IOS and Android device. The setup of the IP camera is quite easy. All you need to do is plug in the unit, download the Wansview Cloud app, and type the WiFi password. Camera works with 2.4G WiFi(5G is not supported). You can set your camera to trigger both noise and motion, it will stream 1080 HD footage to any device with almost zero latency. This surveillance camera offers you a 105-degree wide-angle magnified lens. The camera can rotate up and down or left and right as well, It gives you a picture clearly up to 5 meters in the dark. You can monitor your home anytime anywhere. You can also invite family members (if they have an application) to access the camera.
Interests you? Doesn’t it?
Another significant feature of the camera is Alert notification and you will get a 10s video on your phone, open Wansview cloud app to check what is happening and you will not miss any important activities. You can insert SD card and can access it remotely although SD card and Cloud Storage are optional. Moreover, it offers night vision for an efficient night time recording. The camera comes with a built-in microphone and speakers and allows two-way communication and can work with Alexa.
Making it stand out among the best IP cameras we have just for you.
Pros
1 Wansview wireless Wifi camera gives the highest protection of the data for privacy.
2 Useful motion alerts.
3 Easy to install.
4 Rotatable camera view
Cons
1 It takes a few seconds to set up for a complete home monitoring solution.
Looking for something to surveillance inside and outside the home, both? Well, we’ve got just the best IP camera for you.
Arlo is the perfect IP camera that can be used both inside and outside the home. Now you can see splendid clarity and strident details and watch live-streamed recorded videos on your computer, tablet or smartphone through Arlo app. The camera has patented 100% wire-free design easily mounts to the wall using a magnetic mount. You can place it anywhere you want and monitor your home from every possible angle.
Also, they are waterproof and can be placed outdoors if you want to keep an eye on the garden or your driveway while you are out. The surveillance camera has night vision in the dark, motion detection capabilities with storage space in the cloud-free of charge. The motion stimulated cameras activity alerts to deliver you notifications both email or app. They are battery-powered and requires at least four lithium batteries that come with the camera.
Sounds cool? Right?
Pros
1 Arlo have night vision capability that offers great HD clarity even in the dark.
2 It is waterproof and safe for outdoor use.
Cons
1 The camera is not suitable for outdoor streaming.
Among the best IP cameras, we have listed for you. Amcrest offers you well designed waterproof surveillance camera which is simple to install and can be monitored through your computer or any Android phone. It provides you high-quality HD resolution image and you will not need to struggle to identify the crucial details in the footage. Also, no gaps form lag in the feed. It offers you high-quality image in the day with 3.6-millimetre lenses and a camera of 90 degrees but can be tilted 360 degrees to give a wide range of view.
Moreover, it provides high-intensity infrared LEDs for clear night vision, no matter how poor the light is. You can easily install the app by scanning the provided QR code on the surface of a DVR box. Once you have scanned it, feed a name and press start live preview. The system is effectively supported by various active interface options including zoom, pan or tilt manoeuvrings. Also, some switching features are provided to you between streams and capturing screenshots. The app provides you playback option and allows you to view recorded files with limitless access by using your phone.
Pros
1. The camera infrared mode is activated automatically in low light to give you the best quality video.
2. The motion sensor can be customized and prevents any fault alarms.
3. The superlative build quality of cameras guarantee amazing reliability of the surveillance system even in the extreme weather.
4. 4-hour free trial storage is provided on the Amcrest Cloud once you install and login, through your device to control the camera.
5. You can talk and listen, both at the same time, as a result of its two-way audio system.
Cons
1. It may face technical issues.
2. The Wi-Fi connectivity is not strong.
3. The user manual that comes along with the security camera is somewhat ambiguous and not so useful for first-timers.
If you are looking for great picture quality and good night vision, then Reolink outdoor security camera is the just the best option for you in our list of best IP cameras. The surveillance camera has a fine built up and thus it is weatherproof to stay durable and serve you in any weather condition. It provides high-quality 1080p video, 130degree wide field of vision and great night vision images and videos even in absolute darkness up to 33 feet.
This surveillance camera features a micro SD memory card up to 64 GB size, it has a microphone, speaker at the bottom and motion detector for constant motion detection. It can store backup videos on a Reolink cloud. You can view live streams on your computer, mac computer or Android phones along with the delivery of instant email alerts on motion detection. Only support 2.4GHz WiFi.
Pros
1 Reolink Security IP camera has a super solid construction that makes it weatherproof and extremely durable to serve you in a long run.
2 The tech support and the user’s manual are very helpful. No wire, it is simple to install.
3 Camera with a rechargeable battery and have an optional solar panel to charge your battery.
4 Its high-end infrared LED enables you to catch things at a distance of 33 feet.
5 It has a micro USB connector at the back of the camera with a USB charger.
Cons
1 At times, it may face technical issues.
2 Motion detection starts working once there’s movement.
Wyze Cam is the best IP camera choice you can make. Night vision lets you see enough to capture a sufficient area. The quality of the image is not affected by low light and you can easily look out for details. The camera has 4 infrared LEDs that let you identify the person in the pitch dark.
Moreover, Wyzcam has a resolution of 1080p Full HD live streaming allows you to see the happenings inside your home from anywhere using your mobile. Wyze Cam comes with two-way audio. You can hear the happenings in the room you are monitoring and also communicate directly in that room through the app. This amazing audio feature also includes sound detection which offers you to have the 24/7 recording.
Keep reading…..
Also, the camera uses motion detection and you can set the motion sensitivity from low to high when it senses movement. Wyze Cam is the easiest camera to use. All you need to do is download the Wyze app from your mobile phone and plug the camera into an outlet. Within a few minutes, the camera will be connected to Wi-Fi and you can adjust the options for the IP camera. Notifications will be delivered on your smartphone or tablet whenever motion or sound is detected. Also, you can set the camera to record at particular timings and review the 12-second video that was captured. It can save the video to the cloud for 14 days. It supports 2.4-GHz Wi-Fi and does not support 5GHz WiFi network. It can work with google assistant and Alexa.
So isn’t it an amazing one in all the best IP cameras?
Pros
1 Wyze Cam is the easiest camera to use and install.
2 It has a decent night vision range.
3 It features motion and sound detection options and comes with two-way audio.
4 It is weather resistant.
5 It has a siren feature that you can activate manually.
Finding some HD stuff for your surveillance? Samsung SmartCam is just the perfect one with an impressive surveillance camera. It shoots high-resolution video at 1080P to offer you clear and crisp image. The clarity of video quality is excellent. It features a night vision range of 62 feet which allows you to see any object even in the complete dark.
Additionally comes with 2-way audio so you can communicate through the app as well. It does not use cloud storage and supports up to 64Gb micro SD cards. Though you can’t schedule recording motion and sound detection can help you to preserve the storage space. Samsung features Smartthings so you can hook the camera to monitor your home. Also, it works with Samsung devices to help automate your home.
So are you going to order it just now?
Pros
1 The surveillance camera can be used with Samsung smart home monitoring club.
Ring Stick Up Cam Solar is just another best IP camera we have for you.
You can see the live stream through apps and recordings are very clear. It offers you a superlative video quality even in the low light. It comes with 2 way audio The audio of both camera and the app is of excellent quality and clarity. You can place it on a flat surface or mount it to the wall through mounting bracket. It has LED lights, sensor and speaker. It comes with all the amazing features including motion and sound detection, digital zoom and wide-angle lens that allows you to see the major portion of the room you are monitoring. The Ring app for Ring Stick Up Cam Solar is simple and icons are way too easy to understand. Moreover, you can easily set up Stick Up Cam Solar by plugging-in the solar panel and connecting to Wi-Fi.
Also, you can schedule recordings and let the camera record only when any movement or audio is detected. It can work with Alexa.
Pros
1 Ring Stick Up Cam with Solar has the best audio quality.
2 It offers you a wide field of view.
3 You can activate the alarm in case of any suspicious activity outdoor.
4 You can link it to other Ring devices.
5 Weatherproof.
Cons
1 Solar panel cable has a very long cable that is not visible in the image.
Flir Flex is one of the best IP cameras for its high-quality footage. The video can be captured in daylight as well as low light with exceptional quality. In the complete dark, the objects close to the lens can be seen clearly. It features 1080p high video resolution and provides you with sharp images. It provides one of the widest fields of view and allows you to see the large portion of the room you are monitoring.
Also, you can set the camera to record only when motion or sound is detected and you can select the specific spots you want the camera should capture. Furthermore, the camera is easy to set up and use two rechargeable batteries. The Flir app sends you notifications when the camera senses motion or sound. It can support up to 64Gb SD cards. Also, the Flir basic cloud storage is free which includes two days of storage before your recordings are removed along with three recap videos per month.
Pros
1 The cloud storage in the company offers the lowest price with seven days of video storage and unlimited recap.
2 The video quality is up to the mark.
3 Intuitive, well-designed app.
4 Wide angles, excellent night performance.
5 Very simple to set up.
Cons
1 You can’t schedule recordings and the camera does not integrate with any third-party systems.
Zmodo Pivot security camera effectively keeps tabs on your home when you are away. The camera features 1080p resolution with 2.1mm lens and 4x digital zoom. It offers you a 360-degree field of view by using a mechanical motor in order to pivot the enclosure’s mid-section. Moreover, it offers you IR LED that provides night vision up to 30 feet with clear details.
The camera comes with motion, temperature and humidity sensors. In addition to that, Bluetooth speaker, microphone, Wi-Fi and Bluetooth wireless circuitry is also made available to you. Zmodo Pivot can support up to 16 Gb of internal storage(up to 2 days of 24/7 footage). It automatically records when senses any motion or sound and also can interact with numerous home automation devices.
Pros
1 Excellent video quality with vibrant colours and sharp night vision.
Looking for some best network surveillance cameras? D-Link is just one of the large network camera you are looking for. It is designed to offer you more flexible pan and tilt capabilities. The lens of the camera is surrounded by 4 LEDs to work effectively in the night vision mode. You can set the camera by pressing the WPS button to make it pair with the router.
Also, you can use my link Lite app on Android or IOS to set the camera. You can select the specific areas for motion detection by browser-based configuration on your PC. It sends you notifications either as push notifications or emails to the registered account. The camera can capture up to 720p resolution and 8m in the dark through infrared LEDs.
Pros
1 D-Link offers great image quality.
2 It uses 10x zoom and the frame rate goes up to 30fps which is quite smooth as compared to other cameras.
3 It features a sensitive microphone and intercom function.
4 Local storage on a MicroSD card.
5 Relatively inexpensive, considering the resolution.
Cons
1 The mydlink app does not allow you to have full control over the camera’s function such as motion detection.
TheBlink Mini is a pleasing easy camera to set up. It is just $24.99. It has high-resolution 1080p of video quality, 2-way audio, also LED night vision so you can get a very clear picture of what’s happening inside your home both day and night. You can see or speak to your family in your home on your smartphone. Cloud storage subscription is not free. It can only work with Alexa.
Moreover, Push notifications will be sent to your device through the app whenever activity is triggered and also you can adjust the sensitivity level.
Your watchdog!
Pros
1 The video recording frame rates are approximately up to 30fps.
2 It comes with Infrared LEDs and offers you a 110-degree viewing angle.
3 It gives you motion alerts notification in 10 seconds
4 Easy to install, plug-in camera and connect to WiFi and goto the Blink app.
5 Attractive design.
Cons
1 It can only record the motion-detecting event to the cloud.
The Logi Circle is more like a lifestyle camera among the best IP cameras list we have for you. The central appealing circle can be used wirelessly. It features a high-quality 1080p HD video streaming and a time-lapse function. It can smartly filter between pets and humans. The camera is very simple to use. It has a convenient two-way communication and provides you with great night vision. It timely alerts you on your phone when something unexpected happens.
Pros
1 The camera has an easy setup.
2 The app is excellent and can easily use.
3 Great video quality.
4 Battery-powered option.
5 Two-way voice communication.
Cons
1 Battery life is only two hours which is way too less as compared to other IP cameras.
IControl networks Piper NV is a smart security camera that does not require any contract or monthly fees. It is a high-resolution camera providing you 180-degree view angle for live and recorded video. The device features multiple sensors including motion, sound, temperature, light and humidity. It offers you night vision, two-way audio and 105 Db sirens. In addition to that, the system is very easy to use and set. The camera efficiently sends you texts and email alerts on your Android or IOS smartphone, tab etc. It connects with Wi-Fi and provides high-grade SSL video encryption.
Great isn’t it?
Pros
1 It is compatible with Z-wave wireless accessories.
eufyCam is among one of the best IP cameras features high-quality videos and produces 1080p HD videos with live stream and 135degree diagonal field of view. You can record the live view. It offers a built-in infrared LED and spotlight that turns on automatically in case of motion detection at night. The camera requires eufy security HomeBase 2 to operate. eufyCam 2C has a professional build up with amazing weatherproof and microphone features. The camera provides you with motion detection and alerts. The device can work with Amazon Echo devices and google assistant. It has a siren and speaker as well. Video and audio quality is very clear.
Simple yet easy in all the best IP camera? Right?
Pros
1 The camera can record directly to internal microSD cards up to 16Gb of storage
2 It offers maximum connectivity over Wi-Fi.
3 It is accessible from PC, Mac, iPhone and Android.
Arlo Pro 3 HD is also among one of the best IP cameras and incredible security camera with an excellent 30 days of cloud storage. The camera features colour night vision and 160degree field of view. It has a spotlight that lights up at night when it detects motion. In addition to that, the front of Arlo Pro has a microphone with 2-way audio. Also, the camera also has a magnetic mount that makes it easy to install.
The process of setup is simple. Simply take the base station, plug it into your router, setup Arlo app and configure the camera with your Wi-Fi details and connect to the base station and add the camera on Arlo app. The camera offers you both push notification option and email alerts. Also, it records 2K videos. Arlo offers 3-month free subscription trial and after 3 months you have to pay $2.99 per camera. It also has a siren and a quick call facility in case of an emergency.
That’s way more than you expected, right?
Pros
1 The camera allows you to schedule motion detection operation times.
2 It captures 1080p resolution video with the sensor.
3 It is Wireless and weather-resistant.
4 It Supports Alexa and Google assistant
Cons
1 Battery life is not probably good enough as compared to other cameras.
The EyeSpy UCam247i is a simple night vision surveillance camera. The camera provides three streams, one is optimized for mobile access with 176×144 resolution whereas the other two operate at maximum 640×480 resolution and 30fps. The camera also supports dynamic DNS in case you want to access the camera’s web-based stream and interface remotely. It timely sends you notifications and email alerts when motion is detected. Also, you can schedule the sensitivity of motion. Moreover, you can save videos and stills to an FTP server.
Pros
1 Picture quality is excellent with remarkably natural and accurate colours.
2 The Infrared mode clearly illuminate fine details in dark.
Cons
1 The camera does not offer any pan or tilt.
2 It is expensive.
Conclusion
A good surveillance camera is designed to meet your expectations and fulfil your requirements in the most efficient way. It must be able to record any contingencies and can alert you at right time thus acting as a real-time deterrent. Before opting out for a particular surveillance system you must consider various essential features and the above-mentioned security systems for the best choice. Whether you want to use IP camera for indoor or outdoor, wireless or wired system, the above guide will help you to select the best security system which will act as your best companion for a lifetime.
We hope you choose the best IP camera from among our list to help you with surveillance and security!
One can’t sit at home all the time for security. Therefore, the video doorbell cameras make sure that there is nothing to worry about when it comes to keeping your home safe and sound.
Worrying about what to buy for the best spy security of your homes? We have just put together this buyer guide to bring all the information you need while buying video doorbell cameras for your home safety. The top 10 video doorbell cameras are listed below. Every aspect and feature of the home automation system are covered that will effectively help you out in selecting the best video doorbell cameras as per your requirement.
We’ve some tips that you should take care of while buying the video doorbell cameras :
1.The connectivity.
2. The weather resistivity.
3.The internal storage/SD Card slot.
4. The Camera.
Let’s start with a quick brief overview of the specifications of each other best video doorbell cameras we have summed up for you:
Best video Doorbells Camera Comparison
Wireless Doorbells Camera
Video resolution
Viewing Angle
Features
Compatibility
Sky Bell HD
1080 HD
180-degree
customizable LEDs, motion detector, seven days’ video recording
several home products including Amazon Echo and IFTTT, Smart Things, Web Services
Ring Video Doorbell
720p HD
180-degree
IR sensor, control motion-based notification
IFTTT, Wink.
August Doorbell Cam
1280×960 resolution
140-degree
August lock, Waterproof
Android, IOS
eufy video Doorbell
2560×1920 resolution
135-degree
two-way audio system, motion sensor, face detection
Android, IOS
Sky Bell
—
130-degree
motion sensor, camera lens, infrared LED night vision, backlit ring button, water and weather-resistant, two-way audio system, record photos, and videos
The Sky Bell HD features customizable LEDs, motion detector sensors, and incorporates several home products such as Amazon Echo and IFTTT. This awesome wireless doorbell camera offers you the widest angle of view along with the highest quality video. It has a responsive app and allows you to save seven days of recorded videos for free as well.
Wondering how it’s installed? Hear up now…
The installing of the camera does not take more than 15 minutes. It is easy to set and use. Once you have installed the camera and app, you also have the option of personalizing two LEDs on the Sky Bell HD. Moreover, it uses a motion sensor, when triggered, sends you a notification. When it senses motion, the LED on the doorbell also flashes that can alert anyone. The device records video at 1080 HD which is superb. Even in total darkness, it can record usable video.
Interesting right?
Well, in addition to that, accessing a live stream video is quite useful. The Sky Bell HD can link to various smart home platforms thus letting you avail of services such as smart things or web services. Lastly, the device is HomeKit certified.
Pros
1 Sky Bell HD offers the highest quality video.
2 It allows you to see, hear, or talk to the visitor at your door, whether you are at home or outside the home.
3 Weatherproof and videos can be saved for seven days.
3 It is compatible with several home products.
Cons
1 At times, there is a delay in motion and alert.
2 The doorbell is much wider as compared to an average doorbell.
Among the best wireless doorbell cameras, we have just for you, the Ring video doorbell is a superlative wireless doorbell that is capable of shooting at 720p HD. The doorbell effectively works even if you don’t connect it to your present doorbell wires due to the rechargeable battery, sounds interesting; doesn’t it?.
Simply take away the doorbell from the mounting plate and connect the included charger to the USB port. It will take approximately 10 hours to completely charge the battery. The doorbell is 4.9 inches tall and 2.4 inches wide. It comes in four color options including aged brass, polished brass, silver, Venetian bronze, and polished brass. One of the significant features of the Ring is motion detection. It uses an IR sensor to detect body heat, tree branches, and shifting shadows. It also lets you control motion-based notifications. The system almost waits for something 10 feet from your door before alerting you. Moreover, it effectively connects with services such as IFTTT and Wink.
Pros
1 The Ring video doorbell shoots video at 720p HD.
2 It comes with a rechargeable battery.
3 It allows you to control motion-based notifications.
Harkening for some HD featured doorbell camera? Well, I’ve got just the thing for you, it’s the August Doorbell Cam that offers a high-quality build and beautiful HD videos among tens of other best wireless doorbell cameras. This video doorbell works with a ton of smart home devices.
It offers sharper and less pixelated videos. It records videos at 1280×960 resolution which gives more of a portrait. The cam has an ability to integrate with the August lock that allows you to see someone on the cam and give the command to open the door lock within the same app. The feature is ideal for people who are away or can’t easily move around. At 2.9 inches square, it is the largest doorbell.
Now the installations stuff……
The device comes with installation accessories to make sure that you mount it securely and it remains waterproof. Moreover, it requires low light to operate activity at night effectively. Overall, the doorbell camera is reliable and durable to give you excellent quality footage in the long run.
Pros
1 August Doorbell Cam shoots videos at 1280×960.
2 It gives sharper videos with minimum pixelation.
3 It comes with installation accessories.
4 It works with many smart home systems.
5 The design of the lock is impeccable. The grip is better, and the magnetic faceplate is good when it comes to confirmation of the lock’s security.
Cons
1 Installation of August Doorbell Cam is time-consuming.
If you are searching for high quality video doorbell, something just fitting your type? Here’s the deal…
eufy wireless doorbell comes with impeccable high-resolution video as compared to other doorbell cameras. eufy has infrared LED in front, a microphone, and speakers as well. It allows you to communicate with your guest. Every time someone rings your bell, it notifies you, and you can choose either to answer or ignore the call. Also, you can take a photo or video of the person at the door. You can communicate with anyone who comes at your door through two-way audio. It can also pre-record audio messages. It is weather-resistant and needs 2.4GHz WiFi.
Moreover, it comes with a wireless door chime.
Additionally, it has a home safety mechanism that allows you to spot people through the motion detection and Human detection feature. The installation of the wireless doorbell is quite easy and manageable and takes hardly enough time. Simply download the app and follow the instructions. In addition to that, the doorbell comes with a two-way audio system that allows you to easily communicate with the person at your door from anywhere in the world. If you are looking for something impressive and compelling, the eufy Doorbell is worth investing in compared to all the other best wireless doorbell cameras we have got for you.
Pros
1 eufy wireless doorbell has no subscription fee.
2 It offers clear 2K image.
3 The sturdy and reliable doorbell are easy to install.
Looking for some easy setup and other loving features, yet the best wireless doorbell camera?
Sky Bell is just the thing that comes with an easy setup. The device will alert you once pressed. Also, it offers you the option of accepting and rejecting a call along with a video feed on your screen. Your visitors will also be able to talk and hear you through the Sky Bell speaker. The video feed can be seen on your smartphone through Wi-Fi, 4G, and LTE. It allows you to hear your analog wired doorbell chime as well.
In addition to that, you can also control the doorbell’s sound directly from the app anytime. The device can add multiple users to each device. You can also take photos and record videos directly into the device. Sky Bell features a motion sensor, camera lens, infrared LED night vision, and backlit ring button. It offers you a 130-degree field view angle along with the live video. This wireless doorbell camera is weather-resistant and perfectly works with IOS and Android mobile devices. Well, that’s the beauty of Sky Bell in contrary to all the best wireless doorbell cameras listed.
It connects to 802.11b/g wireless networks on the 2.4GHz band. Sky Bell is an excellent device for added security measures and convenience.
Pros
1 The Sky Bell features a two-way audio system.
2 It comes with a motion sensor, night vision, and various photo and video recording features.
3 It uses direct power and does not need battery changes.
The Ring Doorbell Pro comes with a full HD camera and record videos at 1080p. It features a multi-zone motion sensor where you can set up zones to track. The device has the ability to record videos and store them for up to 6 months. Also, you can view the live stream. It has Infrared LEDs that help to see the bright and clear view at night.
Door Bell Pro comes with an advanced power kit and does not require any battery. Simply connect the device to the existing doorbell to another power device, quite easy. Isn’t it?
Moreover, the audio quality is perfect. Also, it offers you a noise-reducing function. This wireless doorbell is compatible with Wi-Fi 802.11 b/g/n, 2.4 + 5Ghz. It smoothly works with IOS and Android cell phone with Ring app installed. In addition to that, you can also connect it to Wink and Wemo systems.
Pros
1 The Ring Doorbell Pro offers HD video quality along with excellent night vision.
2 You can set up areas to track motion detection.
3 It has interchangeable panels and supports 5Ghz Wi-Fi.
4 Live stream view.
5 Smaller design.
Cons
1 The viewing angle is a bit smaller.
2 No battery-only works with existing doorbell wires or external power.
3 Unable to configure the sensitivity of motion detection.
If you are looking for a doorbell camera that provides you professional installation, home safety monitoring, active customer service, then the Arlo doorbell camera is the best option for you among all the best wireless doorbell camera. The doorbell comes with a small and sleek design. It allows you to see, talk, or hear anyone who rings your doorbell.
Moreover, it also supports video, recorded messages, and sends alerts in case of motion detection. The wireless doorbell is quite easy to use and offers you high-quality video even in low light, 2-way audio, and other amazing app features. The wireless doorbell shoots video at 1080p HD and gives a 180-degree wide-angle which is very impressive.
Pros
1 Arlo Doorbell Camera offers high-quality video and audio.
2 It gives alerts in case of motion detection.
3 It is easy to install.
4 .It offers night vision( you can see activities even at night)
Ring Peephole Cam is one of the best video doorbells you can have comparing its quality and price. It records video at 1080p HD, another significant feature of the doorbell is the motion detection sensor, You can get alerts on your phone, PC, and tablet in case of any motion detection around your door. It allows you 2-way audio talk, live stream, let you see the visitor without even changing your position.
Moreover, the doorbell camera comes with automatic night vision mode. It gives you the option of adjusting video to your desired contrast as well as optimize the quality that suits your preferences. The Ring Peephole Cam offers you a motion setting adjustment option. In addition to that, it also allows you to communicate with your visitors through the Echo device.
Lastly, setting up App is very easy after downloading the app scan QR code. it is easy to install. Summing up, the doorbell has an excellent video camera, a good sound system, and motion detection, and everything that you will need in a doorbell.
I suggest you Ring Peephole Cam doorbell if you are looking for something just about the average line for your security purpose.
Pros
1 Ring Peephole Cam sends alerts on your phone, PC, and tablet in case of any motion at your door.
Looking for something peculiar, yet interesting? I guess I’ve got just the thing for you…..
Avantek Mini is simply a wireless doorbell. It costs only $12.99. It is very useful for people living on the upper floor as it comes with 1000 FT Ultra-long wireless range. It is not like the above-mentioned video doorbells. It does not have any video recording, motion detection sensor, or audio features. The doorbell allows you to set any melody from 52 melodies as a doorbell ring. It comes with side buttons to adjust volumes and select melody. It is dust and waterproof. The doorbell has a high-performance Transmitter(doorbell). Battery life is a maximum of 3 years.
The setup is very easy just plug the mini receiver in a socket and sync it with the transmitter thus eliminating the need for operating complex wiring systems. In addition to that, it also includes adjustable volumes and pitch levels. Finally, it is more affordable than many wireless doorbells. If you are looking for a convenient and cheap doorbell, the Avantek Mini video door is a wise option.
ZUMIMALL wi-fi wireless video doorbell measures xx inches. It is one of the best video doorbells. The doorbell features a 1080p camera with a wide 160-degree viewing angle. It provides great night vision up to 26 feet. Below that, there is a speaker, motion sensor, and a microphone. The device effectively works with Android and IOS mobile devices. It allows you to view live videos and recording as well in case of motion detection.
Moreover, it features two-way audio communication. In setting a screen, you can talk to someone from anywhere. It allows you to see and hear the person standing at your door without opening it. Also, it is weather-resistant and waterproof. In addition to that, the edit device screen allows you to activate or deactivate the motion sensor, enable notifications, or assign a sound whenever motion is spotted.
Pros
1 ZUMIMALL wi-fi wireless video doorbell gives a sharp HD video.
2 It offers good night vision.
3 It comes with a wide viewing angle.
4 Continuous recording.
5 PIR Motion Sensor.
6 All data can be recorded in the local storage/SD Card slot.
7 Rechargeable battery.(No wiring required)
Here we have reviewed some of the best wireless doorbell cameras. You can pick up the kind of doorbell you need depending on your safety bracket. The idea of this buying guide is to get something that suits your requirements. These wireless doorbell cameras are a great way to enhance the safety of your place. They not only offer you great recording features but customized options too. Though there are a number of wireless doorbell cameras in the market, these reviews will help you to understand what you need and where you should invest for the best security you can avail.
So you are looking for Apple Homekit devices to secure and automate your home and you want to take the control in your hands?
Wonderful! You are not alone.
A lot of people are going for the ‘smart home’ option and making their homes secure and keeping an eye from remote locations and automating different things which are necessary.
There are plenty of options available, but if you are using iPhones, Apple has a complete solution for this called Apple HomeKit.
What is Apple HomeKit?
HomeKit is Apple‘s latest framework for complete home automation. Manufacturers can implement the Apple HomeKit framework into their smart devices and automate their homes. HomeKit is all over the news and a lot of people are eager to install it in their home.
Apple Homekit
HomeKit installation can seem daunting. But, there is no need to worry because this article contains all you need to know about Apple’s HomeKit framework. In this article, we will explain:
We have also collected the best HomeKit enabled devices and accessories out there to get you started. So, read on and find out all you need to know about how to use HomeKit to make your home secure and ‘smart.’
Ultimate Apple HomeKit Devices & Accessories
With every new day, we see a lot of new smart devices coming to the market so first, we will have a look at all the devices and accessories which support Homekit and then we will review some of the best homekit devices and accessories in one place.
Although we have listed down most of the Homekit devices not all of them are best. Some of them are still in their maturity phase. But there are some accessories which are really good and worth your money. Let’s have a look at some of the best and top-rated accessories and devices a little deeper.
The August Smart Lock is a really formidable piece of engineering. And now, the 2nd-generation model is available on the market. The upgraded model offers HomeKit support for control via Siri, which makes it even better than it used to be.
The August Smart Lock basically protects your home and turns your smartphone into a key. You can lock and unlock your property, control specifically who has access at any given time and even keep an activity log of who enters and exists 24/7. All this can be done through an app or via Siri commands.
The second-generation smart lock features an enhanced streamlined design. The new design has a new magnetic faceplate, along with micro-patterns that improve grip and rotation. Moreover, there is also an indicator light at the top of the lock for clear, visual confirmation that the door is locked or not. The Apple HomeKit-enabled smart lock is available in two colors; silver and dark gray.
Pros:
Easy installation.
Simple software.
Siri integration.
Works with Nest platform.
Cons:
Compatible with all deadbolts.
HomeKit setup is a little complicated.
Overall, the customer responses for this Smart lock have been mostly positive. The installation of the Smart lock is easy according to customers. If you have an Apple TV you can also control your smart accessories when away from home. You can also read about some of the best smart locks to keep your home secure as well.
Smart locks allow us to avoid carrying keys and the frustrations of forgetting or missing them all over the place by making key-free entry mainstream. Because of smart locks and HomeKit, you don’t even need to lift a finger to unlock your doors.
Kwikset’s first HomeKit device, the Premis lock features a white LED display and a capacitive touchscreen. The company has announced its plans for the Premis smart lock which is the company’s first Apple HomeKit-enabled smart lock.
Premis will allow users to lock and unlock the door through Siri voice commands. Besides, the remote control, the Premis can also be integrated with other HomeKit devices, such as temperature and lighting controls. Other perks include a white LED display, secure screen, and options for up to 30 unique user codes.
Pros:
Built-in alarm.
High-end hardware and construction.
You can assign up to 30 user codes.
Allows you to use your old house keys.
Cons:
No stand-alone app.
Requires Z-Wave or ZigBee home automation network to use all its features.
A lot of users have highly praised the device’s features and security. Customers also stated that the installation of the lock is also very easy and you can do it without someone else’s help.
The Canary All-in-one Home security system is one of the many great HomeKit enabled systems currently available on the market. It comes with an HD, night-vision camera and a bunch of sensors for things like motion, temperature, and air quality.
The Canary offers a complete security system with high-end features. It allows you to stream videos of your home in real-time and also receive notifications whenever there is any movement detected. There is also no monthly or installation fee for this security device.
The HomeKit enabled Security System is also designed to get smarter the more it is used. It also comes with free cloud storage and video downloads. The app is also free so anyone in the house can download it without any charge to access the security system.
Pros:
Great video quality.
Night vision mode.
Home health sensors are accurate.
Cons:
Motion sensors are overly sensitive.
Setup may need some technical knowledge.
A lot of users have highly praised the device’s features and security. However, some claim that the motion sensor is too sensitive. The camera of this system and its night mode have also been highly praised. You can also use one of the best wireless doorbell camera to monitor the visitors to your home remotely.
The Schlage Sense Smart Deadbolt is a HomeKit-enabled lock that you can control using Siri on your iPhone, iPad, or iPod touch. This lock is available in two trim designs; Camelot and Century. You can get it in three finishes: Satin Nickel, Matte Black, or Aged Bronze.
The deadbolt is a little pricey, but it is worth the money you pay if you have an Apple TV. However, if you don’t own an Apple TV and don’t plan on buying one, then there are other Smart locks that will be better suited.
The Schlage Sense also features numeric keypads. The lock also allows you to assign user-specific codes for different people. The lock can hold 30 access codes at a time. One of the great features of the lock is that you can set the lock to automatically lock after a pre-defined time period.
Pros:
Simple and minimalistic.
Siri compatibility.
Powered by external batteries.
Cons:
Wireless access only possible if Apple TV is present.
Bulky design.
Expensive compared to other HomeKit-enabled Deadbolts.
Users indicate that the lock is simple to install and works well. The Siri integration is also great. However, if you don’t have and Apple TV, then you won’t be able to access you smart lock outside the Bluetooth range. Apple TV acts as a bridge to allow your WiFi remote access.
The Apple HomeKit enabled ecobee Remote Sensors are additional sensors for the ecobee3 WiFi thermostats that you can place around your house to more accurately monitor and manage temperature with its powerful homekit temperature sensor capability. These sensors can be placed all over your house in different rooms so you can easily control the temperature in your home using your iPhone, iPad, iPod, or Apple Watch.
These ecobee Remote Sensors can be bought as a pack of two. Or, you can also buy the kit that comes with the sensors as well as the thermostat. The sensors simply allow you to regulate hot and cold spots in your favorite rooms for greater comfort. They also provide smart energy saving when you are out of your home.
Pros:
Sensors come with stands so you can place them anywhere.
Communicates with the thermostat wirelessly.
Smart energy saving when you are not at home.
120-degree horizontal field of view.
Cons:
Sometimes they lose connection.
Temperature readings can sometimes deviate.
Overall the customer responses for this sensors have been positive. Users say that the sensors are a great selling point for the thermostat. Setting up the sensors is also simple and easy.
This weather sensor is designed to sense the temperature, humidity, air quality, indoor noise levels, and air pressure in the immediate vicinity of your house. The Netatmo Weather Sensor is HomeKit enabled and long-lasting, replaceable battery power it. The accessory also works with Siri so you can just ask for temperature and humidity readings. it has a powerful home kit temperature sensor.
The Netatmo Weather station can detect when it is time to ventilate air out of your home and will notify you on your smartphone, it is sturdy and can survive harsh weathers. The data it collects can be viewed by day, month, or year. The sensor also has an easy direct connection using Bluetooth Smart technology and requires no hub or gateway. You can access your personal weather data from your smart phone, tablet, computer iPhone or by voice via Alex or Siri.
Pros:
Easy and simple setup.
Long-lasting batteries.
Also good for both outdoor and indoor use.
It allows you to use a third-party weather app to access your weather station.
Users like the accessory’s compact and discrete design.
Elgato Eve indoor sensor is one of the first Apple HomeKit products. The Eve Room is capable of measuring temperature and humidity while also determining the number of volatile organic compounds in the air. This accessory is especially for those suffering from extreme allergies, or those painting or renovating their home, trying to figure out if the room they’ve aired out is now good to go. It also has powerful homekit temperature sensor.
The Elgato Eve Room Sensor doesn’t offer anything special in terms of functionality apart from its HomeKit compatibility. The sensor is powered using AA batteries and comes with a slot at the back so you can mount it on a nail in the wall. The Elgato Eve sensor can be used to gain insights through your personal data. This temperature sensor is Apple HomeKit-enabled and works with Siri. You can easily ask Siri for the temperature or humidity of the room.
Pros:
Accurate readings of temperature, humidity, and volatile organic compounds.
Siri-compatible.
Cons:
No push notifications.
Limited Bluetooth range.
Calibrating to a new location takes a lot of time.
No WiFi connectivity.
Users say that the device falls short in a lot of aspects. The main one being that there are no push notifications. The best aspect of this device, however, is its ability to sense the volatile organic compounds in your home.
Elgato Eve Door Wireless contact sensor allows you to easily monitor your doors and windows. You can immediately check which doors and windows are open in your property and also gain insight on how often doors are opened or left opened.
Elgato Eve is Apple HomeKit-compatible and it has Siri support. So you can easily use an app to monitor your doors and windows or you can also ask Siri if your doors or windows are left open or not.
The contact sensor is truly wireless and it is powered by a replaceable battery. It is easy to setup and it uses Bluetooth smart technology, no hub or gateway is required for the setup.
Pros:
Easy to install.
Long lasting battery.
Cons:
No waterproof certification.
No push notifications.
A majority of the users say that the configuration options are lacking. However, the sensor reports accurately on most accounts.
FirstAlert introduced HomeKit-enabled smoke and CO detector in 2015 and since then the company has unveiled three other accessories that can be controlled with an iOS device.
The Onelink by First Alert is a Wi-Fi Environment Monitor that can detect high and low levels of CO in your home along with humidity and temperature levels. There is also a multicolor LED which offers a quick status update on a room’s conditions.
Onelink Wi-Fi Smoke + Carbon Monoxide Alarm
Along with Siri compatibility, the Onelink by First Alert Wi-Fi Safe can be locked or unlocked with the companion app. The safe is operated with battery power. It is also capable of detecting motion and will alert you if an unauthorized person attempts to open or move it.
Then there is the Onelink by First Alert Wi-Fi Thermostat which allows users to control their heating and air conditioning systems seamlessly. And, it also features remote temperature controls, a full-color touchscreen, scheduling options, home and away settings, and more.
Pros:
High-end hardware.
Nice design.
Very responsive.
Consistent.
Cons:
The companion app has faults.
Push notifications and in app-silencing are too slow.
Customers indicate that while the alarm is highly responsive and consistent the app lacks in many accounts and the push notification and in-app silencing is also very slow.
The Honeywell Home Smart Thermostat is also a cool device. Honeywell has launched two Apple HomeKit-enabled temperature sensors, which tells us about the dedication of the company to improve in the area.
The Honeywell Home T5 Smart Thermostat, Black is a perfect thermostat. Moreover, you can control it through the Apple home kit and Alexa. Firstly, download the Honeywell App and connect the app with the thermostat. It allows you to fan on auto works when heating and cooling takes place. You can set schedules according to your requirement and can also select a heating or cooling mode. Additionally, you can adjust the temperature remotely through iOS or Android smartphone. This thermostat supports geofencing. It can work with Alexa and Siri so you can use Siri voice commands to check status or access settings. Multiple users can have access through different accounts.
Pros:
Screen lock option if you have kids.
Reliable.
The alert system will notify you if your house gets too hot or too cold.
Cons:
Takes 30min to install.
No automatic adjustment of heating or cooling mode.
Best Apple HomeKit enabled Heating & Cooling Accessories
The iDevices thermostat is another brilliant Homekit-enabled smart accessory. There are a lot of great homeKit thermostats in the market currently and iDevices is one of the best.
The iDevice Thermostat packs complete Apple HomeKit compatibility, allowing users to give commands to Siri like “set my home temperature to 55-degrees.” Through Siri voice commands and custom scenes you can control the temperature of your home from anywhere.
Aside from Siri commands, you can also control the thermostat through an app. You can also use scenes and triggers to control the temperature. No Hub or subscriptions are required for the setup, the iDevices thermostat only needs Wi-Fi for the setup.
Pros:
No Hub required.
Nice design.
Customizable
Cons:
HomeKit connections are a hit or miss.
The interface has usability problems.
Very few smart features.
Most of the users are pleased with the devices. Scheduling is easy and the homeKit thermostat also has sensitivity adjustments to allow for temperature differences between locations. However, some user said that the iDevices thermostat is a little difficult to program. Checkout our reviews of some other best smart thermostats as well.
A thermostat is arguably one of the most crucial home appliances. Manually managing a heating system can get frustrating sometimes and lead to several issues. Sometimes your home can end up being too hot or too cold. Your heating system may also be using more energy than needed by being on when it is not needed.
This is where Ecobee3 comes into play. The second generation Ecobee3 smarter Wi-Fi thermostat keeps your home at just the right temperature. The thermostat does this by gathering information about your daily activity and routines at home. And then organizing heating schedule accordingly to conserve energy.
Ecobee3 is a smart thermostat that is supported by Apple HomeKit and Siri. The heating and cooling can be directly controlled by using an app or through Siri commands.
Pros:
Remote sensor extends temprature and motion sensing range.
Smart Home/Away feature.
IFTTT channel.
Cons:
Rewiring required if your HVAC system doesn’t have a C wire.
What makes these homekit thermostats so great are the external sensors that you can place around the house.
Honeywell also announced a thermostat recently that will be HomeKit and Siri-enabled. The second-generation Lyric thermostat can be controlled by using voice commands. Furthermore, it can also adjust the temperature based on outdoor conditions.
Moreover, the thermostat is capable of sending notifications to iOS devices and it can also work with third-party devices. Honeywell thermostat also has geofencing features so the Lyric will know when you’re home or away, and adjust comfort levels accordingly.
Pros:
Simple and straightforward management software.
Adapts to usage habits.
Touch screen display
Cons:
Not as intuitive as other thermostats around.
No motion sensors.
Depending on your previous homekit thermostat and wiring, it is very easy to setup.
The Philips Hue Go is very versatile. It allows you to light up your home with up to 300-lumen light output. The accessory is capable of lighting up your room with up to 16-million different colors. It also allows the light output to be warm or cold, you can also adjust the brightness of the light as well. The Philips Hue Go is also portable and doesn’t require a hub. Moreover, it is user-friendly and easy to setup as well.
Additionally, it also has smart battery management and while it doesn’t require a Hub to work App control and extended features can only be achievable via a Hub.
The bottom line is that while there are quite a few less expensive options available, the Philip Hue is reliable and a fun portable addition to your Apple HomeKit devices. The lamps portability is the true selling point.
Pros:
Portable.
Easy to use.
16 million colors.
Cons:
Slightly expensive.
Brightness isn’t very high.
Requires a Hub for full utilization.
It is easy to use and the design is also highly praised. The accessory also has a timer built in so you can set it to automatically switch on or off. Users also said that it operates at the same level whether plugged in or on charge.
The Philips Hue Tap Switch is a kinetic powered HomeKit enabled accessory which is used to control your Philips Hue bulbs. Additionally, the Hue Tap Switch features four buttons that allow you to instantly select favorite scene creations you’ve set up with the Hue app or control groups of lights.
The Philps Hue Tap Switch is slightly expensive, but if you can afford it and already have Philips Hue LEDs at your home then it is a great addition. You can place the switch anywhere you want to in your home to easily control the lights. The design of the device is also minimalistic and doesn’t stand out negatively.
Pros:
Wireless.
Kinetic powered.
Minimalistic design
Cons:
Stiff buttons.
No IFTT integration.
While the Switch is convenient it is limited in some aspects. The best aspect of this device, however, is that it is not battery or electricity powered and works on a Kinetic powered design.
The Philips Hue range of intelligent bulbs is quite popular when it comes to smart accessories. The lamps and the bulbs produce the light output but the real intelligence behind the hue bulbs is the Hue Bridge.
The second generation HueBridge is what makes the bulbs controllable via HomeKit. It connects directly to the router. You can control old Philips Hue bulbs as well as new ones with this HomeKit compatible Bridge.
Philips Hue range is one of the best affordable, intelligent home automation products. Hue Bridge 2.0 allows your bulbs to be seamlessly controlled by Siri. You can easily use commands such as “Turn all light green” or “Dim all lights to 50-percent.”
Pros:
Siri integration provides voice control.
Can connect up to 50 bulbs.
Cons:
Expensive.
What makes the bridge so great is the Siri voice integration that allows you to control the bulbs why voice commands. It is also very easy to install.
Lutron Caseta Dimmer Kit comes as a little bundle of goodies. The package includes a Caseta Wireless Smart Bridge, two Pico remote controls, two Caseta Wireless in-wall dimmers, and the accompanying accessories to fit them all in the home. Also, Lutron allows functionalities like setting schedules for your lights as well as the ability to use Siri to instantly control your scenes and lighting environment.
Then there is Lutron’s HomeKit-enabled Caséta Wireless Smart Bridge which also allows you to open and close shades. The bridge comes with HomeKit integration. Furthermore, Lutron has also very recently added shade control into that wireless mix.
If you have the DIY version of the Wireless Smart Bridge, you can use Siri and the power of your voice to control Serena battery-powered shades. Homeowners with the Smart Bridge Pro can use HomeKit to tap into Lutron Sivoia QS Triathlon wireless shades, Sivoia QS drapery tracks, the Kirbé vertical drapery system, tensioned shades, pleated shades, and Roman shades
Pros:
Easy setup.
Reliable and responsive.
High-end hardware.
Works great with the mobile app, Apple watch, and Siri.
Cons:
Can’t control non-Lutron devices.
Requires ethernet port.
Not so great for non-iOS users.
It is not perfect but the dimmer kit comes pretty close to it. Easy to setup and very reliable and responsive.
The basics of home automation include the ability to switch on or off your devices with the simple touch of a button in your application or through voice control. The Elgato Eve Energy Switch & Power Meter allows you to do just that and more.
The Elgato Eve works similarly to other smart plugs currently available in the market. Plugging the Elgato Eve into the wall outlet allows appliances to be switched on and off via iPhone, iPad, or an Apple Watch app.
One of the defining features of the smart plug is the statistics of energy usage that it will actually bring to users making the decision to buy it. It allows immediate feedback and precision on how much energy a connected device is using. Then there is the fact that it gives an instant insight into energy consumption. This allows users to decide if an appliance is consuming too much power.
Elgato is also among the smart accessory and home automation companies that support Apple HomeKit Framework in its devices. This means that Apple device owners can also use Apple’s Siri digital voice assistant to power on or off any connected appliances.
Aside from Siri command compatibility, HomeKit support also allows the usage of triggers to automate certain actions. Moreover, the smart plug can also be controlled without Siri by using the Elgato Eve app for iPhone and iPad.
Pros:
Compact design.
Great app.
Cons:
Expensive.
Can’t control remotely without Apple TV.
The device is a great accessory for those who are looking to conserve energy and cut consumption costs. You will enjoy our review of some of the best smart switches and plugs as well.
The iDevices Switch offers similar functionality to the iHome smart plug. You can plug in accessories and appliances into the socket. The switch is easy to use and it allows you to monitor and schedule home appliances.
The iDevices Switch is HomeKit enabled and works with Siri. So, you can give Siri voice commands to control the switch. The switch can be controlled from anywhere via you iOS device. It also allows you to make smarter energy saving decisions that will help lower your utility bills. This is done by monitoring electricity usage by appliances in your home.
It also includes a customizable LED night light which can be set to any color, saturation, and brightness. Additionally, the LED night light can also be set to turn on or off at specific schedules.
Pros:
Simple setup.
Great companion app.
Remote access.
Energy tracking.
Cons:
Exclusive to iOS.
No dimmer.
No IFTTT support.
The switch is easy to setup and the HomeKit integration makes it amazing. Unfortunately, it is only available for iOS devices and users also say that a dimmer function would have been a nice addition.
The iHome iSP6 offers seamless Apple HomeKit and Siri support, but also extends a little beyond that by offering support for other platforms like the Nest, Wink, and Amazon Echo. iHome iSP6 smart outlet was launched last year. The outlet can monitor power consumption and control small appliances.
iHome even comes with remote control. Plugging things like lamps, air conditioners, heaters, and television sets directly into this smart plug will allow you to control their power state through applications, Siri, and more. iSP6’s sequel the iHome iSP8 is also expected to hit the market this year.
Pros:
Affordable.
Easy to use.
Can organize your home into rooms and zones.
Cons:
Setup is difficult.
Not many intuitive features.
The app isn’t very well designed and has a lot of potential for improvement.
The Eve Cam indoor Wireless HD Video Monitoring Camera is a wireless HD camera and has HomeKit enabled. It also features SmartZone technology that lets you set motion-sensing technology to create recordings and alerts only for specified areas.
This camera has 1080p video recording. Eve Cam has no cloud storage. It also grants you access to video time-lapse and detection zone features. You can look after your home and loved one through Eve Cam and get notifications on your iPhone. Download the Eve app, a good Homekit app.
Pros:
Protect your 100% privacy and data.
You can deactivate your camera and use motion detection to control your home.
It has two way built in communication.
Best Apple HomeKit enabled Remotes And Other Accessories
The Apple remote allows users to easily control their Apple devices. The remote has a simple and minimalist design and the buttons are also responsive. You can easily use the remote with your iPod if you have hooked it up to the home theater.
The Apple Remote also works with Mac. You can use it to browse through your photos, videos, music, and even DVDs. It also allows you to control the volume of the media that you are playing as well. There are also shuffle and skip buttons present. However, the Apple TV can only connect to one remote at a time so you cannot use multiple remotes for multiplayer gaming instead you will need an iOS device or a gaming controller. The Remote also features an accelerometer and gyroscope.
The majority of the users prefer this remote over the Siri remote because it is simplistic and operates well. The Remote ships with a battery and a user guide.
Pros:
Works with most Apple products.
No range issues.
Buttons are responsive.
Cons:
Buttons can get damaged easily.
Too few buttons compared to your standard IR remotes.
The new Salt Remote control is the best alternative remote for Apple TV via infrared technology, built by a Swiss company because of serious complaints from users of Siri REMOTE. The remote lets you control your Apple TV by pressing buttons but the Siri button is missing from the remote. The buttons on the remote also allow you to navigate easily so you have multiple ways to interact with your Apple TV.
The Remote has a comfortable design that fits well in your hand and it also supports gaming.
However, by pressing the power button for 2 seconds the remote will be switched off and is compatible with other Tv sets too.
The remote requires two AAA batteries rather than a rechargeable battery. It uses infrared technology.
The WeMo Dimmer light switch is compatible with Apple Homekit, Alexa and google Assistant. It features touch sensitive dimmer along with face plate. For setup, you need to install WeMo app. It only requires WiFi and a neutral wire, no hub or subscription. you can control your WeMo Dimmer through WeMo app or with your voice by pairing it with Alexa, google assistant or Apple Homekit.
Moreover, You can adjust brightness of light and set schedules by syncing your light to sunset and sunrise according to need and also set sleep timer that will automatically dim the lights gradually within few minutes. Additionally you can set night mode for your lights according to your desire.
Now even ceiling fans are coming with Apple HomeKit compatibility. Hunter’s fans are Wi-Fi enabled and can be controlled by any iOS device. However, The fans aren’t exactly what you would call smart but thanks to the addition of HomeKit and WiFi they are the best in the market.
Users can easily control Hunter fan by using Siri voice commands. Furthermore, The fans can also be controlled through scenes. Multiple fans can also be controlled using voice commands.
Pros:
Easy installation.
Siri compatibility.
High-quality build.
Bulbs can be attached.
Cons:
HomeKit setup is complicated.
Lights can’t be dimmed using Siri.
How does Apple HomeKit work?
HomeKit is Apple’s home automation framework for developers. HomeKit allows iPhones, iPads, and other Apple homekit devices to communicate, control, and configure home devices. The framework allows you to control the internet of things. It can be used both locally and remotely through third party apps and Siri.
HomeKit is based on a database and a “Home” Manager. The database is stored in the iOS and it contains all the information about the home and the smart devices in them. Since everything is stored in one place, it makes it easier to manage.
Image: ecinews
Home Manager allows you to manage your home. You can manage multiple ‘Homes’ also if you have more than one. In the Apple Homekit hierarchy, ‘Homes’ are made up of ‘Rooms.’
Both Homes and Rooms in each house are given unique names for identification. ‘Rooms’ can also be grouped into zones like “upstairs” and “downstairs” so you can specify actions for zones easily.
Developers can easily work with Apple HomeKit. They can do this by developing a HomeKit device simulator with the help of the Xcode 6 or above.
HomeKit helps to make your home automated by tackling the complex problems of automation and making the solution simple enough to fit into your Apple iOS device. HomeKit is still quite new so glitches and kinks are expected but HomeKit is a breakthrough framework for home automation.
homekit-Framework-app
Why Should you use HomeKit and Apple Homekit devices?
The main question that most people will have is if the HomeKit automation worth it? Is it a good investment? Will it pay off in the future or will it be rendered obsolete?
So, here’s the deal: Apple HomeKit is far from perfect. Its accessories started being launched in 2015 and the framework has a long way to go. There are still a few problems in the framework that need to be fixed, for example, sometimes Siri doesn’t work properly.
However, while the framework isn’t very reliable to use on door locks it is perfect for other basic services. It works great when it comes to lights, thermostats, plugs and other accessories. Also, Siri’s response rate and performance get better over time.
Image Credit: APPLE
When it comes to automating your home using Apple’s framework it is best to start small. Maybe buy a $30 worth Apple HomeKit-enabled plug and see how it goes. Apple automation service is also big on security and that’s what keeps it ahead of other competitors like Wink and WeMo. The service also features Scenes which lets you configure complex actions that can be triggered by ‘commands’ through Siri.
Ultimately, Apple’s automation service still has a long way to go before it goes truly mainstream. However, for those who are eager for experimentation and early adoption, the framework is worthwhile. Aside from a few bugs, the framework is a blast. It also has a lot of potential for improvement in the future.
Apart from a few bugs, the framework is a blast. It also has a lot of potential for improvement in the future and Apple is making improvements on a regular basis.
Apple’s HomeKit App – Home:
Apple launched its automation framework HomeKit with the iOS 8. Since then, Apple HomeKit has been missing one crucial piece and that was a built-in app. The service had no Apple-supplied HomeKit-UI app, so all automation was controlled by third party applications. But now, with iOS 10, Apple has announced its own built-in HomeKit App called Home.
While the manufacturers make great smart accessories, the third party apps lack the integration and uniformity Apple made user interface would provide. With official iOS 10 launch, Apple’s built-in app will be a success undoubtedly but, there are some apps currently on the market that Apple’s built-in app might not be able to compete with.
HomeKit was first revealed at WWDC 2014 developers conference. The automation service launched three months later in September but the Apple HomeKit devices hit the market a year later. There are many accessories out in the market these days. Some of these are Philips Hue Lights, smart thermostats from ecobee, Honeywell etc.
All these devices have separate HomeKit controller applications by their respective companies. But the official Apple HomeKit built-in app for iOS 10 will control all the accessories.
However, Apple isn’t the first to create an iOS app that will solely control all Apple HomeKit products. There is a Home app currently in the market by Matthias Hochgatterer worth $15 that does just that. The Home app is arguably the best on the current market. Then there is also Hesperus, which is a high-quality free app that controls the HomeKit. It has also been updated to include notification center widget and 3D touch support.
Then there is also Hesperus, which is a high-quality free app that controls the HomeKit. It has also been updated to include notification center widget and 3D touch support.
Apple official HomeKit built-in application will be official, but that doesn’t necessarily mean that it will be the best one. Let’s have a brief look at each of these apps.
Home by Mattias Hochgatterer
Home app by Mattias Hochgatterer is the app the Apple should have offered with the home automation framework. The $15 Home is an all purpose HomeKit application that makes home automation simpler. The Home app lets you control and configure all your HomeKit devices, it displays all your HomeKit items at a glance.
With the app, you can add new items, assign them to zones and rooms, configure triggers and scenes.
The Home app makes the room and zone organization easier and simpler. The app allows you to jump from your overview to Zones and Rooms by just tapping the tab. From there, you can add or remove accessories, add and edit rooms and zones themselves, and control all your items.
Image Credit: iMORE
The Home app also allows you to set scenes that are time-triggered, Siri command-triggered or even action-triggered. The scenes can include any Apple HomeKit device.
Then there are triggers, at their most basic, triggers can turn on or off your HomeKit accessories at a particular time. For example, you can add a time trigger “turn on lights in the dining room at 9PM” then your lights will automatically turn on at 9PM.
However, triggers can do much more than just that. For example, if you have door or motion sensors you can add a trigger that toggles an accessory when the motion sensor is activated or the door opens. You can also add certain actions to triggers if the temperature drops or rises.
Siri integration With Home App
When Siri is paired with the Home app it can recognize a variety of commands:
Accessory names: “Turn on the Hue office light strip.”
Room and Zones: “Turn on the lights in the dining area” or “Turn off the lights downstairs.”
Scenes: “Emergency alert!” or “Set the ’emergency alert’ scene.”
Individual accessory tweaking: “Set the lights to 60 percent” or “Set the office lights to blue” or “Set the temperature to 57.”
The rooms, zones, accessories, and scenes can also be renamed from the Home app. The bottom line is that if you have a lot of accessories at home the Home app is the best way of controlling them.
Apple Home App for HomeKit in iOS 10 – Preview
As discussed above, Apple is bringing the built-in Home App for Homekit framework in iOS 10 for iPhone and iPad and WatchOS 3 for Apple Watch. This is going to make Homekit more widely acceptable and improved.
Although the app works more like the other third party apps using the HomeKit framework. The built-in Apple Home app provides more controls and options like you can access it from Home screen on iOS 10 directly and control a lot of functions from the lock screen as well after the Homekit compatible accessories have been configured.
There are three main screens in the built-in Home app. Home, Rooms, and Automation. The Home screen shows the summary of activities and different statuses. You can also bring important scenes and accessories on Home screen as a shortcut. The Home screen also helps to add new accessories to your ‘smart Home’ without downloading the separate app for each accessory.
The second important screen is the Room screen. Here you can create as many rooms as required in your home along with scenes and accessories configured for that specific room. The iOS 10 Home app provides options to add custom wallpapers as backgrounds to identify different rooms visually.
Image: 9to5Mac
The third and the most important screen is called Automation screen where you define all the triggers for active scenes and accessories. The automation screen is the backbone of the whole app where one takes the actual actions and the HomeKit starts working.
For example, one very useful trigger in the automation screen is sunrise/sunset. This trigger helps you turn on and off the lights accordingly. Without the built-in Home app for HomeKit, one was only able to control this with defining the time. But sunset and sunrise time changes day to day basis and this means some manual work every two-three days of changing the time. But now this cool trigger can do everything itself.
Although the Apple’s built-in Home app for HomeKit is still new and needs a lot of improvements but considering the point that HomeKit framework is itself in development phase this is understandable. The built-in app for iOS, WatchOS and TVOS will help you automate and control your smart home from all Apple devices including the iPhone, iPad, Apple Watch and Apple TV to some extent.
Update: With the release of iOS 10 the HomeKit integrations has improved significantly. The built-in Home app is now available in iOS 10. The new app is a centralized Hub that allows you to easily manage various connected Apple HomeKit devices. It is quite easy to use and also simple to setup. The official app features integration with the control center, Siri support, and 3D Touch quick actions.
All the settings for the Home app are synced via iCloud. This will allow you to control any iOS device that is running on iOS 10 to easily control your HomeKit devices. The official Home app is also free and provides seamless control of your automated Home. The new Home app is not perfect but it is the first step. It fulfills all the basic automation needs with utmost ease and has a lot of potential for improvement in the future.
How to setup Homekit Enabled Accessories?
To get started you will need to have iOS 8.1 or later installed on your iPhone, iPod touch, or iPad. You will also need one or more HomeKit Siri enabled accessories. You can buy smart plugs, lights, locks, thermostats, and more to control with HomeKit. After you have bought the accessories, you will need to do the following things to setup HomeKit in your home.
Download the HomeKit App:
First of all, after buying the accessories, download an app to manage HomeKit. The accessory itself will also come with an app but you can also use other third-party apps like Home if you don’t like the manufacturers one.
Then you will have to store and pair your Apple HomeKit enabled device. This will be done by using the special code that comes with the accessory.
Setup HomeKit:
After you have successfully paired your accessory, use Siri commands to control them. You can easily command Siri to turn off the lights or lowering the temperature. Some commands will require you to unlock your iOS device before Siri can execute them.
For example, if you are using a smart lock then you will need to unlock your iPhone, or another iOS device to open the door. This feature is of course for safety and security reasons.
There are commands for scenes, rooms, and triggers also. The complete list of commands is in the “HomeKit Siri Commands” section of this article. There are applications that will allow you to group accessories into rooms, zones, and scenes. We have also listed instructions on how to setup rooms, scenes, and zones in the next sections.
The accessories that have been grouped can be easily controlled together. You can also use a single command to turn all the lights on in the kitchen (if you have setup kitchen as a room in HomeKit). Scenes allow you to group actions, along with accessories, rooms, and zones. For example, Night time scene could lock your doors, turn off the lights in your house, and lower the temperature.
You can also reset the complete configuration of your HomeKit setup and begin from scratch. To do so you need to open the Settings app on your iOS device and then select Privacy. After that, select HomeKit and then tap “Reset HomeKit Configuration. This will completely reset HomeKit and delete all your accessories, rooms, zones etc.
Shared Connections:
You can use your HomeKit with multiple people. What does that mean? It means that you can grant access to your HomeKit house to more than one person. Adding new users to HomeKit is simple and we have listed the steps to do so in this article. They are located in the “How to share HomeKit access” section below.
The person who initially configures the Apple HomeKit house is the administrator. Only the administrator has access to add other users to the house. The guests have access to accessories, rooms, and zones. However, they cannot control triggers and scenes.
HomeKit and Apple TV:
While you are away from home, or not in range of your local network, you can setup your Apple TV to look after you home. To do this you will have to make sure that your Apple TV and iOS device is signed in with te same Apple ID account. Then you can remotely control your smart accessories by using Siri commands. For example, if you forgot to turn off the lights, or lock the door before leaving the house, you can remotely do so by using Siri commands.
If you have iOS 9 then you will not need the Apple TV to remotely control the accessories because it comes with HomeKit Accessory Protocol. HAP or HomeKit Accessory Protocol makes it easier to control your home via iCloud.
If for some reason your HomeKit isn’t working remotely with Apple TV here is what you need to do:
Check your WiFi and internet connection on your Apple iOS device and Apple TV.
Update the software on your Apple TV and iOS device.
Make sure that your Apple TV is on the same Wi-Fi network as your Apple HomeKit devices.
Make sure Apple TV is within about 25 feet of your Bluetooth HomeKit accessories.
Go to Settings > HomeKit and check that your iOS device has iCloud turned on.
Make sure that your iOS device and Apple TV are not in Airplane Mode and are on the same network.
Try signing out of iCloud and then sign in again after two minutes.
Check that your iOS device and Apple TV are signed in to iCloud with the same Apple ID and password.
Make sure that any HomeKit products you have added using your iOS device can be controlled on your Wi-Fi network or using Bluetooth.
Restart your iOS device and Apple TV.
Go to Settings > Airplane Mode and turn Airplane Mode on and off. Then try to control your HomeKit devices locally.
Lost or Stolen iPhone:
If by any chance your iPhone or iPad is lost or stolen, Apple allows you to remotely delete its contents. By using Find My iPhone you can turn on Lost Mode so no one can use it to remotely activate your Apple HomeKit products. Apple also allows you to erase the contents of the device but only use this feature if you are sure you won’t be getting the iOS device back.
Controlling HomeKit with Apple Watch:
You can also use you Apple Watch to control your HomeKit products. The automation framework allows you to control the accessories by using Siri commands on your Apple Watch. You can easily turn the accessories on or off by using simple commands. “Adjust accessories” command can be used to configure the accessories.
If you have set up zones, rooms, or scenes you can use Siri to control them also. You can use Siri commands to execute or turn off a scene. Accessories grouped in rooms and zones can also be controlled by using Apple Watch via Siri commands.
How to Setup Apple HomeKit Products:
Setting up smart HomeKit enabled accessories on HomeKit is incredibly easy. Apple has made the automation framework easy to setup and configure. The most important thing that you need to make sure when buying an accessory for Apple’s framework is whether or not it is compatible with HomeKit.
There is a list of Best HomeKit Siri enabled accessories below if you are looking to buy one. To check if an accessory works with HomeKit, locate a label that says “Works with Apple HomeKit.” If there isn’t such a label on the accessory then it is not compatible with HomeKit.
How to create a HomeKit home for your smart accessories:
If you are setting up your first HomeKit accessory then the first and foremost thing you will have to do set up a “Home” is HomeKit. Home is basically your house in HomeKit. It will contain all the rooms, zones, scenes, and accessories. You can also have multiple homes in HomeKit. Although, you can only have one primary house at a time.
To setup the HomeKit home first download a HomeKit compatible app of your choice. Every HomeKit accessory comes with a companion app but not all of them are very user-friendly and well made, so it is best to use a third party application to configure HomeKit. There are quite a few apps out there but Home by Mathias Hotchgatherer and Elgato’s Eve are pretty good and easy to use.
After you have downloaded and installed the app, here are the steps you need to take to setup your HomeKit house:
Open the application.
Press OK if the app asks you to access your Home data.
If you are using Elgato’s Eve app, then tap Add Accessory. If you are using the Home app, tap the plus button in the upper right corner.
Name your home.
After you are done setting up your Home it is time to set up your smart accessory.
How to set up your HomeKit-compatible accessories:
Connect your device to power. Your accessory may be powered by plugging into a wall outlet or adding batteries.
Connect the accessory to Wi-Fi or Ethernet.
Download and open the app for your accessory.
Follow the instructions in the app for setting up your accessory.
During the setup process, you will be prompted for the HomeKit setup code: It has the HomeKit house next to an eight-digit number separated into three groups. Enter the code into the application.
After completing these steps you will have successfully added your accessory to your HomeKit house. Now you can customize the accessory’s name, add it to rooms, zones, scenes, and triggers, and control it with Siri commands.
How to control HomeKit devices outside your house:
If you want your lights to activate before you arrive in your home. Or if you want to turn on the thermostat, or control any other accessories while you are out of the house it is possible with HomeKit. You can use the app to control it, but if you have an Apple TV or iOS 9 then you can also use the Siri commands to control the accessories when you are out of your house.
If you have iOS 9 in your Apple device then your iPhone can securely communicate with your HomeKit house. This is possible because of HomeKit’s new accessory protocol (HAP). The protocol uses secure networking over iCloud to talk to your connected HomeKit products.
However, HAP doesn’t work with previous versions of iOS. So, if you are using iOS 8 on your Apple device then you will need an Apple TV to control your house outside of your local WiFi network range.
HomeKit Siri Commands:
Apple HomeKit automation framework’s support page was updated a while back. The update has added the complete list of Siri commands that can be used on HomeKit Siri- enabled accessories.
Image Credit: APPLE
Siri commands act as the main way to control the automation framework. Siri makes it easy to control and communicate with your smart accessories by simple commands. Most of these commands are simple like turning an accessory off or on. Siri commands can also be used to adjust settings of HomeKit enabled accessories in your home.
The command list also includes several commands that will be used for smart accessories that are grouped into homes, scenes, zones or rooms.
As more HomeKit products hit the market we can expect this list to expand and include more commands and even a few more complex ones. But, for now here is the full list of Siri command for Apple HomeKit devices:
“Turn on the lights” or “Turn off the lights.”
“Dim the lights” or “Set the brightness to 50%.”
“Set the temperature to 68 degrees.”
“Turn on the coffee maker.”
If you have setup rooms, scenes, zones, and homes then you can use these commands to control the HomeKit devices:
“Turn on the upstairs lights.”
“Set the Tahoe house to 72 degrees.”
.“Set the dinner scene.”
“Turn off Chloe’s light.”
“Make the living room lights the brightest.”
“Set the thermostat downstairs to 70.”
“Turn on the printer in the office.”
“Set up for a party, Siri.”
“Dim the lights in the dining room to 50%.”
“Set my bedtime scene.”
The important thing to note is that for some accessories like a smart lock, Siri commands won’t work if your Apple device is locked. You will be required to unlock your device before you can use it to make Siri execute a command.
The HomeKit support page also includes other basic instructions on how to get started with HomeKit devices. There are several HomeKit product available in the market the best of which we have listed below in the section “Best HomeKit Siri-Enabled Devices.”
How to add rooms, zones, and scenes to your HomeKit:
The Apple HomeKit automation framework offers manufacturers an easy and secure way to connect their home automation accessories to iCloud, Siri, and your iPhone or iPad.
HomeKit also allows you to setup rooms, scenes, zones and also multiple homes that can be controlled through Siri commands. Multiple HomeKit products can be grouped into scenes which allow them to be triggered by a single Siri command. So, you can communicate multiple devices at the same time with a single command phrase or word.
First, what you will need to do is name your devices, rooms, and zones. Siri has the ability to understand custom names for rooms, zones, and devices. After naming a HomeKit device you can control it with its custom name.
You can also group multiple devices into rooms and zones which will allow you to control multiple devices with a simple command. For example, you named you Kitchen in HomeKit now you can use Siri command “Turn on all the lights in the Kitchen”. This command will then turn on all connected lights in the Kitchen.
Rooms are basically used for controlling multiple accessories. With zones, you can control multiple rooms. For example, you can create zones that are named “Upstairs” or “Downstairs.”
Here is a general guide on how to assign names, the steps may vary depending on application used:
How to rename your Apple HomeKit devices:
Open any HomeKit app of your choice and find your accessory.
Locate the Edit button next to the accessory.
Press Save. Tap the Name field required.
Name your room and select the devices you want to control it.
Image Credit: iMORE
How to create a HomeKit Room and add products:
Open any HomeKit app.
Locate the Rooms tab or setting.
Tap the plus button to add a new room.
Name your room and select the HomeKit products you want to control with it.
Press Save.
Image Credit: iMORE
How to create a HomeKit Zone and add accessories:
Open any HomeKit app.
Locate the Zones tab or setting.
Tap the plus button to add a new zone.
Name your zone and select the rooms you want to control with it.
Press Save.
Image Credit: iMORE
How to create a HomeKit scene:
Scenes are more complex than rooms and zones. In a scene, smart accessories are grouped together with actions. For instance, you could create a scene “Movie Time.” In the “Movie Time” scene you can group accessories like the hue lights, smart lock, and thermostat. You can include actions for those accessories like “Dim the lights to 60%,” “Lock the door,” and ” Lower the temperature to 55.” So, when you say the scene command all the accessories will simultaneously perform the listed actions.
Setting up a scene differs wildly from app to app. The best app currently in the market according to us is the Home app. Although, even it has a few oddities when setting up scenes. Note that scene with multiple words work best with Siri. This is because there is little chance for Siri to misunderstand. It is important to keep your scene names distinctive so that Siri doesn’t confuse it with a different command.
Locate the Scenes tab in your HomeKit app of choice.
Tap the plus button to add a new scene.
Name the scene and press Save.
Press the new scene and tap the plus button to add a new action.
Select the accessory you want to add to your scene.
The accessory will show its current settings when you tap on it.
Re-select all the actions you’d like to execute for your scene. Those actions will highlight blue once you have modified them.
After doing that, tap the Home name in the upper left corner.
Add actions for any other accessories you want to control.
Press Done when you are finished.
Press Execute to see a preview of the scene, or say the scene name to Siri.
Image Credit: iMORE
Using names, rooms, and zones with Siri:
After you are done naming your accessories, rooms, and zones, you can use those names to control your accessories via Siri. It may take awhile for Siri to register those names, so wait for some time if it doesn’t happen immediately.
How to share HomeKit access:
If you have guests over at your house and you have installed Apple HomeKit automation framework you should know that you can easily grant access to your HomeKit to your guests. As a side note, you should be wary when giving access to your HomeKit to guests especially if you have a smart lock installed. It is best to give access to only those who you trust and those who won’t try to annoy you by switching the lights on and off.
Aside from guests, it is possible that you have multiple housemates. So, of course, you will have to grant them access as well. Doing that isn’t difficult, and we are going to walk you through the process in this article.
When you create a HomeKit house, initially it is tied to your unique Apple ID by default. No one can access or control you Apple HomeKit house without access to your account. HomeKit also allows you to grant access to other people, so you don’t have to be the only one to control your HomeKit house. To do so you will have to add the people that you want to grant access into HomeKit.
There are two access modes that you can grant a person management control and accessory access. This way you can belong to multiple HomeKit homes. Here is how you add a person to your HomeKit house:
How to add another person to HomeKit:
Adding a person to your HomeKit house is very simple. Firstly, you will need to know their Apple ID. After that, all you need to do is send an invite to the Apple ID. When the person accepts the invite he/she will be added to your HomeKit house and granted the specified access. To do this you will need iOS9 or later, and of course your HomeKit house should already be setup. Here are the steps that you need to follow:
Open the Settings app on your iPhone.
Scroll down to the HomeKit option and select it.
Tap on your home.
Tap Invite People.
Enter the iCloud address of the person you wish to add to your HomeKit home.
On the recipient’s device, press the Accept button on the banner.
If you don’t see the banner then go to Settings > HomeKit if they miss the banner.
How to remove a person from HomeKit:
Removing a person from you HomeKit house is also quite simple. After a guests stay is ended at your house it is best to remove them from your HomeKit house as a security measure. Moreover, giving your guest indefinite access and control of your home is probably not a good idea. Here is what you need to do to remove a guest from your HomeKit House:
Open the Settings app on your iPhone.
Scroll down to the HomeKit option and select it.
Tap on your home.
Swipe left on the person’s name.
Tap Delete to remove the person from you HomeKit house.
How to Control HomeKit guest house:
If a person has granted you access to their HomeKit house then as a guest user you will have access to almost all the HomeKit controls that an administrator has access to.
You can control accessories and access their data. For example, you can make the light change colors or brightness via Siri commands. Or, you can ask for thermostat readings. You can also view the house and all accessories in it by using apps like Home by Mattias Hochgatterer or Elgato’s Eve. You can also change switches and toggles by using those apps.
Furthermore, Any rooms, scenes, or zone the homeowner (administrator of HomeKit) has created will also be available for you. You can easily use Siri commands to set a scene or specify an action for a room or a zone. However, you won’t have access to trigger set by the Home
However, you won’t have access to trigger set by the Home administrator whether they are event-based or time-based. Moreover, you also cannot rename accessories or delete them from the house. You also cannot add new accessories or delete the HomeKit house itself.
How to Troubleshoot HomeKit Products
Check whether or not you are logged into your iCloud account:
If you are having trouble using Apple HomeKit on your primary device or an auxiliary one, firstly check and make sure that you are logged into your iCloud.
Do this by going to Settings > HomeKit.
The theory is that any device that has been logged in by your Apple ID should be able to understand and execute HomeKit commands. So if your Apple device is not communicating with HomeKit it is possible that you are logged out.
If nothing is working then check your network connection and reset all accessories:
Did you launch a HomeKit application and got nothing? Then if you are encountering such a problem then you should carefully check and see that your network is online. Moreover, after checking the network make sure all of your HomeKit enabled accessories are connected to your network via ethernet or WiFi.
After checking and connecting everything if you are still not getting any sign that you are connected then you may want to try and reset your hardware.
All HomeKit manufacturers have slightly differents methods for doing this. It is best to check a manual or refer to official online guides. Usually, this process requires you to simply press a tiny button located somewhere on the bridge or hardware.
Resetting your accessories will not delete your HomeKit house.However, all the individual accessory connections to HomeKit will be reset. After resetting open you HomeKit app and add the accessories again. Hopefully, this will solve the problem and your HomeKit automation framework will start functioning normally.
If your HomeKit accessories are working inside the application then iOS may be causing trouble:
Whether you can’t get a guest to connect to your network or have yourself lost connection to Siri you will need to check the app you are using to control HomeKit. To do this open the specific app and then see if the buttons are responding or not. If the buttons are still working inside the app then this might be the indication of a bug in the iOS side of things.
First of all, like in most cases, try logging out of iCloud and then logging in again, consult the “How to reset HomeKit Sync” section for help in doing this.
If this doesn’t work then you will have to try something a bit more complicated, that is you will have to reset your HomeKit settings. This is the last option and if you do this you will have to rebuild your HomeKit home from the very beginning.
Resetting your HomeKit setting is a pain but if all else fails then this is your best choice for fixing the problem. Here s what you will need to do:
On your iPhone or iPad go to Settings.
Then go to Privacy > HomeKit.
Locate Reset HomeKit Configuration and tap it, then confirm.
Resetting HomeKit configuration will wipe out all the stored rooms, zones, and house names. After this. you may also have to pair some of your accessories again.
When you open your selected app for HomeKit accessories after the reset you will be asked to give your connected home a new name. You will also have to link your HomeKit bridge or other connected accessories again to HomeKit.
If you can’t add a guest to your network do this:
When adding guests to your network you may encounter two issues. One involves the invited status and the second problem is the invite not showing on the recipient’s device. Fixing these problems isn’t hard but it is tedious here is how to do that:
The Apple device may be displaying a never-ending “Invited” status even after your guest has accepted your Apple HomeKit invite into your House. Usually, this issue arises because of server delay. Because of the delay the invite status changes after a period of time.
To fix this problem the best approach would be to try removing the initial invite and then send an invite again. This may help solve the delay but if it doesn’t login out of iCloud and then login in again should solve the issue.
Then there is the issue of your invite is not showing up on the recipient’s iPhone, iPad, or another iOS device. There can be two reasons for this problem. It is possible that you made a typo or an error in the invited address if not then it could be because of some unknown problem.
The best way to fix this problem is same as that of the previous one. Try deleting the initial invite and then send an invite from HomeKit to the guest again. This solution works 90% of the time but if you are still encountering problems login out and then back into iCloud should fix them.
If all fails then worst case scenario is that you will need to reset your HomeKit configuration.
If you are on LTE then you might need Apple TV:
Apple HomeKit devices are designed to primarily work in the reach of your WiFi network. But, if your HomeKit manufacturer has built in support for HomeKit Accessory Protocol (HAP) and if you have iOS 9 on your device then you will be able to access you smart accessories on LTE.
However, if you can’t do this then you may need to get an Apple TV. Normally all Siri command and handshaking occurs within the confines of your WiFi network. But, your Apple TV combined with your unique Appl ID allows you to securely communicate with your Apple HomeKit accessories even when you are outside the house or outside the boundaries of your network.
This is done by a combination of iCloud Keychain and HomeKit framework. For example, suppose you are on LTE and you press the Home Button to activate Siri and give a command to “switch on the lights.” Now, if you don;t have Apple TV or iOS 9’s HAP Protocol support then the command will result in Siri replying “I can’t do that.”
However, if you have Apple TV or Apple HomeKit Accessory Protocol support then the command will travel over your cellular network to you set top box and handshake using your Apple ID. Then the Apple TV will relay the command to you installed HomeKit bridge. The Apple HomeKit bridge will execute the command and the lights will turn on in your home.
To setup, your Apple TV with HomeKit all you have to do is log out of your iCloud account on your Apple TV and then login back again. After doing this you Apple TV will be HomeKit enabled.
How to reset HomeKit sync
If your Apple HomeKit house is having trouble syncing or it has outright disappeared, here is a guide on how to fix it. If you update your Apple iOS device to iOS 9.2 you may encounter a bug that will cause your HomeKit house to vanish. The good news is that you won’t nee to reset you HomeKit house to solve this problem.
What the bug actually does is that it glitches the iCloud syncing. As a result, the Apple HomeKit data in iCloud stops syncing with the iOS device which in turns displays that the device has no data.
If you encounter this sort of bug, here are a few troubleshooting steps that will allow you to fix the problem.
Step 1: Reboot your device.
Before trying anything extreme or complex, try rebooting your Apple device. Sometimes a simple reboot is all your iPhone or iPad needs to fix itself back with the iCloud sync repository.
Step 2: Turn iCloud Keychain off.
If a device reboot doesn’t fix the problem then try rebooting ]your iCloud Keychain. Since your Apple HomeKit data syncs via iCloud’s encrypted storage locker, turning it off and on again will force a re-sync between the keychain and your device.
Before rebooting the iCloud keychain, make sure that you remember your security code or have another iOS device that is logged into iCloud so that you can easily reauthenticate your Apple iPhone.
Go to Settings > iCloud.
Tap on Keychain.
Turn the iCloud Keychain off.
Reboot your iOS device.
Go to Settings > iCloud > Keychain, from here turn iCloud Keychain back on.
Approve iCloud Keychain via security code or another device.
Wait a few minutes to see if your House data reappears; if it doesn’t, try rebooting your device again.
Image Credit: iMORE
Step 3: Reset your iCloud account on your device
If simply rebooting iCloud Keychain or your device didn’t fix the bug then it’s time to try something more complex and extreme. What you will need to do is log out of iCloud from your device. This can be annoying for multiple reasons. but the biggest inconvenience is that it resets all credit and loyalty cards you have in Apple Pay. Nonetheless, if you the previous steps didn’t work out then this is your only option.
To reset iCloud sync you will need to have a second Apple ID. If you don’t have one you can create one for free at the sign in screen. So, here are the steps you need to take to fix your iCloud sync:
Go to Settings > iCloud.
Tap on Sign Out, and then confirm.
Afterward, a prompt will pop up in your device saying that all iCloud-stored notes and pictures will be removed from your device. Tap Delete to confirm.
Image Credit: iMORE
Tap Keep on My [device] when iCloud prompts you about locally-stored News data, Safari data, calendars, and more. This will help reduce sync time. Enter your Apple ID password and tap Turn Off. After your account has been disabled, return to the iCloud settings screen. Create a new iCloud account or Log in with your other iCloud account if you have one. Tap on Don’t Merge when prompted about your data.
Image Credit: iMORE
Log out of the secondary iCloud account and repeat steps 2 till 5. Login again into your primary iCloud account. Tap Merge when prompted about your data. Go to the Keychain screen and turn your iCloud Keychain back on. Approve iCloud Keychain via security code or from another device. Wait a few minutes to see if your House data reappears; if it doesn’t, try rebooting your device again.
Hopefully, these steps will help you fix your iCloud sync problem. If you are lucky you will be able to fix your bug without having to reset your iCloud sync.
How can HomeKit Improve in the Future:
When a technology is in its initial phase it is bound to have some flaws and glitches. Similarly, like all new technologies, it will take time for Apple HomeKit to refine and reach perfection. Home automation isn’t a new concept but it is not mainstream yet. Apple is determined to make HomeKit a success and provide easy, accessible, and reliable home automation.
The company still has a long way to go. Apple HomeKit is already quite amazing in many ways, but it still possesses a few bugs and lacks a few features. Here’s how we think the HomeKit will improve in the future:
More Triggers:
Currently, we can seamlessly control smart accessories by using Siri commands. Although, the real gem of automation is that it is really about scheduling repetitious actions and letting the technology do the work. Apple HomeKit lets you automatically engage scenes, or groups of set actions, using triggers, or certain conditions like time of day.
Image Credit: APPLE
There are triggers that we can set that we operate a certain accessory at a particular time every day. For example, you can set your outdoor lights to turn on at 7:30 PM and turn off at 6:00 AM. But what would make HomeKit better is if it included triggers for times that may change. For example, a sunset and sunrise trigger would be brilliant.
More Siri Commands:
While we can do amazing things using Siri-voice commands on smart accessories, Siri still can’t always control your Apple HomeKit setup.
For example, if you use Siri voice commands from CarPlay to turn off your lights the Siri gets confused and a message pops saying Siri can’t control your car.
Similarly, If you ask Siri on Apple TV to dim the lights then on-screen text reads “Sorry I can’t help you with that here.” Why not? setting a Movie Night scene is probably one of the popular uses of Apple HomeKit. Lower the temperature, set Hue lights to 30% brightness, lock the front door and enjoy your movie. Now, scenes are easily created in HomeKit but you can’t use the Siri Remote on Apple TV to set them. Instead, you’ll need to use your iPhone, iPad, Apple Watch, or iPod touch.
More Apple HomeKit Products:
Apple HomeKit works with a variety of smart accessories like plugs, thermostats, locks, shades, sensors, lights etc. But, in the future, one of the main improvement aspects that need to be focused on to make HomeKit better is coming up with a wider range of accessories.
Apple HomeKit had a slow start when it was introduced a couple of years ago. But, recently the automation framework has been gaining popularity swiftly. HomeKit devices variety in the market has expanded greatly since last year. The future of home automation seems to appear bright. Several new technologies are currently in development. However, Apple HomeKit will need to step up its game if it wants to rule the home automation market.
At some points, you have come across animated videos that left you glued to your screen for a long time. But one thing you may not have realized is that there is power in animation content, especially in the world of digital marketing. There is so much you can do with just a clip to generate the right result. Your customers have what they need to click that Call to Action button, turning your leads to sales.
Currently, the world is highly interactive, especially across geographical locations – thanks to technology. Digital marketers are not left out as they implement this tool to promote engagement, boost sales, and improve customer satisfaction. And one way to get the right result is through animated videos.
What’s the Rave About Animated Video Content?
There is a flavor that videoanimation brings to the digital marketing world, one you won’t find in other marketing tools. With animated content, you can provide your customers or viewers with hard facts excitingly and appealingly. Many digital marketers enjoy this freedom, so much that they can create unique characters to convey business messages effectively. And perchance, you may be among those looking for result-generating marketing content. For this reason, you have to read on.
Numbers Don’t Lie
Animation provides the ideal platform to launch a product or service to your customers, without spending a massive budget on video production. It helps you to reach out to your target audience conveniently. It will interest you to note that 60% of customers would prefer to view marketing videos – a trend that has been on for the last three years. Pressing further, they will choose them over pictures, banners, emails, and PDFs. It doesn’t end there; market age groups ranging from 18 to 24 years show significant interest in videos. Let’s face the fact; it is more convenient watching a video than to read a 10-page document on a product or service. For this reason and more, over 87% of businesses now implement video marketing, compared to 63% in 2017. 83% of these individuals have witnessed tremendous business growth.
Here’s Where it Gets Interesting
If you are into FB marketing, then here is an interesting fact worth knowing. According to lead conversion rate, a simple animated video on Facebook business pages gets more results, two to ten times more than most well-documented text posts. And you know what? You don’t have to empty your savings to create an animated video. In fact, you will spend way less doing this than “actually” producing a live video. Do you know why? Animation offers flexibility. There are no limits to what you can do.
A reputable and reliable video production company can take your “crude” concept and transform it into eye-catching, decision-making content for your customers or viewers. Interestingly, video marketing shows no signs of slowing down. On the contrary, it keeps growing. So, this is a useful tool you would want to optimize to get the right business results. Additionally, Blogging is fast overtaking traditional journalism. Most journalists are aware of this fact and have taken on the profession. Nothing is stopping you from transforming your brand with animated videos.
Car mount accessories are pretty much essential these days for safe driving. With all the laws out there banning handheld device use, it is important to have your car fitted with a safe and easy-to-use car mount. There are countless iPhone Car Mount Accessories available on the market but it is crucial to pick one that will perfectly accommodate your device.
If you own an iPhone then this article will help you choose the perfect iPhone car mount accessories for your device. We have listed the very best car mounts that are out on the market. All these have multiple features and reasonable rates.
Why Use iPhone Car Mount Accessories?
Do you know there occur 1.6 million road accidents, only in the US, due to using phones while driving? This means 1 out of 4 accidents are caused because of phones.
A car mount will help you use your iPhone safely and legally in your car. It will make the GPS navigation easier as it will always be mounted. It will make iPhone usage while driving a car easier and a lot safer.
Sturdy and good quality iPhone Car Mount Accessories will also protect your iPhone as it will be firmly locked in place and there won’t be any risk of it getting tossed around.
Best Car Mount Accessories for iPhone
Here are the best car mount accessories for the iPhone 6S and 6S Plus currently available on the market:
iOttie Easy One Touch 2 features a unique one-touch mounting system. Removing your device from the mount is hassle-free. To release your iPhone from the mount, all you need to do is firmly push. The mount is equipped with a super sticky gel pad that sticks securely to various surfaces.
The One Touch 2 iPhone car mount accessory also features a telescopic arm. This adds two inches to the mount and enables closer viewing angles. There is also a two step mounting lever which provides additional mounting support for most surfaces. It is made of durable, aesthetic plastic.
The product also comes with a one-year product replacement warranty. The product is compatible with both iPhone 6S & 6S Plus. This mount has great features and a reasonable price. It is good for all types of cars and will stick on most surfaces.
Belkin Car Cup Holder mount has a unique design. It looks as if it is perfectly designed for your iPhone. The cradle of the mount is designed such that it fits in your car’s cup holder with utmost ease. The mount sits in the holder safely and securely.
The holder allows a complete 360-degree rotation. This enables you to position your iPhone in any direction you desire. The car mount also accommodates landscape mode. You can easily position your device in the common portrait mode or if you wish to go landscape you can do this also.
You can also tilt your device to a full 90-degrees. The base of the Belkin car cup holder mount can be adjusted (expanded) to fit a cup holder of any size securely.
There is also a slot located at the base of the mount that allows easy cable management. You can also charge your iPhone comfortably while it is mounted. Belkin is a tried and tested brand. It is a unique design and good for users who are looking for something different than the traditional mounts.
The iOtti mount is quite sturdy and reliable. If you are looking for a mount that will hold your iPhone, Samsung, Huawei, Nokia, LG, smartphones firmly in place without the risk of falling out, then this is the best choice.
The iOtti mount lives up to its name. It is cleverly designed and comes with a Holder desk stand pad and suction cup. The cup has strong adherence; it can attach securely to the dashboard or windshield of your car.
The mount also allows 225-degree rotation that allows you to position your device according to your requirements. The mount also provides an easy one-touch mechanism that allows quick one-hand open and close mechanisms. All these features allow you to position your device at optimal viewing angles.
You can also rotate the device to use it in portrait or landscape mode. The iOtti is a sturdy mount with essential features. It has a traditional design, but it is of good quality. With iOtti, you are sure to get your money’s worth.
Mpow car holder is a great windshield, air vent, and dashboard mount. The mount features a shockproof design, this allows for extra security and stability. There is a quick-release button located on the mount which allows you to release your iPhone from the smartphone holder easily with one hand.
The holder also features 360- degree rotation so that you can easily set your device to portrait or landscape mode. Moreover, the mount is versatile and can accommodate the iPhone 6S/ 6S Plus, iPhone 12 iPhone 11 Pro Max iPhone 11 Pro iPhone 11 iPhone XS Max iPhone XR iPhone XS iPhone X iPhone 8 Plus iPhone 8 iPhone 7 Plus iPhone 7 iPhone 6s Plus iPhone 6s iPhone 6 Plus iPhone 6 Samsung Note10 Galaxy and other similar devices.
The car mount contains an air vent clip and a suction cup that can be mounted on your air vent, dashboard, or windshield to ensure your phone remains in place. This car mount is the best option for people who want an efficient, simple, and easy to use the holder.
TechMatte ProGrip Universal Windshield Car Mount Holder
Price: From $24.99 Features:
Easy lock and unlock system
360-degree rotation
Strong suction cup
TechMatte ProGrip has a sleek design. It comes with a strong suction cup that has good adherence and fixes securely to most surfaces. There is a soft foam lining in the holder which provides security from scratches.
Like other car mounts discussed on this list, this one also comes with 360-degree rotation. This feature allows you to set your device in various positions, you can also easily position your device in landscape or portrait mode.
The simplistic, discreet, easy-touch mounting system enables the user to securely and safely lock their device into place with just the push of a finger. It feels unyielding and allows multiple positioning of your phone. It also can mount to the dash or onto the windshield. The suction for the window is very stable and you don’t need to worry about it falling off.
The suction cup pad can stick to any non-curved surface and is also washable. TechMatte ProGrip is focused on functionality. At $24.99, it is a great car mount.
Aukey is a car mount, it allows you to securely fix your iPhone to the dashboard. The design of the mount is light yet durable. Like many other mounts discussed in this list, Aukey also comes with a 360-degree rotation with an adjustable arm and ball joint so you can set your device at various angles.
The rotation allows you to set your device easily in landscape or portrait. This mount features a magnetic attachment that lets you fix and unfix your iPhone with ease and speed. Aukey has a reusable suction cup, sticker base that holds your Mount Holder firmly even on a curved surface This model is versatile and can hold various devices. The mount is flexible and keeps your iPhone within easy reach.
Overall, this car mount is an efficient and easy-to-use model. All the basic features are included in this holder.
Akron Mount is one of the most secure smartphone holders on the market. It is designed to offer complete security and stability. The Akron mount features a mega grip holder that provides optimal support and gives your iPhone complete security.
The holder features 3 in 1 mounting solution, all of which will hold your device firmly in place. The mount can be attached to any surface, it allows you to secure it to windshields, dashboards, or even air vents.
The Mega Grip holder on Arkon Phone mount can fit all smartphones from 2.25 inches to 3.25 inches in width. It is compatible with Apple iPhone 6S and 6S Plus.
The best part is that this car mount comes with the added benefit of a lifetime warranty. But, there isn’t anything new in this mount, it is a standard design and at this price, there are mounts that will offer better features but they don’t come with a lifetime warranty.
iOttie’s Easy one-touch 5 car mount comes with a cradle. The cradle is versatile and can fit a number of devices that have different sizes. The grips of the mount are wider, thus, they keep your iPhone or other devices completely secure.
The holder allows complete 360-degree rotation. This enables you to position your iPhone, Samsung, Huawei, Nokia, LG, and smartphones in any direction you desire. The car mount also accommodates landscape mode. You can easily position your device in the common portrait mode or if you wish to go landscape you can do this also. The folding support shelf also allows for optimal control and easy access to your iPhone’s buttons and ports.
The mounting system is specially designed, it locks & releases your device in a matter of seconds. The design is lightweight and also foldable. The holder is durable as well as highly adjustable.
Lamicall air vent clip holder has a smooth locking mechanism, it is one of the sturdiest smartphone mounts on the market. The 360-degree rotation allows you to use your iPhone in any position depending on your wish. The phone clamps securely hold the device even on bumpy roads. The rubber car clip will protect your phone as well as a car air vent from scratches. You can rely on the mount to never lose its grip.
Lamicall is a universal car mount. It can be used with many other devices including iPhone 6S Plus. It is an efficient car mount for your iPhone.
AboveTEK Universal Smartphone Tablet Car Mount Holder
Price: From $19.75 Features:
Fits all Gadgets Width Between 2.2-5.5 inches
Strong Suction and Very Steady Support
Solid Grip
Two Sizes Holders
Easy to Install One-Touch Mounting System
If you are in the market for a high-quality car mount for your iPhone, then Above Tek is as good a choice. The universal holder is well-crafted and works well with smartphones of all sizes. It is compatible with iPhone 6S and iPhone 6S Plus.
The car mount is durable and the body of the holder is made from an aesthetic plastic material. Above Tek has a powerful suction that can attach to most surfaces. The mount can be fitted on the windshield or dashboard of your car easily.
This model is secure and will not damage your iPhone or your car. It provides easy access to your smartphone when the device is mounted and does not block any ports. It provides excellent support for smartphones or tablets with a width of 2.2 to 5.5 inches and comes with holders in two sizes. The mount’s phone cap has a secure rubbery grip, while its one-touch mounting system provides easy installation and un-installation on a rough dashboard and smooth windshield surfaces.
Koomus Aero Air Vent Universal Smartphone Car Mount Holder
Price: From $67.28 Features:
360-degree rotation
The stretchable holder can hold up to 3.27 inch wide smartphones
Easy mount using Push in Technology
Can be tilted to create optimal angle at eye level view
Compatible with all iPhone, Samsung Galaxy, and all other smartphones.
Komus Aero Air Vent is for users who want to be able to answer calls and read text messages easily while driving. The Komus mount is an air vent clip that attaches to your car’s air vent. This model is highly affordable and user-friendly.
The car mount is also durable and constructed out of high-quality parts that increase the mount’s functionality and give it a premium feel. The holder also features an innovative 360-degree rotation so that you can easily set your device to portrait or landscape mode. Moreover, the mount is versatile and can accommodate the iPhone 6S/ 6S Plus and other similar devices.
The mount also features an advanced push in phone mounting system which is innovative and protects your iPhone from scratches when being mounted. Koomus Aero has a powerful suction that works on dashboards and windows and mounts securely to most surfaces.
Mount padded with silicon protects your mobile from scratches
It features a secure air vent mounting grip.
widely adjustable phone cradle with quick-release button
Aukey air vent car mount is a great holder for regular use. This mount attaches to the air vent of your car which provides easy reach and allows you to answer calls or running GPS and operate your iPhone or other compatible devices safely. The mounting system is very simple to use.
This car mount is among the most versatile models on the market. Its design is compatible with most vehicles, while its rotating joint ball supports an array of viewing angles. This is one of the best air vent car mounts currently on the market.
Will a car mount damage my iPhone?
There are various types of car mounts available on the market like air vent clippers, windshield, dashboard, cup holder, magnetic etc. The first thing that you need to decide when buying a car mount is which type you want. This is because each type has different adjustment locations and features.
There is a common misconception among users that magnetic holders affect the iPhone in a negative way and may cause damage. This, of course, is not true and magnets don’t actually have an adverse effect on your smartphones.
However, magnetic fields can temporarily interfere with the compass and magnetometer inside your iPhone. So, while magnetic holders won’t wipe your iPhone’s memory, they may still make the compass give incorrect readings. So just to be on the safe side, it is best to avoid magnetic holders with overly strong magnets.
Air vent clipper type car mounts are safe to use, they will not damage your smartphone. Some people believe that because the iPhone will be incredibly close to the air vent, the vent will affect the temperature of the device and cause it harm. There is no need to worry, though, as the impact is too minimal to cause any damage to your device.
These are our top picks of the best iPhone car mount accessories. You can also look at these battery cases for iPhone 6S and 6S Plus for extra battery juice. All of these mounts are sturdy, reliable, and are guaranteed to keep your iPhone safe. Car accessories make navigation a lot more convenient and hassle-free. Hopefully, this article will help you out in buying a suitable car mount.
A home weather station is a great addition to the advancement of your home. Weather junkies are the demand of the era, keeping you accurately updated with all subjects regarding the weather, from precipitation levels to exactly how windy it’s about to get.
You might be looking forward to purchasing one. There are unlimited choices in the market so you might find it hard to select the best home weather stations. This is the primary reason why buyers get confused when it comes to purchasing a particular weather station. Don’t worry, this buyer guide will help you select the best weather home stations for your home.
In this best home weather stations review, you will find honest reviews on best home weather stations along with relevant information regarding top-rated best weather stations. Here’s a rundown of the top 10 best home weather stations, saving your precious time helping you make the right decision.
Factors to consider while purchasing the best home weather station
You will find weather stations in a variety of shapes and sizes with different features. Therefore, it ‘s hard to choose the best among them. You can go through the entire buyer guide that will help you in selecting the best home weather station that suits your need. Though, you can take a look at the continuous considerations that are required to be well-thought-out.
Purpose of use
Weather stations are weather informers, but usually, individuals use them for various applications. Some might use them to know the current climatic conditions or some may need them for the weather forecast to plan their trips whereas enthusiasts and professionals may need them for study purposes.
A home weather station is comparatively large. It mainly consists of an integrated sensor system and a console. The sensor system will detect the different weather variables and sends the data to the console where you can virtually see the weather conditions. These home weather stations also come in many forms. Some weather stations have three sensors while some have 5. You shall purchase the one as per your requirement.
Durability
The strength of a home weather station is the foremost factor that you must keep in mind. As the elements can be harsh and the sensors will be in it 24/7 therefore, inexpensive systems are constructed from low-grade plastic that quickly rusts. Whereas, if you look at a well-built station, all the units and sensors are in a single housing. Though these sensors are expensive and if any of it burns out or malfunctioning, you will need to replace them.
Connection Type and Distance
There are two types of connections i.e. wired and wireless. The wired weather station connects through the wires. This kind of system requires precise mounting and much more installation time. Whereas on the other hand, the wireless weather stations are easy to install.
However, they are less reliable as some signal might be lost some time due to the wireless construction. Moreover, the transmission distance of the weather station is one of the most important aspects to consider. You must want to opt a weather station that offers a maximum range of transmission. Usually, a transmission distance of at least 300 feet is preferable.
Type of Data
Though all the weather stations provide the reading of the first climate variables such as barometric pressure, humidity, temperature and wind speed. But many high-end weather stations offer data beyond these fundamentals. If you want, you can look for a unit that can provide you UV data, rainfall, leaf wetness and much more. These features could be very useful especially for farmers. Therefore, select the one according to your needs.
Accuracy
Accuracy is the hardest to gauge, for precision. Hence, we recommend you to look at the specifications and choose the station with subtle margins of error. Also, you can look through user reviews for real world testing. The high price weather station might not always be a high-quality station.
Expandability
Your weather station might suit your current needs, but your preferences can change later. So, you will be on safe side, if you buy a mid-range product that can expand with new and different sensors.
Power Source
It is an important aspect to notice on which source of energy your unit will run. Mostly, wired weather stations run on AC power while some operate on AA batteries. Also, few high-end weather stations come with solar panels. Solar panels are preferably in the areas with high power cut tendency. If your budget is high, go for a home weather station that operates on multiple sources.
Update Frequency
If your weather station updates faster, then probably you will have the most accurate information. Choose a weather station that takes maximum 30 seconds to update. Some weather stations can even update every 2 to 16 seconds.
Price and Warranty
The home weather stations fall in a great range of prices. You will find a lot of weather station models with advanced features on increasing the price. So, if you have a limited budget, buy the one with most features available in your budget. Furthermore, all the reputed brands offer 1-5 years of warranty period to ensure the safety of their customers investment. Make sure to buy a unit with a reasonable period of warranty. Another thing to notice is the replacement parts whether they will be available for the particular weather station in a long run.
Comparison Table of Top 10 Best Home Weather Stations
The AcuRite’s 02007/06035RM weather station comes with a vivid color display. It can predict perfect conditions 4,8 and 12 hours later. The best home weather station can measure indoor and outdoor temperature and humidity along with the barometric pressure. The temperature sensor allows for use in varied temperature settings. The measurable indoor temperature lies between 32-122 degrees Fahrenheit whereas the outdoor temperatures from -40 to 158 degrees Fahrenheit. Also, you can regulate the temperature in degrees Fahrenheit or Celsius as per your preference. The relative humidity can measure from 1-99 percent, and it is updated every 60 seconds.
Moreover, the temperature and humidity accuracy are standard for basic weather conditions. The AcuRite best home weather station features wireless transmission range of 330 feet that updates every 16 seconds with the use of 433MHz frequency band. The data is communicable through walls. The weather station has time and data settings. The clock automatically updates for daylight savings times. Though you can turn off this feature, if needed. The time zones mainly include the continental United States, Alaska, and Hawaii. Besides, the display’s light setting is entirely adjustable from low to high. With the AC adapter, the backlight remains constantly operational. The device uses either French or English language. The weather station is powered by an AC adapter along with three AA alkaline batteries.
Finally, it is suitable for use on a tabletop or mounted on the wall, and the system comes with one year warranty.
Pros
1 The AcuRite 02007 is moderately priced, and the system gives precise weather forecasting measurements.
2 The unit comes with an adequate long-range sensor to measure outdoor temperature and humidity capacities.
3 It includes a large well-lit color display with icons that comes in easy to read format.
Cons
1 The weather station does not have an indicator for low battery or low wireless receptions, so you need to keep an eye on it.
2 The backlight is dazzling even on the faintest setting.
The Ambient Weather WS-10 is the affordable best home weather station that comes with three remote sensors, a large display, and amazingly provides room for eight sensors. The weather icons make checking the forecast very convenient even from a longer distance. This ambient weather station measures indoor and outdoor temperature and humidity. It provides highs and lows for the whole day along with providing a smooth reading graph.
Ambient Weather WS-10 measures the indoor temperature from 32-140 degrees Fahrenheit and capable of measuring outdoor temperatures from even low to -40 degrees. Furthermore, the indoor and outdoor humidity temperatures are accurate between 20-90 percent with a slight margin of error. In addition to that, the wireless transmission can reach a distance of 300 feet while using a frequency of 433MHz. The unit updates every 60 seconds. It has alarms for temperature and humidity that are easily programmable for indoor measurements.
Lastly, it uses ten AAA batteries for the remote sensors and comes with a one-year warranty.
Pros
1 The Ambient Weather WS-10 comes with three remote thermo-hygrometer sensors for measuring temperature and humidity.
2 The unit has the capacity for eight channels.
3 The system offers a highly readable display along with the ability to expand the number of sensors.
Cons
1 The Ambient Weather WS-10 has some limitations as the signals may not be able to pass through metals.
The La Crosse Technology C85845 is the best home weather station that offers animated weather icons on a color display which makes it perfect for reading. The unit has a battery backup as well. The best weather station comes with an LCD and backlight button to set the brightness of the backlight to conserve battery power. The system measures both the indoor and outdoor temperature and humidity along with the minimum and maximum values displayed. It uses included a wireless outdoor sensor to give precise measurements of temperature and humidity. The indoor temperature range lies between 32-122 degrees Fahrenheit whereas the outdoor temperatures measure from -40 to 140 degrees Fahrenheit.
La Crosse Technology C85845 successfully transmits data from the sensor to the base unit over 300 feet. It comes with a 5 Volt power cord and the weather station uses three AAA batteries as a backup. The batteries are usable in outdoor temperatures’ drop to minus 20 degrees. Other than that, the use of a lithium battery is recommended. Likewise, the best home weather station measures relative humidity between 3 and 99 percent. It also provides heat index and dew point calculations. La Crosse Technology 85845 gives the forecast limited to 12 hours. It comes with a self-setting clock that links to an atomic clock. It often updates for daylight thus saving your precious time automatically. In addition to that, it has an alarm button with a snooze button. It displays an icon while the alarm is active.
Overall, it is an excellent weather station that is worth considering.
Pros
1 La Crosse Technology 85845 includes a large color enhanced display that is convenient to read.
3 The automated icons make visualizing the forecast more exciting.
The Davis Instruments Vantage Vue 6250 is the best home weather station that provides accurate data while using an easy to install sensor. It lets you see variations in weather data over a period of 25 days thus enabling comparisons and predicting for future forecasts. The best home weather station measures for both indoor temperature and humidity that are updated every minute. It measures the outdoor temperature from -40 to 150 degrees Fahrenheit every 10 seconds. Whereas the outdoor humidity measures from zero to 100 percent, every 50 seconds.
The system has a radiation shield that allows for more placement options. The bubble level inserted in the sensor effectively increases accuracy by allowing you to install the sensor. It assists with the data collection. The unit creates graphs for the previous 25 hours and lets you pinpoint past weather conditions very quickly. Moreover, 22 alarms are available for various weather conditions that include a freeze and flood warning with a rain rate as well. The system has a wireless transmission distance of 1000 feet, and a refresh occurs every 25 seconds. It measures heat index and wind chill every 10 seconds whereas the frequency hopping feature offers continue reporting. Davis Instruments Vantage Vue 6250 uses solar power to augment battery life. The unit allows you to set the time and date and it displays sunrise, sunset along with the moon phases.
Pros
1 The Davis Instruments Vantage Vue 6250 comes with a backlit display along with the keyboard.
2 It shows weather forecast icons and weather trends thus making it easier to see tomorrow’s weather.
3 It features a radiation shield and long data measurements that make it a complete weather station.
Cons
1 The Davis Instruments Vantage Vue 6250 can only work in daylight and on clear days.
The La Crosse Technology C83332 is the best home weather station with precise and real-time weather information. The system comes with two new features, an indoor weather station, and a multi-use remote sensor to mold the risk for two separate areas. It features animated color forecasts with trends that react to changing barometric pressure. It can effectually monitor indoor comfort level and in or out temperature trends. Also, you can set high and low-temperature trends. The best home weather station can measure temperature and humidity levels along with the minimum and maximum records. It offers you easy to read color display with adjustable brightness.
Furthermore, it also shows heat index and dew point and contains an atomic clock so you can set the time and reset the daylight saving time. The La Crosse Technology C83332 gives you the outdoor temperature range of -20°F to 140°F. The unit is capable of predicting perfect weather on the very next moment as it is built with enough advanced technology. The dimensions of the weather station are 8.34 x 1 x 5.5 inches, It offers you the option for adjustable settings of the backlight. It has a sensor transmission strength icon that will keep you updated with the power of the sensor. The weather station can work with both the AC adapters and the batteries that come along with the product.
Overall, it is the best choice to stay updated and alert with the latest indoor and outdoor weather conditions.
Pros
1 La Crosse Technology C83332 gives you 12 hours weather forecast.
2 The unit has an imperative sensor transmission signal strength icon.
3 It features an indoor weather station and multi-use remote sensor to give you both indoor and outdoor temperatures.
The AcuRite 01512 Pro is considered as the best home weather station that provides you confidentially your weather and weather prediction information. It is capable of giving pinpoint accuracy right from your place. The weather station comes with self-calibrating technology to provide your personal forecast of approximately 12 to 24 hour of weather conditions. The forecast is generated from weather data that is measured by a sensor. It successfully combines the latest procedure in weather prediction modelling with related effects of current localized weather observations to provide a reliable and accurate forecast of weather conditions.
Moreover, the unit analyses changes in pressure and temperature to determine your altitude for approximately 14 days. AcuRite 01512 Pro relies on sensors that collect live data directly from your backyard. It efficiently measures rain build-up along with covering record by year and by month which displays in inches or millimetres. The system allows you to view the total number of days with rain in the current month along with the number of days since the last recorded rainfall.
Besides, it gives the users present wind speed as well as the expected minimum, and maximum wind speeds up to 99 MPH. The best home weather station contains the Customizable Weather Ticker that stream with the real-time information. Also, it notifies as text messages on the display screen that mainly includes the moon, temperature, indoor comfort level conditions and much more.
Be the next one to experience with this best home weather station!
Pros
1 AcuRite 01512 Pro features an amazing illuminated color display that features three different lighting settings and makes sure you can easily read the information.
2 The unit tracks rainfall day by day.
3 You can expand the system to connect additional displays.
Cons
1 The weather station does not allow you to shut off the back light even when powered by AC.
Netatmo Weather Station is one of the most advanced and best home weather stations that has been designed for home use. The Netatmo weather station is simple and easy to use with high-end features. The unit has a CO2 sensor that measures the indoor pollution levels. It alerts you about the conditions so you can let fresh air get into your room. The indoor module of the weather station also gives you the necessary information and keeps you alert about the noise rate. Whereas, the outdoor module of the system offers real-time information on various weather variables.
Likewise, the device can be connected to your smartphone thus allowing you to analyze the past readings, observe the current condition and forecast the future. Netatmo Weather Station provides you real time tracking of your location. Its specially designed app lets you view the data in a graph form so you can observe the cycles and forecast the variations in your environment. Lastly, the outdoor module works on standard AAA batteries, and the indoor module can operate on AAA batteries as well as on AC power socket.
Pros
1 Netatmo Weather Station gives you the CO2 rate and noise rate in your room.
2 It allows you to access the weather station from any place by using the app if you have an internet connection.
3 It provides information faster in comparison to any other weather station that uses the traditional radio signal.
Cons
1 The device lacks protective shield; hence it is not recommended to be directly exposed to Sun.
2 It is limited to only few weather variables such as temperature, barometric pressure, and humidity.
The AcuRte 01036M is a wireless weather station. It is considered the best home weather station due to its reliability and accuracy at an affordable price. The weather station features a dual processing technology with an easy to install design. It comes with an indoor Wireless sensor that transmits data of 433 MHz. The data displays on the illuminated color screen.The sensor measures temperature, humidity, rainfall, wind speed and direction, UV and solar radiation.
Furthermore, it monitors the indoor humidity ranges from 16-98 percent whereas the temperature ranges from -40 to70 degrees Celsius. The AcuRite 01036M comes with a large LCD screen. In addition to other weather variables, you can also view the heat index, dew point, and, rainfall rate. It allows you to set the programmable weather alarms for temperature, humidity, wind, rain, dew point, heat index, and storm alerts. Besides this, it notifies you in case of changing conditions through email and text alerts.
Pros
1 The AcuRite 01036M updates every 18 seconds regarding wind speed and wind directions.
2 You can connect the data to the PC via USB and provides you weather conditions remotely through the internet on your smartphone.
The Davis Instruments Vantage Pro2 is a very reliable weather station with its versatile sensor configurations. The unit is easy to install and provides excellent accuracy which makes it the best home weather station. It features a temperature sensor, humidity sensor, rain gauge, anemometer and solar panel. The temperature and humidity sensors houses in a standard radiation shield which protect it from extreme radiation and heat. The wireless unit has the maximum transmission range of 1000 ft. That may limit to 200-400 ft. Due to the walls and obstruction. You can also add wireless repeaters with distance up to 2.7 kilometers.
Davis Instruments Vantage Pro2 comes with a large LCD screen display with the easy to use the keypad. It offers both cabled and wireless options so you can choose depending on your requirement. The console displays weather variable including temperature, humidity, wind speed, barometric pressure, and rainfall along with the date, time, sunset and sunrise. In addition to that, it also lets you know about UV radiation, soil moisture, leaf wetness and much more.
Finally, the console is powered by a power adapter, or you can run it on 3C batteries.
Pros
1 Davis Instruments Vantage Pro2 calculate the forecast accurately by taking weather variables which include temperature, humidity, barometric readings, rainfall, wind speed, and direction.
2 The console updates the weather reports in every 2.5 seconds.
3 The unit comes with an optional weather Link data logger and software of many versions that lets you analyse and compare data.
Cons
1 As the unit is solar powered, hence it is not recommended for the areas where the weather is too cloudy or rainy.
2 At times, signals are not available due to extreme weather conditions.
AcuRite 02027A1 is a color weather station that comes with the backlit LCD screen. It includes both indoor and outdoor temperature, humidity, moon phase, barometric pressure with weather trend indicator, time, date and much more. The outdoor sensor of the system features wireless technology which has an excellent range and weather resistant design. AcuRite 02027A1 is perfect to make the plans of your entire day with accurate weather prediction information.
Moreover, it comes with patented self-calibrating technology that provides your personal forecast of 12 to 24 hours’ weather conditions. The display of the weather station will show you the chart of trends with minimum and maximum temperature and humidity along with the daily and prior records. The unit shows the moon phase icon on display and even tracks the lunar cycle. Also, you can view the moon converts through eight different phases. The weather station uses a unique algorithm to analyze changes in pressure and temperature over 14 days. Lastly, the weather station operates by a 5V power adapter or 3AA alkaline batteries.
Pros
1 AcuRite 02027A1 provides daily high/low data.
2 The wireless range of the unit is up to 330 feet.
3 The weather station has a very attractive color display.
Cons
1 The luster of the weather station quickly fades.
Many customers fail to select the right product and end up regretting their choice. Therefore, detailed research on various best home weather stations is conducted, and the best selection is made available to you. We hope that you will not only be able to choose the best home weather station for your home but also learn some basic things from this buyer guide. Hope you enjoyed reading.
You need heart rate monitors! and you know that. Whether you are a professional athlete or just an average Joe going for a fitness workout, monitoring your heart rate is very important. During exercise or other fitness activities if you monitor your heart rate you can get a lot of health and fitness information about your workouts.
If you are training for some specific sport or fitness event, then heart rate monitors can track data that will help you monitor your performance. Heart rate monitors also indicate when you are overdoing or underdoing your workout which will allow you to modify your fitness routine accordingly.
These days monitoring your heart rate has gotten very easy. There are numerous heart rate monitors available in the market that help you to do so. However, it is important to the right one, and with such a huge range in the market, it can be difficult to do so. There are all kinds of heart monitors available these days, from high-end smartwatches to training accessories like the chest straps. But, fear not because this article will help you pick the right heart monitor for your fitness routine.
What to look for when buying Heart Rate Monitors?
When buying a heart rate monitor the most important aspect is to know whether are actually going to track your heart rate properly or not. While this may seem absurd, there are a lot of heart rate monitors in the market that aren’t up to the task and don’t yield correct BPM. If you want to track your heart rate with high accuracy, it is best to go for the chest strap heart rate monitors because they tend to be more accurate then the wristband kind but, wrist monitors are much more convenient and easier to wear.
Heart rate monitors track your heart rate, but they also offer many other fitness statistics and features. It is important to look for features that will benefit you the most. You can track calories burned, duration, lap time, distance, and a lot more. For heart rate monitoring, the best monitors are personalized according to your gender, age, height, weight, and several other factors. Some monitors also have target zone alarms that will indicate you when you reach your target heart rate zone.
Most heart rate monitors allow you to record your data and view it at a later time. A few heart rate monitors offer training summaries which are viewable after each workout. Some monitors also let you view data of past workouts. A large memory helps long-term training so look for a watch with a large memory capacity if you want to keep track of your previous fitness data.
The best heart rate monitors can transfer your exercise data to apps on your smartphone. Through USB or Bluetooth, you can upload data for each workout session. Some monitors even allow you to compare your data with friends. Most heart rate monitors are only compatible with certain apps and devices so check with the manufacturer’s device compatibility charts before you buy one.
First up is the Garmin Forerunner 225. Garmin’s flagship smartwatch with inbuilt HR tracker is one of the most powerful heart rate monitors in this list. This device has every fitness tracking feature that you can think of but it also one of the most expensive watches in this list. The inbuilt HR monitor is the latest model from Mio and it is pretty accurate.
The Garmin Forerunner 225 basically has two modes that it operates in one Standby and the other Sport. When in the device is in Sports mode it will by default turn on the GPS by default unless you specify otherwise. Garmin has smooth off some of the edges of their top-end fitness feature and has improved their tech by adding a fitness tracker in order to appeal to a more midrange market of average Joes. If you are looking for a top-tier fitness tracking watch then the Garmin Forerunner 225 is a definite winner.
Robustness is vital for a good running watch and the Garmin 225 handles everyday usage with ease. It is water resistant up to 50m so you can wear it in the shower and it is robust enough to survive in the bottom of a sports bag without trouble.
The Withings Pulse Ox is the successor of the Withings Pulse, which is also an extremely capable heart rate monitor. The Withings Pulse Ox can be worn on the wrist, unlike its predecessor the Withings Plus, so it is more user-friendly and comfortable to wear. The device is capable of tracking blood oxygen levels along with monitoring the heart. It has a simplistic design and a long battery life.
Aside from that one extra feature over other fitness trackers, the heart monitor itself is actually a little more high-tech than a lot of monitors that are available in the market today. The device keeps a lot of information on the watch itself. While a lot of wrist trackers hold the information and then require you to check on the companion app to monitor your progress, the Withings Pulse O2 actually lets you access your fitness information via a handy touch screen right on the front.
The Polar H7 strap is not a wrist tracker but a chest strap that pairs over Bluetooth with a free smartphone companion app, the Polar Beat. If you’re looking for the cheapest, but most accurate way to get up and running with a heart rate monitor, then this is your best bet. Chest strap heart monitors tend to be more accurate and hassle-free when actually working out than wrist-mounted heart rate monitors. However, they are slightly more troublesome to wear.
The best part about Polar H7 is that it syncs itself to your smartphone via Bluetooth and lets you check the info in real-time. Using Bluetooth, the chest strap monitor sends information to your smartphone when you are working out. It even sends notifications when you have burned as many calories as you specified for the day.
Motorola’s updated Moto 360 has already wowed with its stylish design. However, the Sports version appears even more interesting, which is specifically designed for sports and fitness tracking. The Moto 360 Sport comes with a dedicated built-in optical heart monitor which is accurate enough for casual runners and for working out. The device is also able to control your tunes and track your runs with GPS via compatible Android Wear companion apps. All these features make it an optimal fitness tracker.The watch also comes with a hefty battery capacity that can last two days.
The Moto Body companion app syncs with your tracker to give you more detailed information about your workout and runs. It is a simple app that does not require any type of learning curve. A week view is displayed at the top, and for each day you can see your heart activity, steps walked and calories burned. The Moto Sport 360 come in three attractive colors: black, white and flame orange. All in all, it is a great activity tracker. It is fast, light and has a bunch of great features.
The Polar H10 chest strap is one of the most accurate heart rate monitors on the market. Polar H7 has gotten so good at heart monitoring and Polar H10 has added many new features. You can use it with any sports or smartwatches as well as android phone and iPhone. It also has Bluetooth connectivity as well.
If you are looking for a heart rate monitor that is accurate, Polar H10 is the best for running, swimming and indoor training most accurate alternative. It is useful if you are swimming as it is water-resistant.
The only con about this device is that the Polar itself is a chunky beast. It doesn’t has an LED display that is slightly limited. The best things about this monitor are that the battery life is good, it is a lightweight comfy chest strap, and the price reasonable. If you’re just looking for an accurate chest strap heart rate monitor after and before workout, then this is the one for you. Don’t forget to download Polar App for tracking workout data.
The Wahoo Tickr is a chest strap HR monitor that will track your heart rate as accurately as possible outside a lab EKG. The Wahoo’s best feature is that it transmits on both Bluetooth 4.0 and ANT+ bands, meaning that you can connect it to most smartphones and any training device that supports ANT+, for example, cycle computers, older fitness trackers, etc.
The most affordable model stops here, but more expensive versions include accelerometers to track running cadence and other technique-improving data and even more storage, so you can go without a smartphone to record your training sessions. If you’ve already got a favorite training app you want to keep, or regularly use another ANT + device, this is the best heart rate monitor choice.
The Microsoft Band’s optical heart sensor is a combination of ten sensors packed into this one little band. This band isn’t very accurate, so attempting serious heart rate zone training with the Band isn’t really advisable, but alongside the nine other sensors, it gives you a lot of information about your health and fitness.
The device can track your heart rate over the course of the day, and uses this to calculate overall fitness, and log in total calories burned. Microsoft has put a lot of time into the Health aspect of this Band and is rolling out periodic software updates to improve te accuracy and functionality of the monitor.
The Garmin HRM-Dual Strap is made up of cotton jersey and feels very comfy and it is called Dual because it can transmit data over ANT+ Bluetooth smart The strap will track your pulse as well as your heart rate variability (HRV) constantly throughout the day, to give you a complete picture of your fitness and stress levels. It can pair with smartphones and the Garmin app uploads all your heart data. It is waterproof.
The strap features an accelerometer that keeps tabs on periods of activity and also alerts you when you have been stationary for too long. The strap is super lightweight, and it can track heart rate and activity during training indoor or outdoor.
TomTom has launched a six-flavored salvo of fitness trackers based around the TomTom Spark. But, as with their current tracker range, the ‘Cardio’ moniker indicates the devices that have a built-in optical heart rate monitor. The TomTom cardio heart rate monitor is a strong contender, and the Spark adds multisport functions, an activity tracker, an updated design, and also an inbuilt music player that will stream your music to a pair of Bluetooth headphones. The Spark features 3GB capacity along with a preloaded ‘Running Trax’ mix.
Jabra Sport Pulse is headphones with a heart rate monitor built-in. If you’re usually listening to music while working out, then the Sport Pulse headphones are a good choice. Once paired via Bluetooth to your smartphone and companion app you can fire up the power ballads, set your zones and workout with confidence.
The Wahoo Tickr FIT is an Optical Heart Rate sensor armband that uses both ANT+Smart Bluetooth technology to relay information to 50 smartphones and devices, apps including Wahoo fitness, Runtastic, and Runkeeper, etc connect on all the smartphones, tablets, GPS running watches, and Android devices. 30 hours of battery life on a single charge. It tracks real-time Heart rate and calorie burned, workouts accurately.
Fitbit‘s Surge features an optical heart rate sensor and PurePulse technology that is capable of automatically monitor your stats every few seconds. Users can use the data to maximize their training and accurately track calorie burn.
The Fitbit Surge is capable of tracking steps, calories burned, distance traveled, floors climbed, elevation and active minutes thanks to its 3-axis accelerometer, a 3-axis gyroscope, and a digital compass. The device offers 24/7 heart rate monitoring via a built-in optical heart rate sensor. It allows you to monitor your heart rate during you workouts as well as when you are stationary.
Fitbit’s PurePulse tech uses LED lights to detect your blood volume changes as your heart beats combined with Fitbit’s algorithms, you will be able to get a more accurate calorie burn figure and keep better track of your health and fitness.
The Surge also allows you to set a target heart rate zone, which helps you make sure that you are pushing yourself enough but not overtraining. The device can also transfer all your fitness data back to the fantastic companion apps. These apps have a great trick up their sleeve also. The companion app’s feature offers the ability to plot all of your heart rate readings on a graph so that you can review all your fitness data of several weeks in one go.
These were our top picks of best heart rate monitors that are currently available in the market. Heart rate monitors are very important for exercising and other fitness activities. All the monitors listed in this article will help you keep track of your heart rate and other health data so you can alter your fitness routine accordingly.
Google Ads previously called AdWords is an advertising platform that promotes your product, business, or brand, shows your product or post at the top of the searches. Google Adwords gives you the opportunity to advertise your products or post at the top of the search results by bidding. These are paid ads through the Google Ad platform.
The great benefits of AdWords are that they are easy to apply monthly budget parameters. Best of all – you can stop your advertising at any point you choose.
What is AdWord Manager?
AdWord Manager consults you in growing your business, AdWords Consultant in helping you to project and improve upon your brand and its digital marketing offering and it’s very important to let them do what they do to help you, while you focus on your core business.
Adword Manager is a handy dandy tool for consultants to manage their client’s accounts easily without logging into each one’s account. For example, they can create campaigns.
How to use AdWord Manager?
One of the biggest mistakes businesses make is to bring AdWords consultants on board and expecting instantaneous results. This stems from a belief that digital means instant – a dangerous mindset to have when you expect anything of value from the expert that you have hired. In reality, creating or building upon a successful marketing strategy takes time, and it is unfair to expect instant results from your digital marketer.
What services should I outsource?
Online marketing campaigns have shown to be highly profitable when the services of an AdWords Consultant are employed. Even if you start off on a smaller budget, you need to start seeing returns, and this will be made a lot easier by involving the right people in the process. Start small if you feel uncertain – even a small campaign can help you reach greater traffic, targeting and clicks.
Although the larger search engines do make it a lot easier than ever before to set up a paid search, it is the attention to detail, and executing things with greater speed and efficiency, that makes the digital specialist a well-justified expense to your campaign. It may be easy to set up and run the campaign online, but there is no substitute for the great human inputs of strategy, tone, and nuance. A fully automated campaign can feel robotic and soulless, and for this reason, the human factor remains central to your brand’s success.
What should my AdWords management agency be able to do?
Yet again, you could do endless searches on this topic, and come up with many answers, and although their services might not be considered essential to the greater scheme of things, time has shown that the benefits a digital campaign gains simply by having a professional consultant working on it, make the investment of outsourcing worthwhile.
Even if you decide to start off with a basic campaign, you can expect your AdWords management services firm to at least be able to generate new campaign ideas and strategies, and implement them, rework existing campaigns to a more efficient version, and manage all the “behind the scenes” aspects of an online campaign to maximize its efficiency.
Can’t I just Do It Myself?
Sure – if you have about 3-4 months lying around for campaign development and growing your audience, developing email strategies and content, and money to blow on experimental phases that might not come to fruition.
Faced with this choice, this is often the point where most people turn on their heels and hightail it over to a good AdWords specialist. They will help you to crystallize your goals and objectives for the campaign, use their expertise to go and find you an audience (where you might have spent time figuring out the HOW rather than the WHERE if you had to attempt it alone), and bring your vision to life with its own flavor. Time is money and investing a bit more money in a professional to save time in the long run, will always be worth your while.
Is an AdWords specialist all that?
Many people are stuck in the mindset that the amount of clicks they get on their website is what translates to the money they make. While it not untrue that leads bring in money, and clicks bring in leads, it is not how digital marketing works.
You may be one of the lucky ones to spend a little on a marketing campaign, have major luck with one click leading to a huge number of leads, and making more than you spent on the campaign for one lead. Here is the thing though: something like that is not calculated, and dumb luck is no basis on which to build your campaign. Here is why you need someone who knows their keywords from their PPC, and why you need them on your side.
It’s all about the turnover
Even a small business can benefit from targeted digital marketing, and the great part is that you can work within any budget. The great benefits of AdWords are that they are easy to apply monthly budget parameters. Best of all – you can stop your advertising at any point you choose(but would you want to?) To best answer that, let us talk about how effective digital marketing really is.
Millions of impressions per month that lead to proven paid clicks cannot be wrong. Speak to an AdWords consultant about what you need from your digital marketing – it is always better to treat marketing in a bespoke way and tailoring it around what you need.
Are you all write?
Good copy is what stops an ad from malfunctioning. If there is anything to outsource, make a copy, and find an Adword consultant with great writing skills. A good copywriter will research your topic, make sure they know their oats when it comes to your competitors, and will structure your campaign based on best practices within the industry. In a nutshell, they know what they are doing, so you do not have to figure it out. Bad copy affects your trustworthiness as a brand and attempting it if you do not know what you’re doing, is time and money wasted.
Be specific
Keywords. There is so much to be said about this category, but most importantly, the key is not missing the mark. Getting to this point involves a lot of trial and error, like keywords that cover too broad a field leads to more money being spent on fewer clicks, which is definitely not what you want!
How hard can it be?
If something inside you is still going “I can probably do this”, you either need to stop immediately or make sure that you know exactly what you are doing when it comes to plotting the campaign points, defining, and researching your demographics, and isolating the most effective keywords. A bit daunting? Sure, but this is the value of involving an AdWords Consultant in helping you to project and improve upon your brand and its digital marketing offering. Let them do what they do to help you, while you focus on your core business.
These days voice assistants are getting more and more popular, and currently, Siri is taking the lead in the digital voice assistant market. Because of Siri’s integration and efficiency, voice assistants have gained popularity among users. While Siri is Apple‘s own digital voice assistant to help you with different tasks on the iPhone and iPad, there are different alternate solutions on the Android platform as well. Siri for Android and other apps are getting popular more and more. We will here review some of the best Siri for Android apps which can be a good alternative of Siri for Android phones.
Google Assistant
Bixby Voice Assistant
Cortana
Extreme- Personal Voice Assistant
Hound
Jarvis personal Assistant
Lyra Virtual Assistant
Robin
Amazon Alexa
Voice assistants help out a lot in daily life. They help you keep track of important things and make your life a little easier to manage. Siri isn’t the only digital voice assistant in the market. There are quite a few great ones out there. Here we are going to list the very best digital voice assistants for Android OS. If you are looking for some fun time go and ask some funny things from Siri.
Google Assistant is undoubtedly one of the best personal voice assistants and Siri like app for Android. It comes with a large number of features which include the basics, along with more advanced stuff like anticipating your needs, activation from anywhere, Google Assistant on Tap, and a lot more. It’s not enough that this app is solid as a brick wall but it also receives updates constantly by Google which seems to only add to its stability and range of features. If your device has Google Play Services, you probably already have this installed which means you just have to turn it on.
The Bixby voice assistant is an amazing Siri-like App for Android phones. It serves the full purpose of having a virtual assistant on your phone. It sets meetings, recognizes voices, and navigates the maps for you efficiently and easily. The interface of the assistant app is smooth and makes it a delightful app to use.
Microsofts’s Cortana still needs some work but it still has a lot of potential for improvement. Microsoft’s voice assistant has a ton of things that it can do and it’s integrated into Windows 10 for near-seamless, cross-platform support. Among its many features include the ability to call people, send SMS and email, take notes, track packages, tell jokes, add stuff to your calendar, and more. Cortana might be a little rough around the edges but it is still better integrated than a lot of other apps on the market.
What makes Siri unique on iPhone is the ability to start running by just saying ‘Hi, Siri.’ Robin — the Siri Challenger, is a similar, fast booting, light weight voice assistant app for the Android phones. It boots in incredibly fast speed and pops up quickly by tapping on the app icon. The interface is a little bit peculiar, however; it does not give a high impact on the app. The interface also has a transparent background which could become a little bit distracting in the presence of multiple colors on the drawer. The app can recognize many different accents and text-messaging can be made fun easily with it.
Extreme personal voice Assistant has a great resemblance with Siri and it is a conventional voice assistant app for android, and it does the virtual assistant job very well. Extreme virtual Assistant is most useful in those scenarios where a user needs some multitasking on the daily basis. For example, if you are doing some important work and want to send an email, you could ask extreme to write an email for you. The Extreme personal Assistant does some quick work by writing an email for you according to what you say. Imagine if you didn’t have Extreme personal Assistant helping you through this, you should have to open your mobile and your email app to do the job. Therefore, the importance of having an Extreme personal Assistant cannot be ignored.
Amazon Alexa is a standard digital assistant that gets the job done. It features the ability to ask for simple things such as starting various apps, the weather, time, calendar, reminders, and even provide answers to simple math problems. You can also ask AVC about fun facts about stats, stocks, and more. Of course, it also includes basic features like calling, sending SMS, navigation, alarms, and translation. It’s not as complex or smooth as something like Google Assistant but it’s not a bad choice if you just need something simple that helps you keep track of things.
Hound — Siri-like Assitant app for Android phones is nothing less than a great assistant. It has a very beautifully designed simple assistant. A fully functional and intelligent voice assistant and one of the best companions to the navigator community around the world.
Thus, if you are looking for Siri for Android apps, it can become one of your best choices.
The 4th inline is Jarvis Personal Assistant is another Siri-like App for Android, which has the best stylish interface design out there. It serves the functions of a fully reliable Siri for Android app. You can make calls, Set Alarms, Open apps, Play Music, Open Wi-Fi and Bluetooth, Time and date, Quick alert, Hot word detection, Sending text, through command, and with the help of voice is a nice feature. This makes it very easy for you to find hotels and restaurants around the country. Jarvis personal assistant makes your life very easy when you have it on your phone. But rush now to install it and wait for the next and the best Siri for Android apps.
Genie is one nice digital voice assistant app on Android OS which you can use as an alternative of Siri on your Android Phone. Tasks like voice texting, calling, and dialing is made easy through Genie app. Setting the alarm has never been so much easy with voice command. For example, for setting the alarm for Monday morning 8 am, you have to speak the words: “Wake me up at 8 on Monday Morning.” The app will understand it and serve you according to your instructions. Therefore, it is no doubt, one of the best apps for the alarm clock. This app has a paid version for $3 price; the free version comes with some limited features.
Lyra Virtual Assistant is another Siri-like App for Android. With one of the best interfaces among the other related apps, the Lyra Virtual Assistant provides some amazing features like controlling the music when you are busy with something else like workouts or kitchen works. The Lyra can-do the translation for you as well but you must have a native accent. The app also provides features to connect on social media as well. These cool features make it one of the good choices to become an alternative Siri for Android apps.
These were our top ten picks of the best digital voice assistants available on the market. All of these voice assistants are available on Android and some on a few other platforms as well. Some of the digital assistants in this list are a match of Siri while others are simplistic and standard to get the job done.


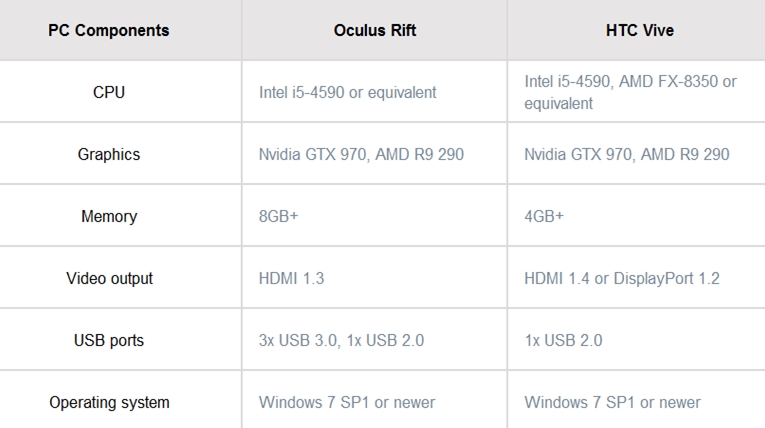


 If you are a tech & gadgets enthusiast then you probably know that among the latest tech trends smart home devices and smart assistants are quite popular. When it comes to virtual assistants Amazon Alexa has been very successful especially in the smart home automation domain. This is because the smart assistant allows one of the best voice controlling for your smart home. It provides standardized control over the basics like lights, locks, and more. This is what makes the Amazon Alexa very popular and if you are looking to set one up, then you are at the right place.


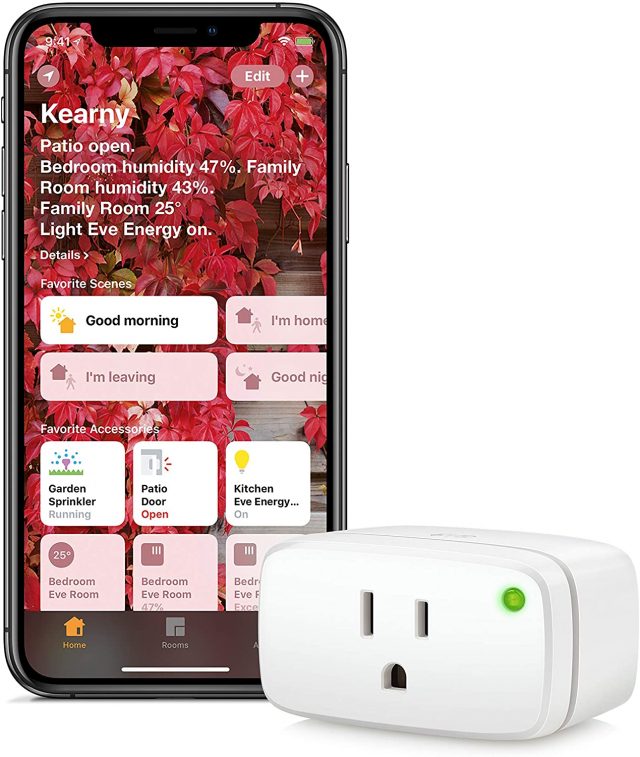


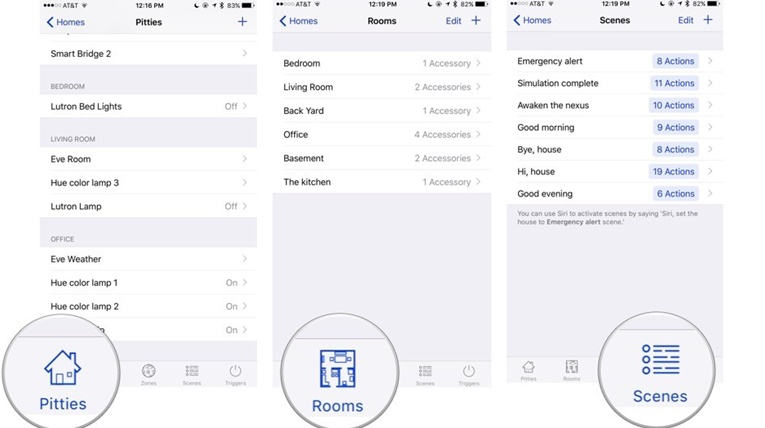


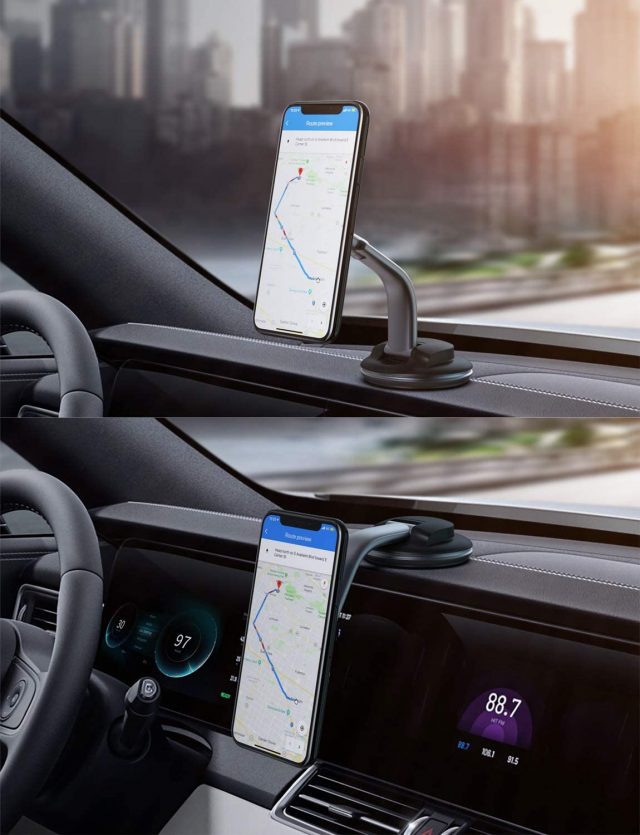


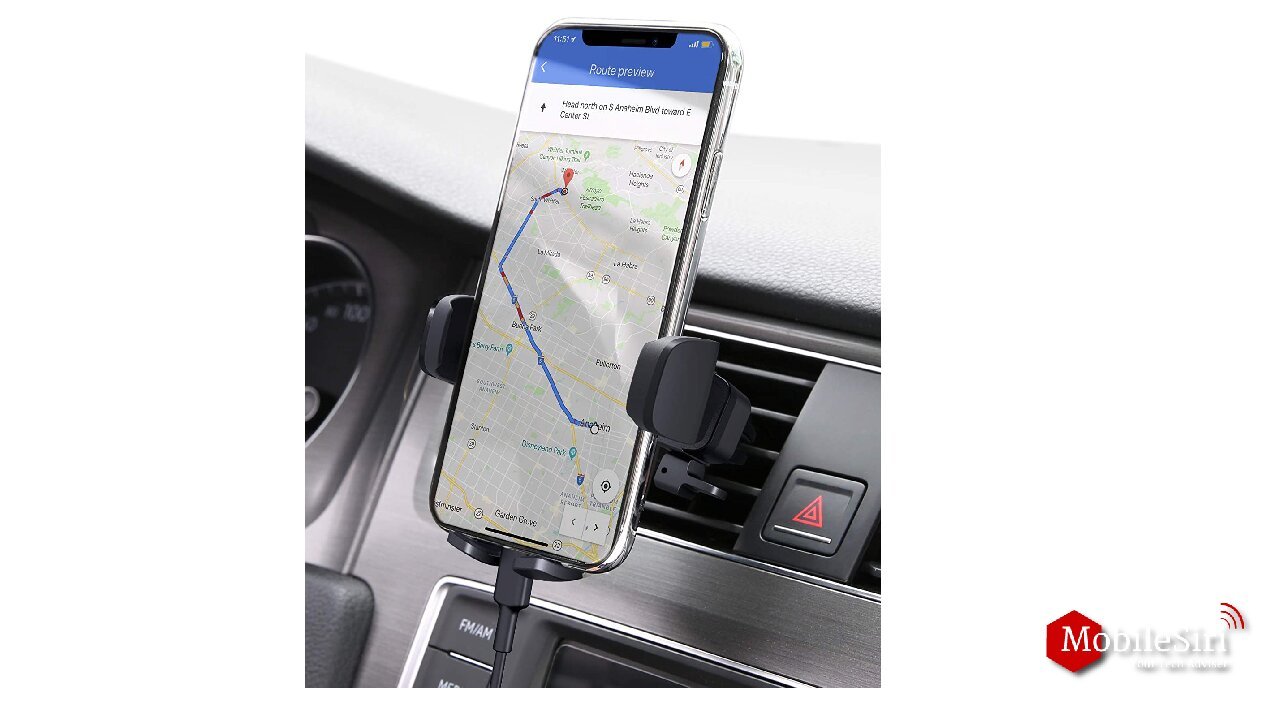


 The Garmin HRM-Dual Strap is made up of cotton jersey and feels very comfy and it is called Dual because it can transmit data over ANT+ Bluetooth smart The strap will track your pulse as well as your heart rate variability (HRV) constantly throughout the day, to give you a complete picture of your fitness and stress levels. It can pair with smartphones and the Garmin app uploads all your heart data. It is waterproof.


